Setting up your site with SSL and Let’s Encrypt on Azure App Services
It has become increasingly important to have your site secured via some kind of certificate. Even your Google ranking is affected by it.
The main problem with SSL/TLS certificates is the fact most of them cost money. Now, I don’t have any problem with paying some money for something like a certificate, but it will cost quite a lot if I want to set this up for all of my sites & domains. In theory it’s possible to create a self-signed certificate and publish your site with it, but that’s not a very good idea as there’s no one who trusts your self-signed certificate besides yourself.
Luckily Mozilla is helping us, poor content-creators, out with their service called Let’s Encrypt. Let’s Encrypt is a rather new Certificate Authority which is offering a free, open and automated service to create certificates. Their Getting Started guide contains some details on how to set this up for your website or hosting provider.
This is all fun and games, but when hosting your site(s) in the Azure App Service ecosystem you can’t do much with the steps defined in the Getting Started guide. At least, I couldn’t make any sense off it.
There’s a developer who has been so kind to create a so called Site extension for an Azure App Service called Azure Let’s Encrypt. It comes in two flavors for both x86 and x64 systems. Depending on which platform you have deployed your site to, you need to activate one corresponding this platform.
In order to access these site extensions you’ll have to log in to the Kudu environment of your site (https://yourAzureSite.scm.azurewebsites.net/SiteExtensions/#gallery).
Once it’s installed you can launch the extension and will navigate to the configuration area of this extension. This screen will show you a number of fields for which most of them have to be filled with correct data.
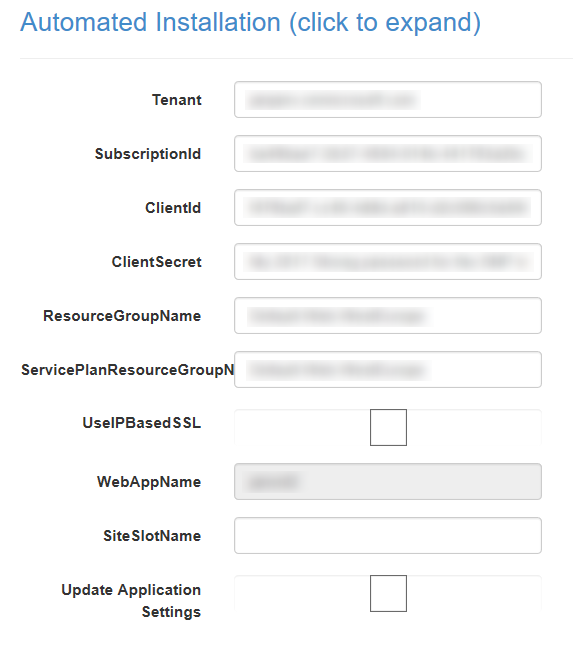
This form can look quite impressive if you are not familiar with these things. I’m not very familiar with these terms also, but Nik Molnar has a nice post with some details on the matter.
He mentions you should first create two new application settings within the Azure Portal for the App Service you want to enable SSL. The name/key of these settings are AzureWebJobsStorage and AzureWebJobsDashboard. Both should contain a connectionstring to your Azure Storage account, which will look something like the following DefaultEndpointsProtocol=https;AccountName=[storage account name];AccountKey=[storage account key]. The storage account is necessary for the WebJobs, which will be created by the site extension in order to refresh the SSL certificate.`
Next up is the hardest part, creating a Server Principal and retrieving a Client Id and Client Secret from it. In this context, a Server Principal can be seen as some kind of authentication server.
If you already have a Server Principal, you can skip the step of creating one. I still had to add one to my subscription. The following script will create one for you.
$uri = 'https://mysubdomain.mydomain.nl'
$password = 'SomeStrongPassword'
$app = New-AzureRmADApplication -DisplayName 'MySNP' -HomePage $uri -IdentifierUris $uri -Password $password
Needles to say, your PowerShell context needs to be logged in into your Azure subscription before you are able to run this command.
You are now ready to add your application to the server principal with the following commands.
New-AzureRmADServicePrincipal -ApplicationId $app.ApplicationId
New-AzureRmRoleAssignment -RoleDefinitionName Contributor -ServicePrincipalName $app.ApplicationId
These commands will add the application and make sure it has the Contributor role, so it will have enough permissions to install and configure certificates.
Make sure you write down the $app.ApplicationId which will be used as the Client Id in the site extension later on.
Now that we have all the information to configure the Let’s Encrypt site extension, we are ready to install it on our App Service. In order to make this even easier, please configure the following Application Settings in your App Service.
| Key | Value |
|---|---|
| letsencrypt:Tenant | Your AAD domain (yoursubscription.onmicrosoft.com) |
| letsencrypt:SubscriptionId | Your Azure Subscription Id Can be found on the Overview page of an App Service |
| letsencrypt:ClientId | The $app.ApplicationId we saved from before |
| letsencrypt:ClientSecret | The $password value used in the earlier script |
| letsencrypt:ResourceGroupName | The resource group name your App Service is created on |
After installing the site extension, navigate to the configuration page. If all is set up correctly, the fields will all be prefilled with the correct information.
Check the settings and adjust them if necessary. When you are sure everything is set up correct, proceed to the next page.
This next page isn’t very interesting at this time, so we can continue to the final page of the wizard.
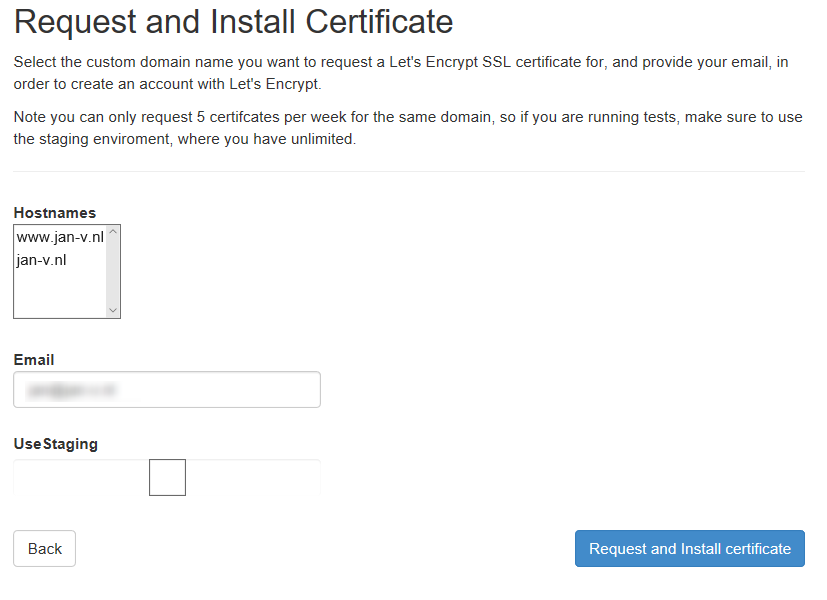
Nothing very special over here, just make sure to fill out your e-mail address so you are able to receive notifications from Let’s Encrypt when necessary.
Also good to note, don’t check the Use Staging option. By checking this box the extension will use the test API of Let’s Encrypt and will not create a certificate for you.
Press the big blue button and your site will be available with the certificate after a few moments. The extension uses the challenge-response system of Let’s Encrypt to create a certificate for you. This means it will create a couple of directories in the wwwroot folder of your App Service. This folder structure will look like .well-known\acme-challenge.

If this succeeds, Let’s Encrypt is able to create your certificate.
The challenge-response system folders are hard-coded in the extension. If you run your site in subfolder, like public, website, build, etc. you have to specify this via a special variable. You can add the letsencrypt:WebRootPath key in the application settings and specify the site folder in the value, for example site\wwwroot\public. This is very important to remember. I had forgotten about this on one of my sites and couldn’t figure out why the creation of the SSL certificate didn’t work.
Now that you know how to secure your sites with a free certificate, go set this up right away!