The project I am working on requires me to deploy our compute solution, .NET and Python, to an Azure service and it should only expose specific endpoints via Azure API Management (APIM). To accomplish this, I have set up some networking services including NSG-rules. The goal is to set up the network boundaries as strict as possible.
One of the things I started with is set up APIM in a subnet, the Container Apps in another subnet and use an NSG
to limit traffic to only use port 443. This is based on the knowledge of my containers and what is mentioned on the overview pages of the Container Apps networking page
.
   ┌─────────────────┐
   │      APIM       │
   │   (Subnet A)    │
   └─────────────────┘
           │
           │ HTTPS Traffic
           │ Port 443
           │
           │ NSG: Allow
           │ Port 443 Only
           │
           ▼
   ┌─────────────────┐
   │  Container Apps │
   │   (Subnet B)    │
   └─────────────────┘
Long story short: This does not work!
When trying to invoke any endpoint on the Container App via the APIM test page I continuously received an error.
Error occured while calling backend service.", “connection timed out: 10.0.6.139:443
As the IP-address is resolved, I know the DNS resolution works. Just a timeout on port 443.
Obviously, I’ve exposed port 443 in my containers. That’s the first thing you should probably validate when running into this issue.
Read more →When working in Azure, storing secrets in Key Vault
is a good idea. And to make it better, there’s the Key Vault Reference notation. This feature makes sure no one can read the secret(s) unless someone grants permission.
For storing configuration, values a different service is available, called Azure App Configuration.
Both services are excellent for storing & sharing the values of your cloud services.
Wouldn’t it be great to be able to combine the two? What I mean by that is to use Key Vault references inside your App Configuration. Well, you can!
There is some work involved as you need to set up access to Key Vault from within the application.
Key Vault References in App Configuration
If you’re using the Azure Portal, it’s easy to add a new Key Vault reference in the App Configuration.
Head to the Configuration Explorer and press the Create button.
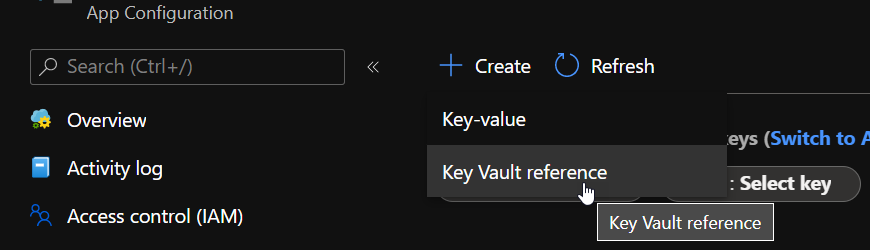
It will bring a small blade to the side of the screen from which you can add the secret with an appropriate name.
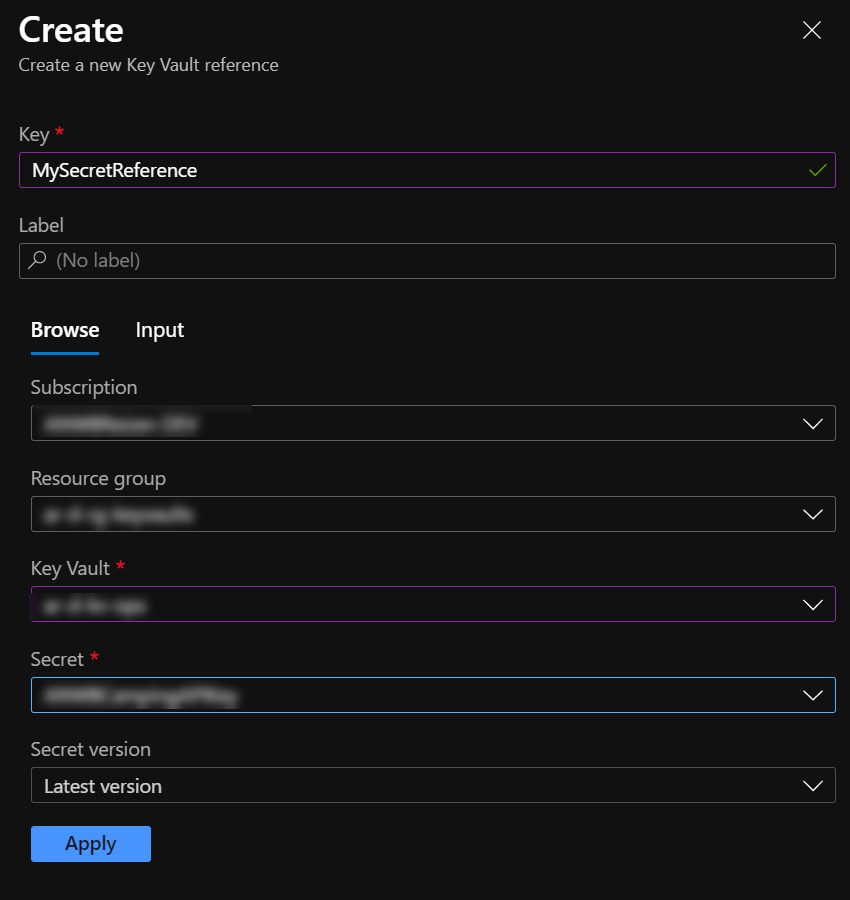
Having finished this, press the Apply button, and you’ll see the reference added and visible in the Configuration Manager.
Read more →A couple of days ago a friend asked me the question ‘How should I authenticate services with each other using roles’. I wanted to point him to a post I wrote last year, ‘Using an Azure Managed Identity to authenticate on a different App Service’
, but I noticed this post wasn’t as complete as I remembered it to be.
While it does explain how to enable authentication in your service and using a Managed Identity for this, it doesn’t cover how to add roles in your application and assign them to a user or service principal (like a Managed Identity). So, let me cover the missing parts for the role-based authentication over here.
Adding roles to your App Registration
Wouldn’t it be nice if there was a possibility to add roles to your App Registration via the UI?
Well, that doesn’t exist.
You have to add your application roles in the manifest of the application, which is a big piece of JSON. I’m going to assume you have created an App Registration, as mentioned in the linked post above, and can navigate to the ‘Manifest’ blade of this application.
Over there you’ll see a property called appRoles.
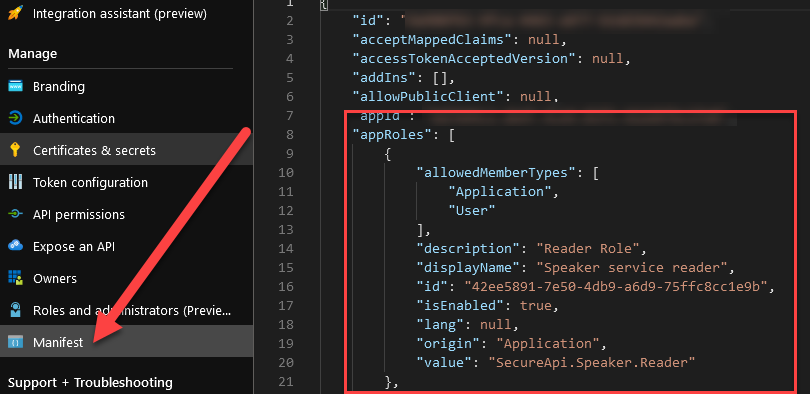
Read more →A couple of weeks ago, I was tasked to implement authentication between the services we have in our Azure landscape. I knew this can be done by using the Managed Identity, as we were doing this on a project I was involved with in the past.
However, I had never actually done this myself. Most of the time the System Administrators were configuring everything and I just had to copy-paste some Guids in a configuration file. After doing some digging into the matter, it was a bit harder to set this up as I had expected at the start.
Lucky for me, Joonas Westlin
has some excellent posts on the matter which have helped me enormously. He was also able to help me out on Stack Overflow when I was stuck
and couldn’t find out why the authentication wasn’t working correctly.
Much of what I’ll be writing down here will be similar to Joonas his posts on the matter. I’ll be using some different wording.
The posts I’ve used to learn this stuff were:
I started working on some internal web applications for a customer. For these types of applications, it makes a lot of sense to use Azure Active Directory to authenticate users and use their AAD groups/roles to authorize them on specific pages.
I wanted to authorize users by the AAD groups they are placed in. Some users can access Production data, while others are only allowed to access data from the Test environment, all based on the groups they are in. Because this is already configured by our system administrators, I want to use these groups for my application(s) also.
This sounds easy enough, and it is, but you have to do some manual work in Azure Active Directory to make this possible. It took me too much time for my liking, so I hope this post helps others (and myself) in the future.
One of the first things you need to do is create a new App Registration in the AAD and give it permission to User.Read.All to read the users’ claims.
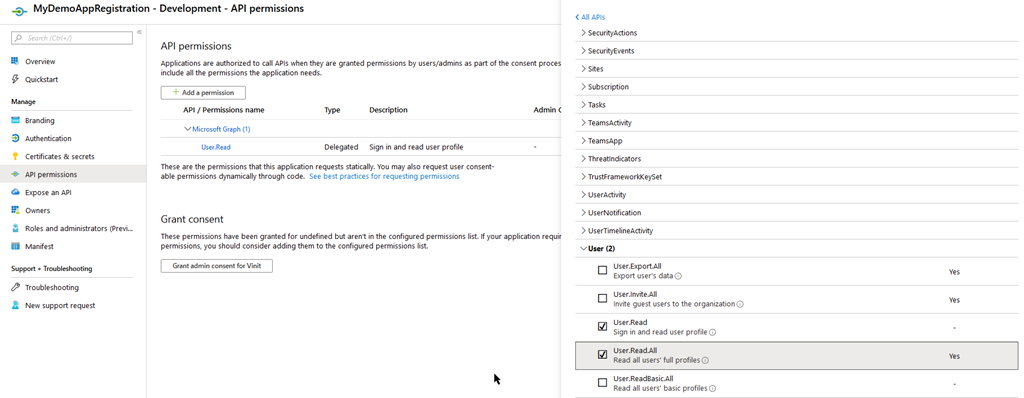
This requires consent from your Administrator, so make sure they are available or you have enough permissions yourself to do this.
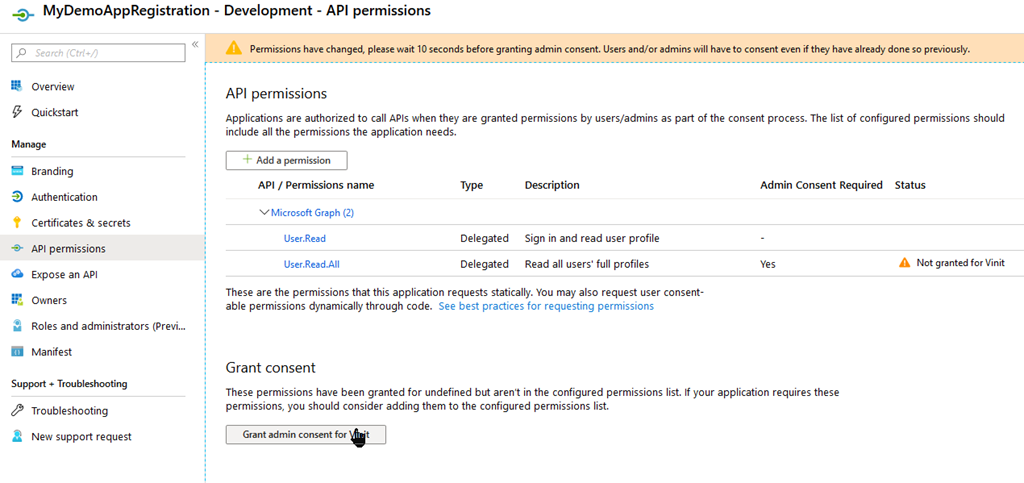
When this is set up correctly, head to the Manifest blade.
Read more →If you’ve read my earlier post on authentication of actions invoked in a Microsoft Teams MessageCard
, you’ve probably seen the only useful information we get in the user’s token is the Object Id (oid).
{
  "iat": 1560799130,
  "ver": "STI.ExternalAccessToken.V1",
  "appid": "48afc8dc-f6d2-4c5f-bca7-069acd9cc086",
  "sub": "bc6c3ca0-5acd-4cd4-b54c-f9c83925e7e3",
  "appidacr": "2",
  "acr": "0",
  "tid": "4b1fa0f3-862b-4951-a3a8-df1c72935c79",
  "oid": "b26c3c10-5fad-4cd3-b54c-f9283922e7e2",
  "iss": "https://substrate.office.com/sts/",
  "aud": "https://serverlessdevops.azurewebsites.net",
  "exp": 1560800030,
  "nbf": 1560799130
}
While this is nice, it doesn’t really tell us much.
However, because we have the object id, we can use this to query the Azure Active Directory to check up on who this user actually is and implement some authorization logic with it.
However, when I was searching for a workable piece of code describing how to access AAD and retrieve users from it, the information was�not very useful. In the end, I have found something workable and I’ll be sharing my solution in this post.
How to set up my application in AAD
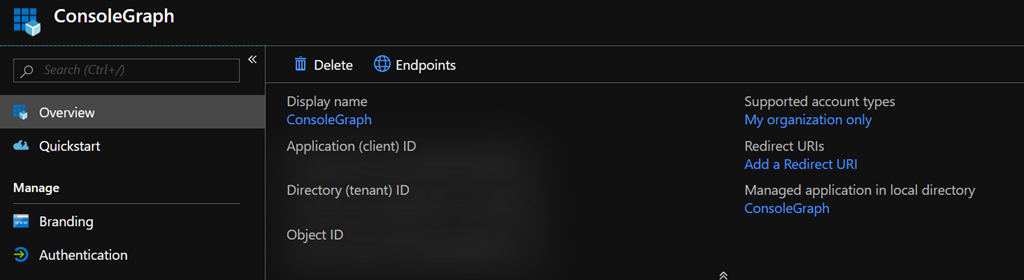
In order to do something inside AAD, you need to have an identity over there. Since we’re creating an application (console or API), we need to create an Application Registration.
To do this, navigate to your Azure Active Directory blade inside the Azure Portal and create a new App registration. I’ve called mine ConsoleGraph because I’m creating a console application to query my AAD.
Read more →Being able to create Message Cards or Actionable Messages in Microsoft Teams via a Logic App
or an Azure Function
is great. Especially if you can use this to invoke logic on your API and update the message in the Teams channel
.
However, you don’t want everyone to invoke a management API endpoint you’ve exposed to ‘do stuff’ in your cloud environment. Normally, you’d want to authenticate if the user pressing the button (read: invoking the endpoint).
Lucky for us, this is very doable when invoking the endpoint via a Teams MessageCard/Actionable Message.
The token
Because Microsoft Teams is part of the Office 365 suite, you will be logged in as a user on the tenant. Therefore, the software has a user context and is able to pass this along to your API via a JWT Bearer token
.
If you log in to the web client of Microsoft Teams (https://teams.microsoft.com
) with your favorite browser you’ll be able to find the token which belongs to you.
In order to test this, I’ve created a new MessageCard in my Teams channel with 1 potentialAction which will invoke an Azure Function.
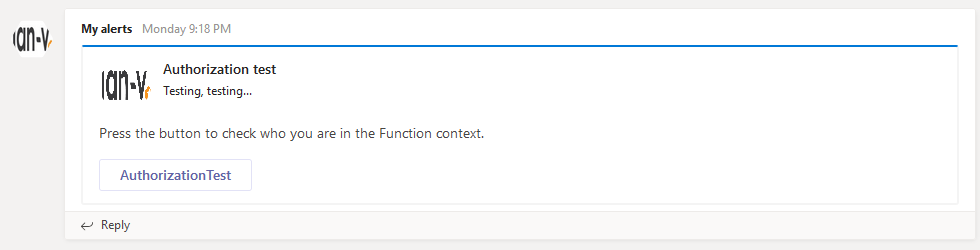
If you open up the network tab of your browser’s Developer Tools and press the AuthorizationTest button you’ll see the request is made to a Teams endpoint called executeAction with a bearer token in the Authorization header.
Read more →Azure Functions are great! HTTP triggered Azure Functions are also great, but there’s one downside. All HTTP triggered Azure Functions are publicly available. While this might be useful in a lot of scenario’s, it’s also quite possible you don’t want ‘strangers’ hitting your public endpoints all the time.
One way you can solve this is by adding a small bit of authentication on your Azure Functions.
For HTTP Triggered functions you can specify the level of authority one needs to have in order to execute it. There are five levels you can choose from. It’s Anonymous, Function, Admin, System and User. When using C# you can specify the authorization level in the HttpTrigger-attribute, you can also specify this in the function.json file of course. If you want a Function to be accessed by anyone, the following piece of code will work because the authorization is set to Anonymous.
[FunctionName("Anonymous")]
public static HttpResponseMessage Run(
    [HttpTrigger(AuthorizationLevel.Anonymous, "get", Route = null)]
    HttpRequestMessage req,
    ILogger logger)
{
    // your code
    return req.CreateResponse(HttpStatusCode.OK);
}
If you want to use any of the other levels, just change the AuthorizationLevel enum to any of the other values corresponding to the level of access you want. I’ve created a sample project on GitHub
containing several Azure Functions with different authorization levels so you can test out the difference in the authorization levels yourself. Keep in mind, when running the Azure Functions locally, the authorization attribute is ignored and you can call any Function no matter which level is specified.
Read more →There’s a relative new feature available in Azure called Managed Service Identity
. What it does is create an identity for a service instance in the Azure AD tenant, which in its turn can be used to access other resources within Azure. This is a great feature, because now you don’t have to maintain and create identities for your applications by yourself anymore. All of this management is handled for you when using a System Assigned Identity
. There’s also an option to use User Assigned Identities which work a bit different.
Because I’m an Azure Function fanboy and want to store my secrets within Azure Key Vault, I was wondering if I was able to configure MSI via an ARM template and access the Key Vault from an Azure Function without specifying an identity by myself.
As most of the things, setting this up is rather easy, once you know what to do.
The ARM template
The documentation
states you can add an identity property to your Azure App Service in order to enable MSI.
"identity": {
    "type": "SystemAssigned"
}
This setting is everything you need in order to create a new service principal (identity) within the Azure Active Directory. This new identity has the exact same name as your App Service, so it should be easy to identify.
Read more →I’m in the process of adding an ARM template to an open source project I’m contributing to. All of this was pretty straightforward, until I needed to add some secrets and connection strings to the project.
While it’s totally possible to integrate these secrets in your ARM parameter file or in your continuous deployment pipeline, I wanted to do something a bit more advanced and secure. Of course, Azure Key Vault
comes to mind! I’ve already used this in some of my other ASP.NET projects and Azure Functions, so nothing new here.
The thing is, the projects I’ve worked on, always retrieved the secrets from Key Vault like the following example:
"adminPassword": {
    "reference": {
        "keyVault": {
        "id": "/subscriptions/<subscription-id>/resourceGroups/examplegroup/providers/Microsoft.KeyVault/vaults/<vault-name>"
        },
        "secretName": "examplesecret"
    }
}
While this isn’t a bad thing per se, I don’t like having the subscription-id hardcoded in this configuration, especially when doing open source development. Mainly because other people can’t access my Key Vault, so they’ll run into trouble when deploying this template. Therefore, I started investigating if this subscription id can be added dynamically.
Introducing the Dynamic Id
Lucky for us the ARM-team has us covered! By changing the earlier mentioned configuration a bit you’re able to use the function subscription().subscriptionId to get your own subscription id.
Read more →