A couple of weeks ago I’ve passed both the AZ-300 and AZ-301 exams. You’re required to pass both of these exams in to get the Azure Solutions Architect Expert certification. After posting a tweet I got a lot of responses asking if I had any pointers on what to learn. Instead of responding to each person individually it makes more sense to share what I’ve used to study and hopefully it’s helpful to others also.
When going through the list of [Skills measured](https://www.microsoft.com/en-us/learning/azure-solutions-architect.aspx?WT.mc_id=AZ-MVP-5003246) you quickly notice this certification covers a lot of stuff in the Azure ecosystem. Everything from Azure Active Directory to Azure App Services and from storage accounts to multi-factor authentication for users. You need to know everything!
At my day job I’m doing a lot of stuff within the Azure ecosystem but mainly focus on PaaS solutions, like App Services, Functions, Logic Apps, Service Bus, Event Grid, etc. All of the other stuff like IaaS, CaaS, security, AAD, hybrid solutions, site recovery are topics I don’t have a lot of experience with.
So while there might be stuff I didn’t know in the PaaS ecosystem, I knew I had to focus my learning on all of the other stuff as most of it is/was a black box to me.
Read more →So, a couple of weeks back I wrote about leveraging the power of Logic Apps to retrieve Alerts from within your Azure ecosystem and send them to Microsoft Teams. This works great and a fellow Azure MVP, Tom Kerkhove, has enhanced the Logic Apps Template when handling Azure Monitor events.I’m starting to become a pretty big van of Logic Apps, but there are some (obvious) downsides to it.
First, they live inside your Azure Portal. You can create, modify and export them from within the Portal, which is great, unless you want to integrate them in your ‘regular’ development cycle.The export feature enables you to copy/paste the Logic Apps to your ARM templates, but this is suboptimal in my opinion. There’s also the Azure Logic Apps Tools for Visual Studio extension, which makes the integration a bit better, but it still feels a bit quirky.Another downside is the ’language’. When exporting a Logic App you’ll be seeing a lot of JSON. While there might be a good reason for this, it’s not something I like working in and create (complex?) workflows.If you can overcome, or accept, these downsides I’d really advice you to look into Logic Apps. If not, well read on!
Azure Functions to the rescue
If your IT organization consists of mostly developers it might make more sense to use Azure Functions to glue different systems with each other instead of Logic Apps. The biggest downside of Azure Functions in this scenario is, you don’t have all of the building blocks from a Logic App to your availability. You have to create your own logic for this.However, the major benefit of using Azure Functions as the glue to your solution is they are written in the language of your choice and can be deployed via your ’normal’ CI/CD process.The only thing the Logic App in the previous post did was receive a HTTP POST message, parsing it and send a message to Teams. All of this can also be done via a standard HTTP triggered Azure Function. And because I prefer writing C# code instead of dragging-dropping building blocks (or write JSON if you’re really hardcore), the Azure Functions approach works best for me.
Read more →I’ve written about empowering your Teams with Azure Functions a while back, but this isn’t the only way to create value. You can also use Azure Logic Apps.
Logic Apps are a way to express powerful integrations with (several different) systems in a visual workflow based way. It has a lot of similarities with other (Microsoft) workflow systems from the past, so it should strike very familiar to most (Enterprise) developers.
Being a visual workflow solution, it doesn’t warm the heart of most developers. However, the world doesn’t consist solely of developers and this solution being visual is a very big advantage if you’re not a coder or like to deliver value instead of just more code.
First step
The first step you need (or actually, WANT) to take is create a Webhook connector on a channel. You can check my previous post on how to do this.
Posting to this channel has to be done in a similar way. You will still need to post some JSON in a predefined format to this webhook.
Next step: Setting up Alerts
In order to make your DevOps process a bit easier, it’s very useful to leverage the power of Application Insights and Alerts. For this to work, you need to know what metrics you actually want to be alerted for. I’m going to assume you already have some monitoring in place with appropriate metrics. If not, you should definitely define some. They can be tuned afterward.
Read more →In today’s world we’re receiving an enormous amount of e-mail.
A lot of the e-mail I’m receiving during the day (and night) is about errors happening in our cloud environment and sometimes someone needs to follow up on this.
At the moment this is a real pain because there’s a lot of false-positives in those e-mails due to the lack of configuration and possibilities in our monitoring software. The amount of e-mails is so painful, most of us have created email rules so these monitoring emails ‘go away’ and we only check them once per day. Not really an ideal solution.
But what if I told you all of this pain can go away with some serverless magic and the power of Microsoft Teams. Sounds great, right?
How to integrate with Microsoft Teams?
This is actually the easiest part if you’re a developer.
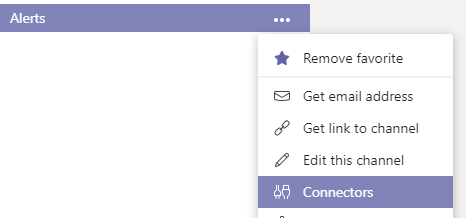
If you’re already running Microsoft Teams on your Office 365 tenant, you can add a channel to a team to which you belong and add a Webhook connector to it. I’ve created a channel called Alerts on which I added an Incoming Webhook connector.
After having saved the connector you’ll be able to copy the actual webhook URL which you need to use in order to POST messages to the channel.
Read more →The default Azure Functions runtime comes with quite a lot of bindings and triggers which enable you to create a highly scalable solution within the Azure environment. You can connect to service buses, storage accounts, Event Grid, Cosmos DB, HTTP calls, etc.
However, sometimes this isn’t enough.
That’s why the Azure Functions team has released functionality which enables you to create your own custom bindings. This should make it easy for you to read and write data to any service or location you need to, even if it’s not supported out of the box.
There is some documentation available on how to create a custom binding at this time and even a nice sample on GitHub to get you started. The thing is this documentation and samples are written for Version 1 of the Azure Functions runtime. If you want to use custom bindings in Azure Functions V2, you need to do some additional stuff. There are still changes being made on this subject, so it’s quite possible the current workflow will be broken in the future.
For this post, I’ve created a sample binding which is capable of reading data from a local disk. Nothing fancy and definitely not something you want in production, but it’s easy to test and shows you how the stuff has to be set up.
Read more →You might have noticed I’ve been doing quite a bit of stuff with ARM templates as of late. ARM templates are THE way to go if you want to deploy your Azure environment in a professional and repeatable fashion. Most of the time these templates get deployed in your Release pipeline to the Test, Acceptance or Production environment. Of course, I’ve set this up for all of my professional projects along with my side projects. The thing is, when using the Hosted VS2017 build agent, it can take a while to complete both the Build and Release job via VSTS Azure DevOps.
Being a reformed SharePoint developer, I’m quite used to waiting on the job. However, waiting all night to check if you didn’t create a booboo inside your ARM template is something which became quite boring, quite fast.So what else can you do?
Well, you can do some PowerShell!
The Azure PowerShell cmdlets offer quite a lot of useful commands in order to manage your Azure environment.One of them is called New-AzureRmResourceGroupDeployment.
According to the documentation, this command will “Adds an Azure deployment to a resource group.”. Exactly what I want to do, most of the time.So, how to call it? Well, you only have to specify the name of your deployment, which resource group you want to deploy to and of course the ARM template itself, along with the parameters file.
Read more →Azure Functions are great! HTTP triggered Azure Functions are also great, but there’s one downside. All HTTP triggered Azure Functions are publicly available. While this might be useful in a lot of scenario’s, it’s also quite possible you don’t want ‘strangers’ hitting your public endpoints all the time.
One way you can solve this is by adding a small bit of authentication on your Azure Functions.
For HTTP Triggered functions you can specify the level of authority one needs to have in order to execute it. There are five levels you can choose from. It’s Anonymous, Function, Admin, System and User. When using C# you can specify the authorization level in the HttpTrigger-attribute, you can also specify this in the function.json file of course. If you want a Function to be accessed by anyone, the following piece of code will work because the authorization is set to Anonymous.
[FunctionName("Anonymous")]
public static HttpResponseMessage Run(
    [HttpTrigger(AuthorizationLevel.Anonymous, "get", Route = null)]
    HttpRequestMessage req,
    ILogger logger)
{
    // your code
    return req.CreateResponse(HttpStatusCode.OK);
}
If you want to use any of the other levels, just change the AuthorizationLevel enum to any of the other values corresponding to the level of access you want. I’ve created a sample project on GitHub containing several Azure Functions with different authorization levels so you can test out the difference in the authorization levels yourself. Keep in mind, when running the Azure Functions locally, the authorization attribute is ignored and you can call any Function no matter which level is specified.
Read more →As it happens, I started implementing some new functionality on a project. For this functionality, I needed an Azure Storage Account with a folder (containers) inside. Because it’s a project not maintained by me, I had to do some searching on how to create such a container in the most automated way, because creating containers in storage account isn’t supported. That is, until recently!
In order to create a container inside a storage account, you only have to add a new resource to it. Quite easy, once you know how to do it.
First, let’s start by creating a new storage account.
{
    "name": "[parameters('storageAccountName')]",
    "type": "Microsoft.Storage/storageAccounts",
    "apiVersion": "2018-02-01",
    "location": "[resourceGroup().location]",
    "kind": "StorageV2",
    "sku": {
        "name": "Standard_LRS",
        "tier": "Standard"
    },
    "properties": {
        "accessTier": "Hot"
    }
}
Adding this piece of JSON to your ARM template will make sure a new storage account is created with the specified settings and parameters. Nothing fancy here if you’re familiar with creating ARM templates.
Now for adding a container to this storage account! In order to do so, you need to add a new resource of the type blobServices/containers to this template.
{
    "name": "[parameters('storageAccountName')]",
    "type": "Microsoft.Storage/storageAccounts",
    "apiVersion": "2018-02-01",
    "location": "[resourceGroup().location]",
    "kind": "StorageV2",
    "sku": {
        "name": "Standard_LRS",
        "tier": "Standard"
    },
    "properties": {
        "accessTier": "Hot"
    },
    "resources": [{
        "name": "[concat('default/', 'theNameOfMyContainer')]",
        "type": "blobServices/containers",
        "apiVersion": "2018-03-01-preview",
        "dependsOn": [
            "[parameters('storageAccountName')]"
        ],
        "properties": {
            "publicAccess": "Blob"
        }
    }]
}
Deploying this will make sure a container is created with the name theNameOfMyContainer inside the storage account. You can even change the permission to this container. The default is None, but this can be changed to Blob in order to get file access or Container if you want people to be able to access the container itself.
Read more →There’s a relative new feature available in Azure called Managed Service Identity. What it does is create an identity for a service instance in the Azure AD tenant, which in its turn can be used to access other resources within Azure. This is a great feature, because now you don’t have to maintain and create identities for your applications by yourself anymore. All of this management is handled for you when using a System Assigned Identity. There’s also an option to use User Assigned Identities which work a bit different.
Because I’m an Azure Function fanboy and want to store my secrets within Azure Key Vault, I was wondering if I was able to configure MSI via an ARM template and access the Key Vault from an Azure Function without specifying an identity by myself.
As most of the things, setting this up is rather easy, once you know what to do.
The ARM template
The documentation states you can add an identity property to your Azure App Service in order to enable MSI.
"identity": {
    "type": "SystemAssigned"
}
This setting is everything you need in order to create a new service principal (identity) within the Azure Active Directory. This new identity has the exact same name as your App Service, so it should be easy to identify.
Read more →I’m in the process of adding an ARM template to an open source project I’m contributing to. All of this was pretty straightforward, until I needed to add some secrets and connection strings to the project.
While it’s totally possible to integrate these secrets in your ARM parameter file or in your continuous deployment pipeline, I wanted to do something a bit more advanced and secure. Of course, Azure Key Vault comes to mind! I’ve already used this in some of my other ASP.NET projects and Azure Functions, so nothing new here.
The thing is, the projects I’ve worked on, always retrieved the secrets from Key Vault like the following example:
"adminPassword": {
    "reference": {
        "keyVault": {
        "id": "/subscriptions/<subscription-id>/resourceGroups/examplegroup/providers/Microsoft.KeyVault/vaults/<vault-name>"
        },
        "secretName": "examplesecret"
    }
}
While this isn’t a bad thing per se, I don’t like having the subscription-id hardcoded in this configuration, especially when doing open source development. Mainly because other people can’t access my Key Vault, so they’ll run into trouble when deploying this template. Therefore, I started investigating if this subscription id can be added dynamically.
Introducing the Dynamic Id
Lucky for us the ARM-team has us covered! By changing the earlier mentioned configuration a bit you’re able to use the function subscription().subscriptionId to get your own subscription id.
Read more →