There are dozens of blog posts, articles and books talking about microservices. Some of them talk about the design, other on how to implement and even others talk about why and when to use them.
This post will be a combination of them all. I won’t claim to be the all-time-expert on the matter, but I have read quite a bit on the subject, attended some talks and have had the honor to design (and implement) such a solution a couple of years ago.
First and foremost, it’s important to understand a microservices design is just another standard architectural design pattern. This pattern can help you to create a high-performance, scalable software solution, but it can also bankrupt your company!
The short explanation
If you don’t have much time to read, or don’t really want to, here’s the elevator pitch for microservices:
It’s a set of small (independent) services, each of them able to carry out their own (functional/business) responsibility without having direct dependencies to other services.
The long explanation
Of course, such a short explanation is a bit short, to say the least.
The general overview
The microservices pattern is a combination of several other, well-known, patterns which we probably have been using for a couple of years now. Take for example the Service-oriented Architecture, Event-driven architecture, Database per Service, API Gateway / Backend for Frontend and many more. All of them combined can form an architecture which has multiple small services, all operating individually.
Read more →It has become increasingly important to have your site secured via some kind of certificate. Even your Google ranking is affected by it.
The main problem with SSL/TLS certificates is the fact most of them cost money. Now, I don’t have any problem with paying some money for something like a certificate, but it will cost quite a lot if I want to set this up for all of my sites & domains. In theory it’s possible to create a self-signed certificate and publish your site with it, but that’s not a very good idea as there’s no one who trusts your self-signed certificate besides yourself.
Luckily Mozilla is helping us, poor content-creators, out with their service called Let’s Encrypt. Let’s Encrypt is a rather new Certificate Authority which is offering a free, open and automated service to create certificates. Their Getting Started guide contains some details on how to set this up for your website or hosting provider.
This is all fun and games, but when hosting your site(s) in the Azure App Service ecosystem you can’t do much with the steps defined in the Getting Started guide. At least, I couldn’t make any sense off it.
There’s a developer who has been so kind to create a so called Site extension for an Azure App Service called Azure Let’s Encrypt. It comes in two flavors for both x86 and x64 systems. Depending on which platform you have deployed your site to, you need to activate one corresponding this platform.
Read more →I’ve just started setting up some continuous deployment for my personal websites. All of the sites are hosted within Azure App Services and the sources are located on either GitHub or BitBucket. By having the source code located on a public accessible repository (be it private or public), it’s rather easy to connect Azure to these locations.
On my day-job I come across a lot of web- and desktop applications which also need continuous integration and deployment steps in order for them to go live. For some of these projects I’ve used Octopus Deploy and currently looking towards Azure Release Management. These are all great systems, but they offer quite a lot of overhead for my personal sites. Currently my, most important, personal sites are so called static websites using MiniBlog (this site) and Hugo (for keto.jan-v.nl). Some of the other websites I have aren’t set up with a continuous deployment path yet.
I don’t really want to set up an Octopus Deploy server or a path in Azure Release Management for these two sites. Lucky for me, the Azure team has come up with some great addition in order to provide some custom deployment steps of your Azure App Service. In order to set this up, you need to enable the automatic deployments via the Deployment Options blade in the Azure portal.
Read more →One of the reasons for me to create an Azure virtual network is being able to connect to my development machines in the Cloud from anywhere, without exposing them to the public. In order to do so, all machines have to be added to the virtual network. You also have to select the option to set up a point-to-site VPN connection to the virtual network.
Setting up a point-to-site VPN connection to an Azure virtual network is documented quite well on the Azure documentation pages. Still, I have come across a couple of problems which I’d like to share.
The first problem I had was executing the makecert program via the Visual Studio Command Prompt on my machine. This tool is really useful when creating a self-signed certificate.
d:\Temp\vpnblog>makecert -sky exchange -r -n "CN=RootJanHome" -pe -a sha1 -len 2048 -ss My "RootJanHome.cer"
'makecert' is not recognized as an internal or external command, operable program or batch file.
Apparently the makecert program isn’t installed by default on your machine when installing Visual Studio 2015. You’ll have to install the Windows 10 SDK and tools in order to get it. To fix it, just Modify your Visual Studio installation and select the option which installs these bits.
Read more →Nowadays it’s possible to create virtual networks within your Azure subscription. This can be very useful for managing your Azure resources within a specific network or setting up a point-to-site or site-to-site connection to expand your current on-premise network.
To me creating a virtual network sounds like a great way to manage my virtual machines and services for development purposes which I’m running within Azure. It will also let me connect to them without exposing stuff to the public internet. I can imagine a virtual network can also be useful for adding multiple build agents, private nuget repositories, a source control server, domain controller, DNS, etc. By moving all of your machines to the cloud, the only thing you’ll need on-premise is a proper router for connecting to the cloud.
In order to create a new virtual network, you’ll have to navigate to the management portal. This feature is available within the classic and new portal. As I prefer the classic portal all screenshots in this post are from within this portal.
The management portal has a menu option called Networks from where you can manage your virtual networks. The image below shows a virtual network called janhome.
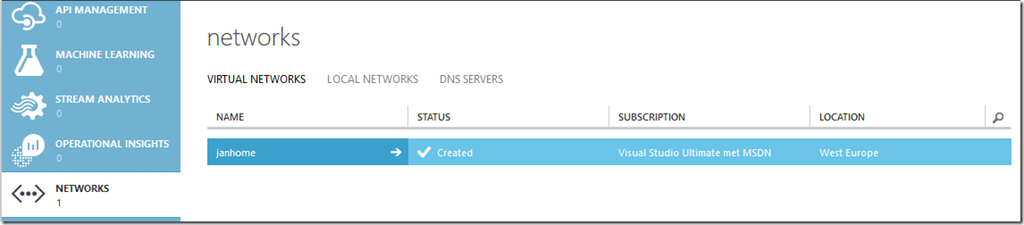
If you want to create a new virtual network by yourself, just select the option from the New menu.
Read more →In my previous post I’ve described how to use Application Insights and use it within your new web application. Most of us aren’t working in a greenfield project, so new solutions have to be integrated with the old.
The project I’m working on uses log4net for logging messages, exceptions, etc. In order for us to use Application Insights, we had to search for a solution to integrate both. After having done some research on the subject we discovered this wasn’t a big problem.
The software we are working on are Windows Services and Console Applications, so we should not add the Application Insights package for web applications. For these kind of applications it’s enough to just add the core package to your project(s).

Once added, we are creating the TelemetryClient in the Main of the application.
private static void Main(string[] args)
{
	var telemetryClient = new TelemetryClient { InstrumentationKey = "[InstrumentationKey]" };
	/*Do our application logic*/
	telemetryClient.Flush();
}
You will notice we are setting the InstrumentationKey property explicitly. That’s because we don’t use an ApplicationInsights.config file, like in the web application example and this key has to be specified in order to start logging.
This final flush will make sure all pending messages will be pushed to the Application Insights portal right away.
Read more →Some time ago the Application Insights became available as a preview in the Azure portal. Application Insights helps you monitor the state of an application, server, clients, etc. As said, it’s still in preview, but it’s rather stable and very easy to use and implement in your applications.
The documentation is still being worked on, but with all the getting started guides on the Microsoft site you can kick start your project with it in a couple of minutes.
The main reason for me to dig into Application Insights is because we still had to implement a proper logging solution for our applications which are migrating to the Azure Cloud. As it happened, Application Insights just became available at the time and because of the tight Azure integration we were really eager to check it out (not saying you can’t use it with non-Azure software of course).
If you want to start using Application Insights, the first thing you will have to do is creating a new Application Insights application. You will be asked what type of application you want to use.
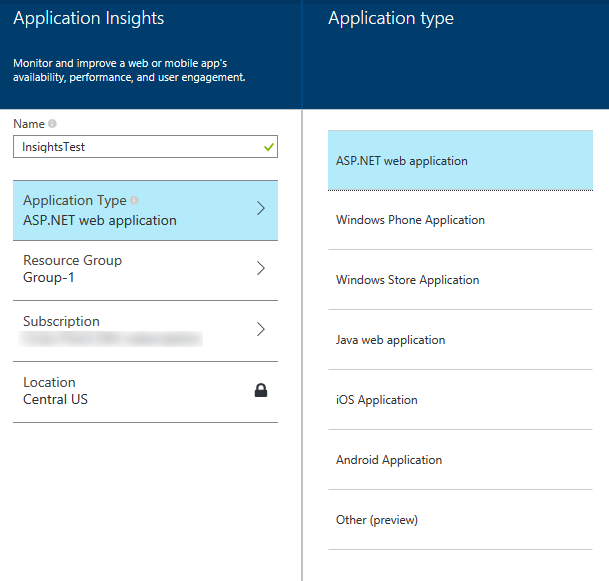
It’s wise to select the proper application type over here, because a lot of settings and measuring graphs will be set for you depending on the choice made over here. For this example I’ll choose the ASP.NET web application. After having waited for a few minutes the initial (empty) dashboard will be shown.
Read more →Once you have set up your sharding solution with a fully configured Shard Map Manager, modified your data access layer to use Elastic Scale, added fault handling and running your stuff in production, there will be a time when you are in need to split, merge or move shardlets between shards.
This is where the Elastic Scale Split Merge tool comes in place. The team has created a nice web application which will enable you to do this kind of management. In order to use this tooling, you have to download the latest Nuget package (1.0.0.0 at the moment) into your project. This will create a new folder called splitmerge which contains two subfolders (powershell & service).
The folder containing the PowerShell scripts will give you the power to move, merge and split shards via scripting. A preferred solution for most power users.
The service folder contains a package and configuration template to deploy a web application which is able to do the exact same thing as the PowerShell scripts.
As I don’t fancy big PowerShell scripts for blog posts that much, this post will dig into the service part a bit more.
There is a nice tutorial available in the documentation on Elastic Scale describing on how to use and configure the Split Merge service. The basics come down to specifying a connection string to your newly created database and file storage in the configuration file. Afterwards you can create a new cloud service with the package and configuration. If all works well, you are ready to use the tooling. A best practice is to copy the settings of your deployed configuration file somewhere safe and do incremental updates on it when a new version of the Nuget packge is released.
Read more →There are quite a lot of differences between having an on-premise data center and using the cloud. One of these differences is the (guaranteed) uptime and the latency between the different servers. When creating your local on-premise datacenter you will have a pretty stable network connection between the different servers and it’s probably really fast. The cloud can be pretty fast also, especially when you are located in the same datacenter/container. However, you don’t have any real guarantees on where your stuff gets deployed, let alone the latency or connection between the servers.
This might lead to some small problems when you have to hit a different server, like when accessing files from storage or querying a database. This is why the Microsoft Patterns & Practices team has published the Transient Fault Handling Application Block. This application block states there are several transient exceptions which can occur when you try to access a service. These exceptions are known to sometimes be automatically be resolved over a small period of time, therefore retrying within a small period of time might fix the problem.
Basically, all this application block does is helping you add a retry-mechanism so you don’t have to worry much about these transient errors yourself. There are a couple of retrying strategies available out of the box when using the Entity Framework. The SQL team has also provided a new retrying mechanism to be used with the Elastic Scale libraries.
Read more →Now that you have configured Elastic Scale for your solution there are still some changes to be made in your application.
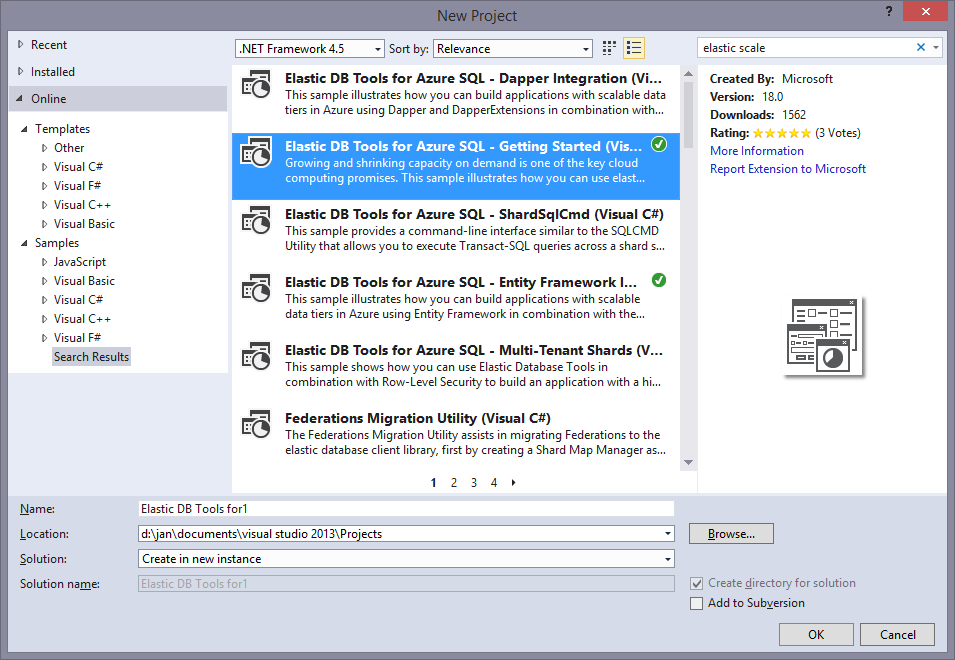
At the moment there are 2 sample applications available, one using plain old SQL-queries (ADO.NET) and another one using the Entity Framework. I would suggest checking out these samples before doing any serious Elastic Scale work.
You will probably notice there are some small differences between the ADO.NET sample and the Entity Framework sample. One of them is the Entity Framework not having a sample for doing multi sharded queries. This is because Entity Framework (or any other ORM for that matter) can’t use the multi shard connection objects which are used by the Elastic Scale libraries. I’ve developed a small work around (hack) for this which is shown at the end of this post.
First, let’s step through the basics on how the Elastic Scale library is supposed to be used.
As stated in my earlier posts about this subject, Elastic Scale should be used when you are creating different shards each with subsets of data. In order to connect to the a shard all you need to do is use the Elastic Scale library.
// Looks up the key in the shard map and opens a connection to the shard
using (SqlConnection conn = shardMap.OpenConnectionForKey(customerId, credentialsConnectionString))
{
	// Create a simple command that will insert a new order
	SqlCommand cmd = conn.CreateCommand();

	//Execute your commands, the way you would normally do.
}
As you can see, all you need is the shard map you want to use, the identifier to search for and (the shardlet) and a credentialsConnectionString. The shardlet is specified in the ShardMap of the ShardMapManager. The connection string is something you will have to create yourself. It should only contain the credentials to log in to a database as the Elastic Scale library will find out the server and database by itself. The sample application has a nice helper method for it which you can use of course.
Read more →