Being able to create Message Cards or Actionable Messages in Microsoft Teams via a Logic App
or an Azure Function
is great. Especially if you can use this to invoke logic on your API and update the message in the Teams channel
.
However, you don’t want everyone to invoke a management API endpoint you’ve exposed to ‘do stuff’ in your cloud environment. Normally, you’d want to authenticate if the user pressing the button (read: invoking the endpoint).
Lucky for us, this is very doable when invoking the endpoint via a Teams MessageCard/Actionable Message.
The token
Because Microsoft Teams is part of the Office 365 suite, you will be logged in as a user on the tenant. Therefore, the software has a user context and is able to pass this along to your API via a JWT Bearer token
.
If you log in to the web client of Microsoft Teams (https://teams.microsoft.com
) with your favorite browser you’ll be able to find the token which belongs to you.
In order to test this, I’ve created a new MessageCard in my Teams channel with 1 potentialAction which will invoke an Azure Function.
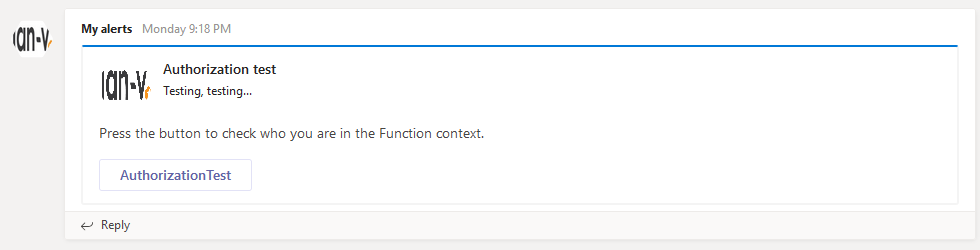
If you open up the network tab of your browser’s Developer Tools and press the AuthorizationTest button you’ll see the request is made to a Teams endpoint called executeAction with a bearer token in the Authorization header.
Read more →In my latest post, I’ve shown you how you can use Azure Functions in your Microsoft Teams flow to handle errors in your environment
. This stuff works great in a couple of projects I’ve worked on, but what would be even more awesome is to reply to a message in Teams when an action has completed after a button is pressed.
Well, replying & modifying the original message with a status update is quite possible and I’ll show you how in this post.
How do I send a reply to Microsoft Teams?
In the image below you can see a message having posted on my Teams channel and a reply is posted.
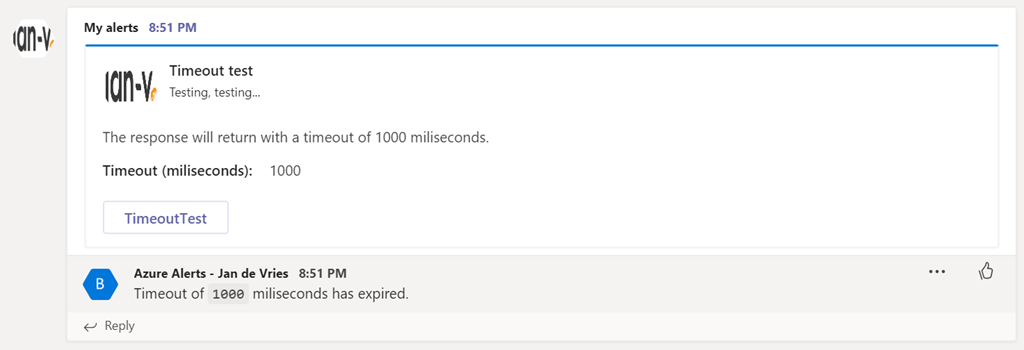
This reply has been sent from my Azure Function. If you want to do this, you need to send a HttpResponseMessage with a status code 200 and a specific header value. This header value is CARD-ACTION-STATUS and the value will be the message which you will see in the reply.
The code for this will look something similar to the following.
public static async Task<HttpResponseMessage> Run(
	[HttpTrigger(AuthorizationLevel.Function, "post", Route = null)] HttpRequest req,
	ILogger log)
{
	// Do your stuff...

	var result = new HttpResponseMessage
	{
		Headers =
		{
			{ "CARD-ACTION-STATUS", $"Timeout of `{request.Timeout}` miliseconds has expired."},
		},
		StatusCode = HttpStatusCode.OK
	};


	return result;
}
That’s all there is to it in order to send a single reply to your message.
Read more →So, a couple of weeks back I wrote about leveraging the power of Logic Apps to retrieve Alerts from within your Azure ecosystem and send them to Microsoft Teams. This works great and a fellow Azure MVP, Tom Kerkhove
, has enhanced the Logic Apps Template when handling Azure Monitor events
.I’m starting to become a pretty big van of Logic Apps, but there are some (obvious) downsides to it.
First, they live inside your Azure Portal. You can create, modify and export them from within the Portal, which is great, unless you want to integrate them in your ‘regular’ development cycle.The export feature enables you to copy/paste the Logic Apps to your ARM templates, but this is suboptimal in my opinion. There’s also the Azure Logic Apps Tools for Visual Studio
extension, which makes the integration a bit better, but it still feels a bit quirky.Another downside is the ’language’. When exporting a Logic App you’ll be seeing a lot of JSON. While there might be a good reason for this, it’s not something I like working in and create (complex?) workflows.If you can overcome, or accept, these downsides I’d really advice you to look into Logic Apps. If not, well read on!
Read more →I’ve written about empowering your Teams with Azure Functions
a while back, but this isn’t the only way to create value. You can also use Azure Logic Apps
.
Logic Apps are a way to express powerful integrations with (several different) systems in a visual workflow based way. It has a lot of similarities with other (Microsoft) workflow systems from the past, so it should strike very familiar to most (Enterprise) developers.
Being a visual workflow solution, it doesn’t warm the heart of most developers. However, the world doesn’t consist solely of developers and this solution being visual is a very big advantage if you’re not a coder or like to deliver value instead of just more code.
First step
The first step you need (or actually, WANT) to take is create a Webhook connector on a channel. You can check my previous post
on how to do this.
Posting to this channel has to be done in a similar way. You will still need to post some JSON in a predefined format to this webhook.
Next step: Setting up Alerts
In order to make your DevOps process a bit easier, it’s very useful to leverage the power of Application Insights and Alerts. For this to work, you need to know what metrics you actually want to be alerted for. I’m going to assume you already have some monitoring in place with appropriate metrics. If not, you should definitely define some. They can be tuned afterward.
Read more →In today’s world we’re receiving an enormous amount of e-mail.
A lot of the e-mail I’m receiving during the day (and night) is about errors happening in our cloud environment and sometimes someone needs to follow up on this.
At the moment this is a real pain because there’s a lot of false-positives in those e-mails due to the lack of configuration and possibilities in our monitoring software. The amount of e-mails is so painful, most of us have created email rules so these monitoring emails ‘go away’ and we only check them once per day. Not really an ideal solution.
But what if I told you all of this pain can go away with some serverless magic and the power of Microsoft Teams. Sounds great, right?
How to integrate with Microsoft Teams?
This is actually the easiest part if you’re a developer.
If you’re already running Microsoft Teams on your Office 365 tenant, you can add a channel to a team to which you belong and add a Webhook connector to it. I’ve created a channel called Alerts on which I added an Incoming Webhook connector.
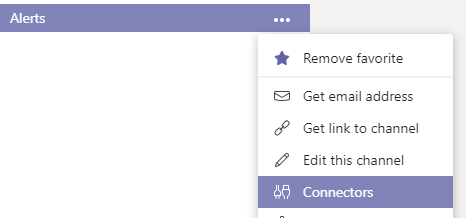
After having saved the connector you’ll be able to copy the actual webhook URL which you need to use in order to POST messages to the channel.
Read more →The default Azure Functions runtime comes with quite a lot of bindings and triggers which enable you to create a highly scalable solution within the Azure environment. You can connect to service buses, storage accounts, Event Grid, Cosmos DB, HTTP calls, etc.
However, sometimes this isn’t enough.
That’s why the Azure Functions team has released functionality which enables you to create your own custom bindings. This should make it easy for you to read and write data to any service or location you need to, even if it’s not supported out of the box.
There is some documentation
available on how to create a custom binding at this time and even a nice sample on GitHub
to get you started. The thing is this documentation and samples are written for Version 1 of the Azure Functions runtime. If you want to use custom bindings in Azure Functions V2, you need to do some additional stuff. There are still changes being made on this subject, so it’s quite possible the current workflow will be broken in the future.
For this post, I’ve created a sample binding which is capable of reading data from a local disk. Nothing fancy and definitely not something you want in production, but it’s easy to test and shows you how the stuff has to be set up.
Read more →Azure Functions are great! HTTP triggered Azure Functions are also great, but there’s one downside. All HTTP triggered Azure Functions are publicly available. While this might be useful in a lot of scenario’s, it’s also quite possible you don’t want ‘strangers’ hitting your public endpoints all the time.
One way you can solve this is by adding a small bit of authentication on your Azure Functions.
For HTTP Triggered functions you can specify the level of authority one needs to have in order to execute it. There are five levels you can choose from. It’s Anonymous, Function, Admin, System and User. When using C# you can specify the authorization level in the HttpTrigger-attribute, you can also specify this in the function.json file of course. If you want a Function to be accessed by anyone, the following piece of code will work because the authorization is set to Anonymous.
[FunctionName("Anonymous")]
public static HttpResponseMessage Run(
    [HttpTrigger(AuthorizationLevel.Anonymous, "get", Route = null)]
    HttpRequestMessage req,
    ILogger logger)
{
    // your code
    return req.CreateResponse(HttpStatusCode.OK);
}
If you want to use any of the other levels, just change the AuthorizationLevel enum to any of the other values corresponding to the level of access you want. I’ve created a sample project on GitHub
containing several Azure Functions with different authorization levels so you can test out the difference in the authorization levels yourself. Keep in mind, when running the Azure Functions locally, the authorization attribute is ignored and you can call any Function no matter which level is specified.
Read more →There’s a relative new feature available in Azure called Managed Service Identity
. What it does is create an identity for a service instance in the Azure AD tenant, which in its turn can be used to access other resources within Azure. This is a great feature, because now you don’t have to maintain and create identities for your applications by yourself anymore. All of this management is handled for you when using a System Assigned Identity
. There’s also an option to use User Assigned Identities which work a bit different.
Because I’m an Azure Function fanboy and want to store my secrets within Azure Key Vault, I was wondering if I was able to configure MSI via an ARM template and access the Key Vault from an Azure Function without specifying an identity by myself.
As most of the things, setting this up is rather easy, once you know what to do.
The ARM template
The documentation
states you can add an identity property to your Azure App Service in order to enable MSI.
"identity": {
    "type": "SystemAssigned"
}
This setting is everything you need in order to create a new service principal (identity) within the Azure Active Directory. This new identity has the exact same name as your App Service, so it should be easy to identify.
Read more →The last two posts had me writing about how logging can be implemented in your Azure Functions
and how you can reuse class libraries using a different logging library, like log4net
. You probably already have some logging- and monitoring system in place, but if you’re starting to use Azure Functions (or any other Azure service for that matter), the best tooling to use is Application Insights
, in my opinion. You don’t even have to use Azure services in order to use Application Insights. You can also integrate it with any other on-premise server or client application.
For those of you who aren’t yet familiar with Application Insights, you should check it out immediately! It’s an awesome tool in Azure which enables you to view logging, metrics, exceptions, performance and more of your applications. It’s also possible to create enormous dashboards, reports and alerts, so everything you need in order to monitor your applications. A real must-have for a professional devops team.
Integrate with Azure Functions
Integrating your Azure Functions (Function App) with Application Insights is pretty straightforward.
The easiest way is to integrate is by selecting Application Insights when creating a Function App. Just press On, the location you want it deployed and proceed with creating the Function App. This will make sure the newly created Application Insights instance will be used by your Function App.
Read more →As I mentioned in my earlier post, there are 2 options available to you out of the box for logging. You can either use the TraceWriter or the ILogger. While this is fine when you are doing some small projects or Functions, it can become a problem if you want your Azure Functions to reuse earlier developed logic or modules used in different projects, a Web API for example.
In these shared class libraries you are probably leveraging the power of a ‘full-blown’ logging library. While it is possible to wire up a secondary logging instance in your Azure Function, it’s better to use something which is already available to you, like the ILogger or the TraceWriter.
I’m a big fan of the log4net logging library
, so this post is about using log4net with Azure Functions. As it goes, you can apply the same principle for any other logging framework just the implementation will be a bit different.
Creating an appender
One way to extend the logging capabilities of log4net is by creating your own logging appender. You are probably already using some default file appender or console appender in your projects. Because there isn’t an out-of-the-box appender for the ILogger, yet, you have to create one yourself.
Read more →