When working in Azure, storing secrets in Key Vault is a good idea. And to make it better, there’s the Key Vault Reference notation. This feature makes sure no one can read the secret(s) unless someone grants permission.
For storing configuration, values a different service is available, called Azure App Configuration.
Both services are excellent for storing & sharing the values of your cloud services.
Wouldn’t it be great to be able to combine the two? What I mean by that is to use Key Vault references inside your App Configuration. Well, you can!
There is some work involved as you need to set up access to Key Vault from within the application.
Key Vault References in App Configuration
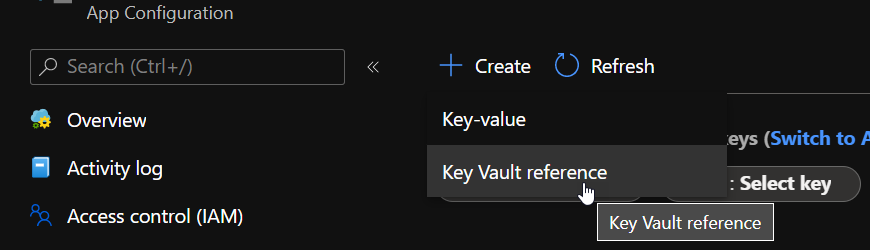
If you’re using the Azure Portal, it’s easy to add a new Key Vault reference in the App Configuration.
Head to the Configuration Explorer and press the Create button.
It will bring a small blade to the side of the screen from which you can add the secret with an appropriate name.
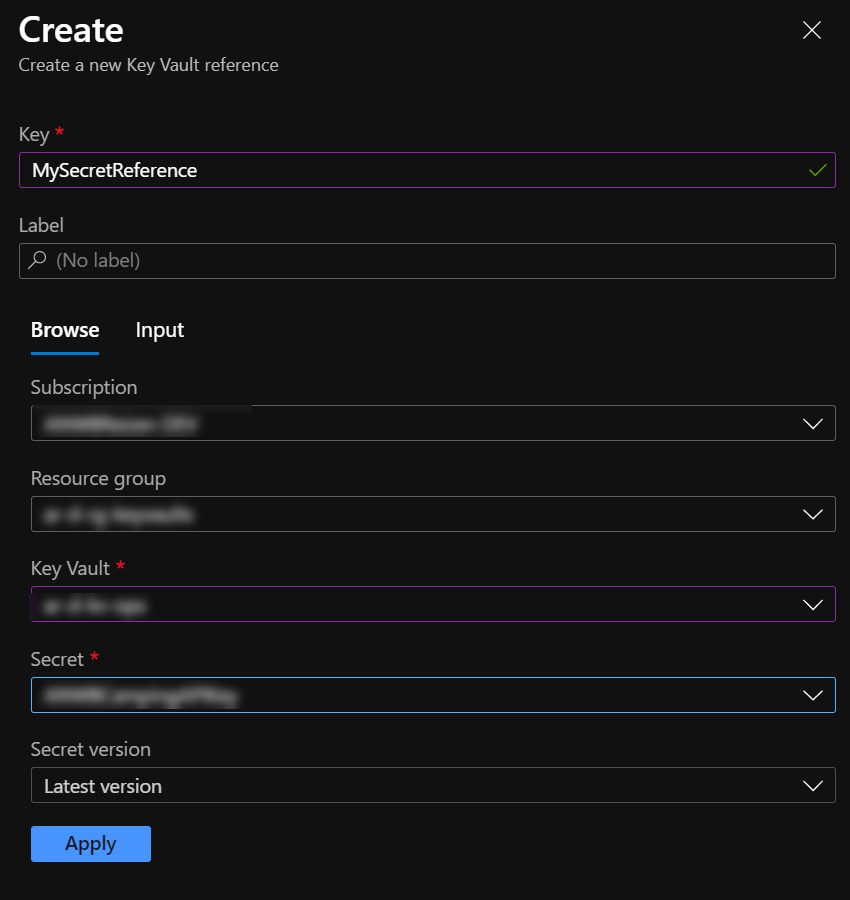
Having finished this, press the Apply button, and you’ll see the reference added and visible in the Configuration Manager.
Read more →My last post was on integrating your Azure App Service with a virtual network (VNet). This post is the other way around. It’s on how to put your App Service in a VNet, or rather, behind a VNet.
If you want to put your Azure App Service inside a VNet, you’ll have to look for the App Service Environment (ASE). This is an offering of dedicated machines that are placed inside a VNet and you’re paying a rather hefty fee for this. While I like the concept, I think it’s quite expensive for most scenarios. Sure, an ASE has its uses, but most customers and projects I’ve come across don’t need it for the current price.
There is one thing that most customers DO want, protecting their services from the outside world. The public cloud, like Azure, is a PUBLIC cloud. By default, anyone can access your services.
Lucky for us, most Azure services have rather decent protection and can also be integrated into a virtual network, though some need an additional price/service tier to make it possible. The same goes for Azure App Services. For quite some time now it is possible to add an access restriction that only allows traffic from a specific virtual network (VNet).
Read more →It’s always a good idea to secure the resources in your Azure subscriptions. One way to do this is by using virtual networks. In a lot of cases, you will put SQL Azure servers, storage accounts and, other services in a virtual network. This will make sure the services can’t be accessed from the public internet unless you explicitly say so.
There are many more advantages to putting services in a virtual network, which I won’t be covering in this post.
This post is on how to integrate an App Service to a virtual network.
The different VNet integration types
At this time, there are 2 types of VNet integration for App Services. They are called ‘Regional VNet Integration’ and ‘Gateway-required VNet Integration’
If you’re running a relatively simple setup, located in a single region, and don’t require a fancy networking setup, it’s probably a good idea to go with the Regional VNet Integration. This one is rather easy to set up and manage.
With this VNet integration, you can still use NSGs (Network Security Groups), route tables, private endpoints, ExpressRoute, and connect to resources in the same region you’re app is located in.
If there’s a need to connect to one or more VNets in another region, the Gateway-required VNet Integration is the way to go. With this integration your service plan can connect to multiple VNets (each app can only connect to a single one), you can manage your DNS and get to create a point-to-site VPN between the different VNets. This is a bit overkill for most scenarios I’m seeing, but if you’re at a large customer or going global, it makes sense to go with this option.
Read more →Recently, I was trying to deploy an Azure App Service which was in need for a couple of certificates, which are stored in Azure Key Vault.
Our ARM template looked very similar to the one below in order to install & configure the certificates in our App Service.
"resources": [
    {
        "type": "Microsoft.Web/certificates",
        "name": "[parameters('certificateName')]",
        "apiVersion": "2019-08-01",
        "location": "[parameters('existingAppLocation')]",
        "properties": {
            "keyVaultId": "[parameters('existingKeyVaultId')]",
            "keyVaultSecretName": "[parameters('existingKeyVaultSecretName')]",
            "serverFarmId": "[parameters('existingServerFarmId')]"
        }
    },
    {
        "type": "Microsoft.Web/sites",
        "name": "[parameters('existingWebAppName')]",
        "apiVersion": "2019-08-01",
        "location": "[parameters('existingAppLocation')]",
        "dependsOn": [
            "[resourceId('Microsoft.Web/certificates', parameters('certificateName'))]"
        ],
        "properties": {
            "hostNameSslStates": [
                {
                    "name": "[parameters('hostname')]",
                    "sslState": "SniEnabled",
                    "thumbprint": "[reference(resourceId('Microsoft.Web/certificates', parameters('certificateName'))).Thumbprint]",
                    "toUpdate": true
                }
            ]
        }
    }
]
When deploying said template, we quickly received a message the deployment had failed.
Resource Microsoft.Web/certificates ‘[myCert]’ failed with message
{ “Code”: “BadRequest”, “Message”: “The service does not have access to ‘/subscriptions/[subscription]/resourcegroups/[resourcegroup]/providers/microsoft.keyvault/vaults/[myVault]’ Key Vault. Please make sure that you have granted necessary permissions to the service to perform the request operation.”, “Target”: null, “Details”: [
{
"Message": "The service does not have access to '/subscriptions/[subscription]/resourcegroups/[resourcegroup]/providers/microsoft.keyvault/vaults/[myVault]' Key Vault. Please make sure that you have granted necessary permissions to the service to perform the request operation."
},
{
"Code": "BadRequest"
},
{
"ErrorEntity": {
"ExtendedCode": "59716",
"MessageTemplate": "The service does not have access to '{0}' Key Vault. Please make sure that you have granted necessary permissions to the service to perform the request operation.",
"Parameters": [ "/subscriptions/[subscription]/resourcegroups/[resourcegroup]/providers/microsoft.keyvault/vaults/[myVault]"
],
"Code": "BadRequest",
"Message": "The service does not have access to '/subscriptions/[subscription]/resourcegroups/[resourcegroup]/providers/microsoft.keyvault/vaults/[myVault]' Key Vault. Please make sure that you have granted necessary permissions to the service to perform the request operation."
Read more →
A couple of weeks ago, I was tasked to implement authentication between the services we have in our Azure landscape. I knew this can be done by using the Managed Identity, as we were doing this on a project I was involved with in the past.
However, I had never actually done this myself. Most of the time the System Administrators were configuring everything and I just had to copy-paste some Guids in a configuration file. After doing some digging into the matter, it was a bit harder to set this up as I had expected at the start.
Lucky for me, Joonas Westlin has some excellent posts on the matter which have helped me enormously. He was also able to help me out on Stack Overflow when I was stuck and couldn’t find out why the authentication wasn’t working correctly.
Much of what I’ll be writing down here will be similar to Joonas his posts on the matter. I’ll be using some different wording.
The posts I’ve used to learn this stuff were:
I started working on some internal web applications for a customer. For these types of applications, it makes a lot of sense to use Azure Active Directory to authenticate users and use their AAD groups/roles to authorize them on specific pages.
I wanted to authorize users by the AAD groups they are placed in. Some users can access Production data, while others are only allowed to access data from the Test environment, all based on the groups they are in. Because this is already configured by our system administrators, I want to use these groups for my application(s) also.
This sounds easy enough, and it is, but you have to do some manual work in Azure Active Directory to make this possible. It took me too much time for my liking, so I hope this post helps others (and myself) in the future.
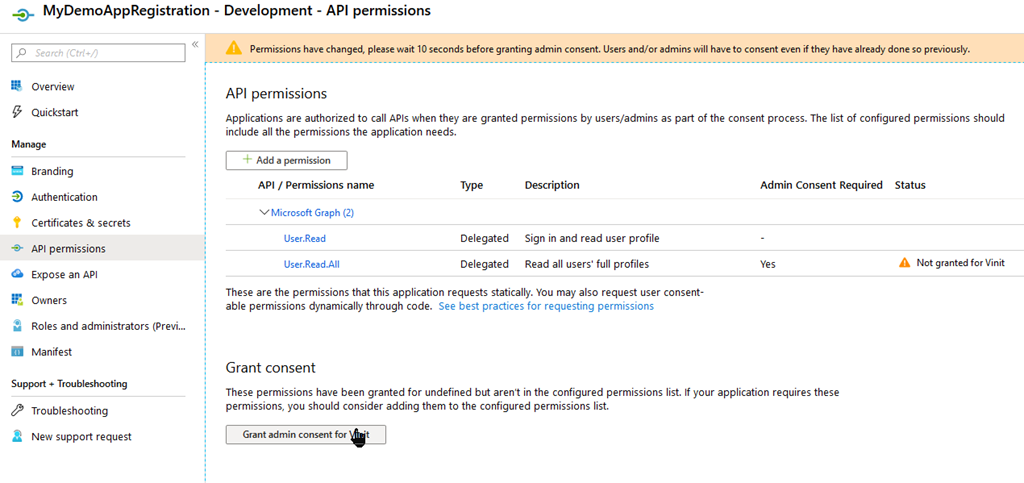
One of the first things you need to do is create a new App Registration in the AAD and give it permission to User.Read.All to read the users’ claims.
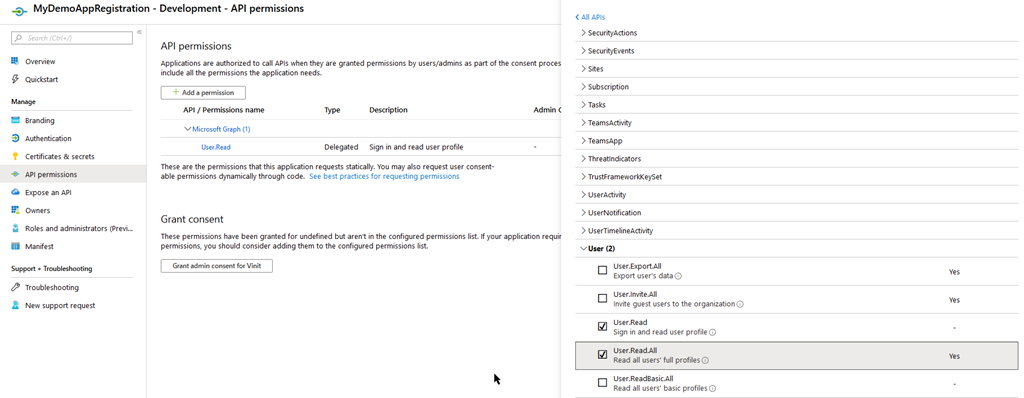
This requires consent from your Administrator, so make sure they are available or you have enough permissions yourself to do this.
When this is set up correctly, head to the Manifest blade.
Read more →A couple of weeks ago I was busy creating some proof of concept applications using Blazor, which was still labeled preview at the time.
To get all of this deployed and working in an Azure App Service, I needed the preview .NET Core runtime installed. An App Service is a PaaS offering, which means you don’t have any influence on what version of the software gets installed on the underlying system.
Lucky for me, there’s a site extension which enables us to install the latest .NET Core version on an App Service.
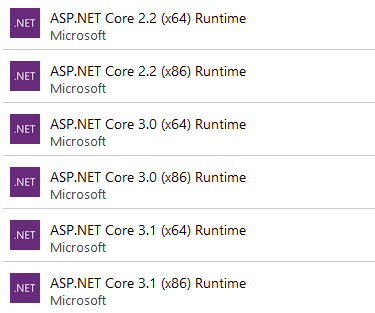
At the time of this blogpost, the 3.0 runtime still isn’t installed on App Services and the 3.1 runtime is still in preview. However, with this extension, you can install whatever you like and use the new features.
It’s, of course, also possible to install these extensions via an ARM template. The following excerpt installs the 3.0 x64 runtime to your App Service.
{
"type": "siteextensions",
    "name": "AspNetCoreRuntime.3.0.x64",
    "apiVersion": "2015-04-01",
    "location": "[resourceGroup().location]",
    "properties": {
        "version": "[variables('aspnetcoreVersion')]"
    },
    "dependsOn": [
        "[resourceId('Microsoft.Web/Sites', variables('webAppServiceName'))]"
    ]
}
As you can see I’m still stating which aspnetcoreVersion I want installed. With this property you can specify which Preview or RC version you need installed.
A very useful extension to use if you want to be on the latest runtime or if it takes too long for your liking for the App Services team to update the .NET version on the underlying systems.
Read more →Being able to create Message Cards or Actionable Messages in Microsoft Teams via a Logic App or an Azure Function is great. Especially if you can use this to invoke logic on your API and update the message in the Teams channel.
However, you don’t want everyone to invoke a management API endpoint you’ve exposed to ‘do stuff’ in your cloud environment. Normally, you’d want to authenticate if the user pressing the button (read: invoking the endpoint).
Lucky for us, this is very doable when invoking the endpoint via a Teams MessageCard/Actionable Message.
The token
Because Microsoft Teams is part of the Office 365 suite, you will be logged in as a user on the tenant. Therefore, the software has a user context and is able to pass this along to your API via a JWT Bearer token.
If you log in to the web client of Microsoft Teams (https://teams.microsoft.com) with your favorite browser you’ll be able to find the token which belongs to you.
In order to test this, I’ve created a new MessageCard in my Teams channel with 1 potentialAction which will invoke an Azure Function.
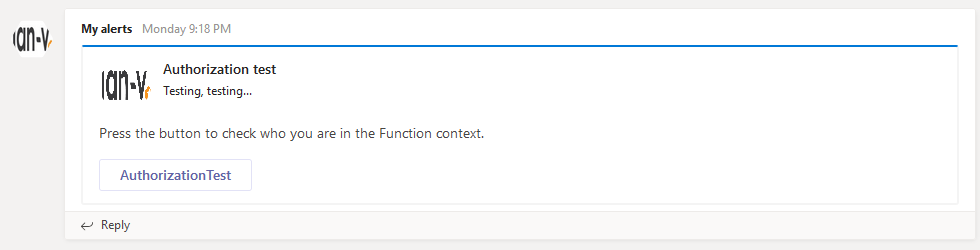
If you open up the network tab of your browser’s Developer Tools and press the AuthorizationTest button you’ll see the request is made to a Teams endpoint called executeAction with a bearer token in the Authorization header.
Read more →So, a couple of weeks back I wrote about leveraging the power of Logic Apps to retrieve Alerts from within your Azure ecosystem and send them to Microsoft Teams. This works great and a fellow Azure MVP, Tom Kerkhove, has enhanced the Logic Apps Template when handling Azure Monitor events.I’m starting to become a pretty big van of Logic Apps, but there are some (obvious) downsides to it.
First, they live inside your Azure Portal. You can create, modify and export them from within the Portal, which is great, unless you want to integrate them in your ‘regular’ development cycle.The export feature enables you to copy/paste the Logic Apps to your ARM templates, but this is suboptimal in my opinion. There’s also the Azure Logic Apps Tools for Visual Studio extension, which makes the integration a bit better, but it still feels a bit quirky.Another downside is the ’language’. When exporting a Logic App you’ll be seeing a lot of JSON. While there might be a good reason for this, it’s not something I like working in and create (complex?) workflows.If you can overcome, or accept, these downsides I’d really advice you to look into Logic Apps. If not, well read on!
Azure Functions to the rescue
If your IT organization consists of mostly developers it might make more sense to use Azure Functions to glue different systems with each other instead of Logic Apps. The biggest downside of Azure Functions in this scenario is, you don’t have all of the building blocks from a Logic App to your availability. You have to create your own logic for this.However, the major benefit of using Azure Functions as the glue to your solution is they are written in the language of your choice and can be deployed via your ’normal’ CI/CD process.The only thing the Logic App in the previous post did was receive a HTTP POST message, parsing it and send a message to Teams. All of this can also be done via a standard HTTP triggered Azure Function. And because I prefer writing C# code instead of dragging-dropping building blocks (or write JSON if you’re really hardcore), the Azure Functions approach works best for me.
Read more →The default Azure Functions runtime comes with quite a lot of bindings and triggers which enable you to create a highly scalable solution within the Azure environment. You can connect to service buses, storage accounts, Event Grid, Cosmos DB, HTTP calls, etc.
However, sometimes this isn’t enough.
That’s why the Azure Functions team has released functionality which enables you to create your own custom bindings. This should make it easy for you to read and write data to any service or location you need to, even if it’s not supported out of the box.
There is some documentation available on how to create a custom binding at this time and even a nice sample on GitHub to get you started. The thing is this documentation and samples are written for Version 1 of the Azure Functions runtime. If you want to use custom bindings in Azure Functions V2, you need to do some additional stuff. There are still changes being made on this subject, so it’s quite possible the current workflow will be broken in the future.
For this post, I’ve created a sample binding which is capable of reading data from a local disk. Nothing fancy and definitely not something you want in production, but it’s easy to test and shows you how the stuff has to be set up.
Read more →