There’s a new feature over here, my weekly links archive
.
Every week a page will be added automatically based on content I have read and found interesting to share. I’m using a self-hosted Linkwarden
instance to collect pages and links for a variety of topics. For the purpose of this weekly links archive I have created a new tag called Newsletter which I use to fetch the weekly links to share with all of you.
Of course, I don’t want to make my Linkwarden service open to the internet. To fetch the content from Linkwarden in my scheduled GitHub Action I use Tailscale as shared earlier on this blog
.
Query Linkwarden API
Linkwarden provides a nice API that is documented (somewhat) on their site: https://docs.linkwarden.app/api/api-introduction
Not all features and possibilities are mentioned over here, but with some creativity you’ll be able to figure out a lot.
To use the API you first need an access token.
These tokens can be created on the Settings -> Access Tokens page.
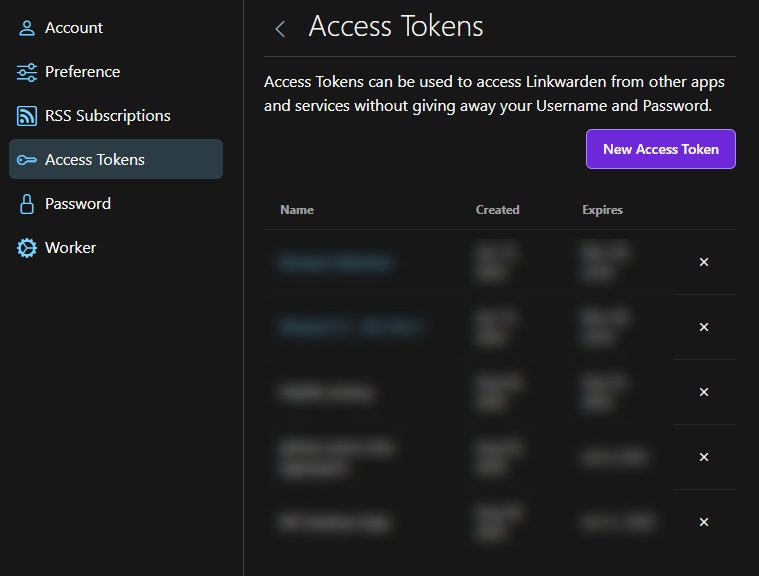
Once you have this token, make sure to store it somewhere safe.
As you can see in the documentation there’s a search endpoint. This one is useful to validate your requests are working. The endpoint I’m most interested in is the links endpoint and using the tagId querystring parameter
. To make good use of this, you do need to know which tag to query, in my case it’s 5.
Do note, this endpoint is being deprecated in favor of the search endpoint. At this point, I have not been able to figure out how to use the search-endpoint to retrieve all posts for a specific tag, but this will probably be necessary at some time in the future.
Read more →It’s not something a lot of people need to do on a regular basis, but when you do, you don’t want to spend a lot of time doing it. I’m referring to the process of “create an SDK for your APIs”.
When your service is exposing endpoints for your consumers to use, it’s easy to refer them to using raw endpoints and let them figure out how to deal with it based on the Open API specifications
(formerly known as Swagger) provided. This requires quite a bit of plumbing on their part.
Needless to say, invoking endpoints from your API by using HTTP-calls isn’t very user-friendly and quite error prone. Providing your consumers with a proper SDK is much better from an onboarding perspective.
How to start building an SDK?
As mentioned, either you or your customer needs to do quite a bit of plumbing to invoke your API endpoints properly. This isn’t something anyone will enjoy, so automation is everyones friend over here.
To start, you first need to make sure you are generating Open API specs for the API. Just about every ecosystem has generators for this process. In het .NET ecosystem we’ve been using Swashbuckle
for a couple of years now, and with the release of .NET 9 there’s also out-of-the-box capabilities to generate the API specifications
.
With these files generated, you’re already halfway of creating an SDK. For best results, be as complete as possible with your Open API specs. Provide descriptions, all error codes, use DTOs, adhere to the HTTP specifications, etc.
Read more →A few years ago, I was assigned on a project with a friend of mine, Marnix van Valen
and we needed to update our APIs in API Management with the latest Open API schema for each release. As we don’t like to do this work manually, it got added to our build- and release pipeline
. I like this approach, as it removes the need to host Swagger / Open API compute on my own service and only static files need to be hosted in some folder.
So I started re-implementing the approach we did a couple of years ago.
Turns out, this still works! Well, it would if the packages were still kept up-to-date with the latest ASP.NET features.
No minimal API support
Like many engineering teams, we adopted to use the (recommended) minimal APIs to create the services
. Apparently, this doesn’t play nice with the Swashbuckle tooling. There are multiple issues at GitHub on this topic
. All without a resolution, aside to migrating back to the ‘old’ way of working with a Program.cs and Startup.cs class.
I understand the core maintainers have different priorities nowadays, but this estimated 15-minute task now took up more time from my part.
Only running on .NET 7
There’s another problem I encountered. The Swagger CLI 6.5.0 tooling only has support up to .NET 7
. Our build agents don’t have this version installed anymore.
Lucky for me, there’s an environment variable you can set to make sure the latest version of .NET is being used.
Read more →Aside from Azure Traffic Manager
, Azure Functions
, and Azure Service Bus
, Azure API Management (APIM)
is one of my favourite services to use in just about any solution.
A useful little nugget for APIM is it’s able to have its own Managed Identity
. You can choose to use a System Managed Identity or a User Managed Identity
. Both options have pros and cons.
When you have configured APIM with a managed identity, this identity can be used to authenticate with the backend services
.
This can be useful in a wide variety of scenarios, but do be careful configuring this. By using this feature, every request to the backend will use the token of the Managed Identity and not of your users or services making authenticated requests to APIM.
As mentioned in the docs, to set this up, you can use the authentication-managed-identity policy for inbound requests.
When doing so, you need to specify which backend resource to use (App URI ID of an App Registration), and the name of the variable to put the token into.
<policies>
    <inbound>
        <base />
        <authentication-managed-identity resource="api://07601ff2-0b86-40f2-b5d9-7f8db33c9fb7/" output-token-variable-name="msi-access-token" ignore-error="false" />
        <set-header name="Authorization" exists-action="override">
            <value>@("Bearer " + (string)context.Variables["msi-access-token"])</value>
        </set-header>
    </inbound>
    <backend>
        <base />
    </backend>
    <outbound>
        <base />
    </outbound>
    <on-error>
        <base />
    </on-error>
</policies>
Very useful in many scenarios, but do be careful of the downsides of using the APIM managed identity to be the authenticated party for backend services.
Read more →Have you ever been on a project where an API returns a response that you can’t, or don’t want to, handle in your own application? Or a customer asks to generate a different response?
Yeah, me neither…
If you ever come across a project, where they want you to return a response like this:
HTTP/1.1 200 OK
Connection: Keep-Alive
Transfer-Encoding: chunked
Content-Type: application/json
Date: Wed, 10 Jan 2024 20:59:21 GMT

{
    "error": 404,
    "status": "NotFound",
    "description": "Could not find the object"
}
This post is for you!
Azure API Management (APIM)
Azure API Management has a lot of features available, one of them is to rewrite requests AND responses. This feature is especially useful if you have to integrate with a third party using a strange type of requests or responses, or when you’re building a platform used by thousands of customers and a couple of them can’t integrate proper with it.
While APIM has a dozen of more cool features, I won’t go into those in this post.
At this moment I’m working on a platform solution and we try to adhere to the most appropriate HTTP response codes for each situation. There are a lot of them
!
Most customers will be able to handle the common status codes, like 200, 400 and 500. However, we use many more. While designing our API we adhere to the Microsoft Azure REST API guidelines
, which I think is quite a good document to start with when creating APIs.
Read more →