Working with Azure Key Vault in Azure Functions
As with almost every application there is a point where you have to work with some kind of secret, like for example a connection string to a database. There are multiple ways to retrieve these secrets and this isn’t any different with Azure Functions.
If you have set up a continuous deployment build within Visual Studio Release Management you can just substitute the values in your build, which makes it easy, transparent and consistent to add and change the values.
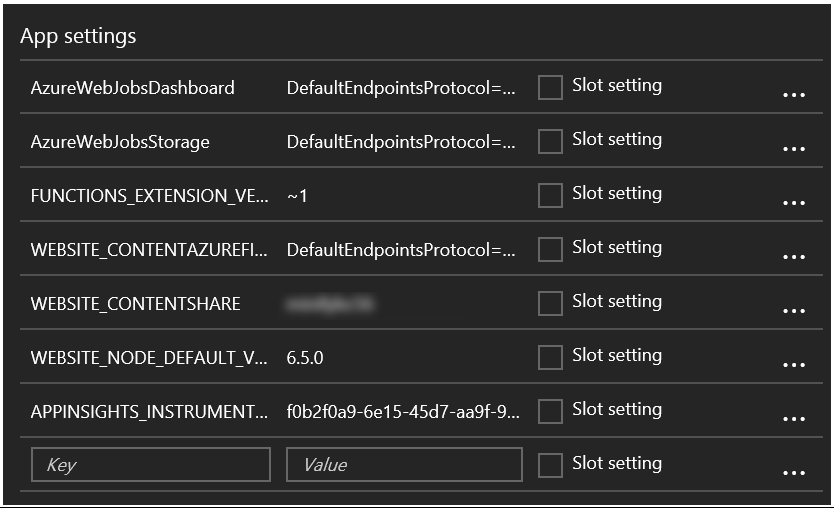
A different approach is to provide the secrets by yourself in the application settings of your App Service. These Application Settings are already used by the Azure Functions in order to specify some settings which are necessary to run properly.
While I have nothing against either one approach, there is a better option available to retrieve secrets in your cloud software. This option is called Azure Key Vault. The Azure Key Vault is a secure store which helps you safeguard keys and secrets used in your cloud applications. One of the many advantages of using Azure Key Vault, compared to the alternatives, is having the possibility to revoke access to specific secrets for an application or user. This makes it much easier to lock down an application or user if it has been compromised. One other advantage is having a central location for all your keys & secrets and being able to update them when necessary. As with almost any Azure service you get detailed logging of usage, which means your operations team is able to monitor the usage of the keys and secrets in more detail.
Setting up Azure Key Vault does have a bit of a learning curve, so I’ll post all steps, which are necessary today, below. There are two (proper) ways of working with the Azure Key Vault from within your application or Azure Function. One is by using a client secret, the other is to work with a certificate. While I do think working with certificates is more secure, I don’t use them often for my personal projects. The main reason being certificates will expire so you have to renew them, which requires more management, which is something I rarely want to do for side-projects. However, if you are building something which is going to run in production for a customer, do have a look at working with certificates!
What do we need?
If you are choosing to work with a client secret, you need 3 things.
A Client Id, a Client Secret and an URL to the location of your secret.
The Id and Secret will be stored within the Azure Active Directory. The secret will, obviously, be stored within the Azure Key Vault.
One of the most common secrets we use with application development is a connection string to some kind of database. This is why I will be saving a Cosmos DB connection string in the Key Vault. Just create a Cosmos DB instance and retrieve the connection string from it. It should look similar the one below.
DefaultEndpointsProtocol=https;AccountName=[myAccount];AccountKey=[myAccountKey]TableEndpoint=https://[myTableEndpoint].documents.azure.com
Setting up Azure Key Vault
Creating an Azure Key Vault works just like any other service in the Azure ecosystem. Either use PowerShell, an ARM template or the portal. In this post I’ll use the portal to explain stuff, but you can do it with whichever has your preference.
I’ve chosen the default options for a Key Vault. I guess the Standard tier is good enough for most people and projects. Do keep in mind to add yourself (or a different administrator) to the principals.
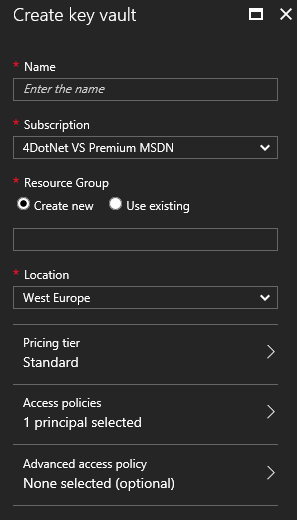
If you remove yourself from the Access policy principals you won’t be able to access the Key Vault, which can be troublesome if you want to configure it.
Wait until your Key Vault has been created and add your secret connection string to it.
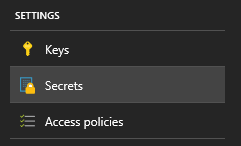
Navigate to the Secrets blade and choose to Add the secret.
The Upload option is defaulted to Certificate, but in order to add our connection string we need to change this to Manual.
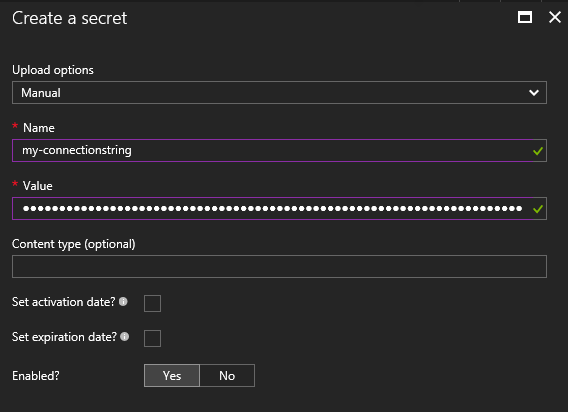
After changing the option you will see some fields which look familiar, Name and Value. Fill the Name field with a proper description of your secret and the Value with the actual secret.
For connection strings you don’t really need to set an activation- or expiration date, but it’s a nice option to have if you are working with secrets which expire from time to time.
When the secret is created in the Vault you can click on it and see some details. A very cool feature is to create a ‘New Version’ of the key. This makes a lot of sense if you have secrets which expire.
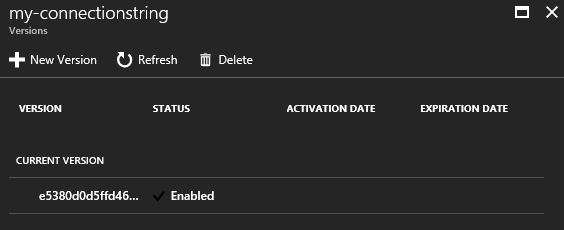
When you click on the current version of the secret another blade will show up with even more details.
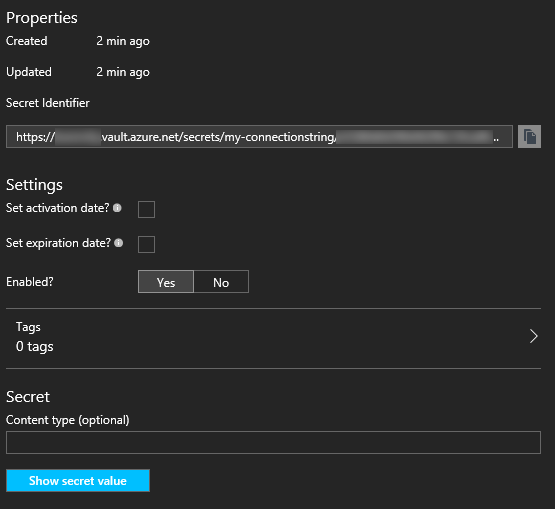
This is the blade which has all interesting data. For starters it contains the Secret Identifier which is the **location of the secret value, **stored in the Key Vault. You can also check what the actual secret value is in this blade!
Each version of a secret has its own Secret Identifier. Because of this, it is very easy to lock down a specific application, because you can just create a new version of the Secret, update it in all other applications and disable the old Secret Identifier endpoint. Using this strategy, the not-updated application will not be able to retrieve the secret anymore, therefore probably not operating (correctly) anymore.
This is all we have to do in the Azure Key Vault, for now.
Configuring the Active Directory
In order to access the Key Vault you need to be some kind of approved principal. This can either be a user or an application. Because Azure Functions (or any other service) aren’t people, we will have to create applications in Azure Active Directory.
First, navigate to your Active Directory and select App registrations.
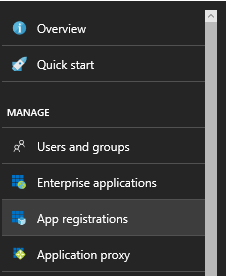
You don’t need to have an existing application yet. These steps are necessary to create the appropriate identifiers and secrets your application can use later on.
There aren’t any real rules to name your application, but I saw some other examples post-fixing them with -ad so I added this myself also. This is a convention to make it clear these are Active Directory configured applications.
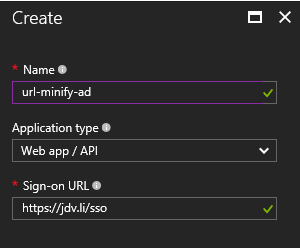
For most services you will be hosting in the cloud choosing the application type Web app / API is sufficient. The other option is Native, which should only be used for applications which can be installed on a system.
You might be surprised by the Sign-on URL at the bottom. For the purpose of storing and retrieving secrets you don’t really need this, so you can write whatever URL you want over here.
After creating the application you will see a blade with some details about it.
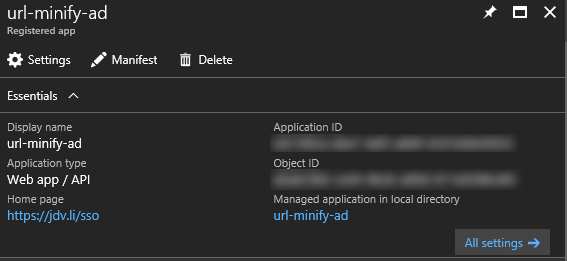
The Application Id you see in this overview is the Client Id, used later on for authentication with the Key Vault.
Now it’s time to create a (secret) key for retrieving the connection string.
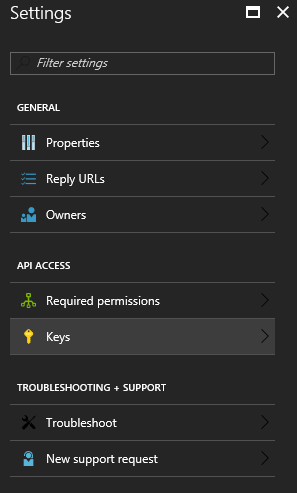
Creating a key is one of the most important steps in the process.

The description of the key doesn’t really matter, just use something which will make it clear for what it is used for. In our case, the expiry date can be set to Never, which will re-define itself to 31-12-2299. I won’t live to see this date, so it’s practically Never to me.
The Value will be created when pressing the Save button on the top. Copy this Value, because you will not be able to see it again. This value is the Secret Key you will need later on!
The configuration of your Active Directory application is now finished.
Back to the Key Vault
Now that we have an application present in the Active Directory, we can add this to the list of approved Principals in the Key Vault.
Navigate back to the Key Vault and search for the Access policies option.
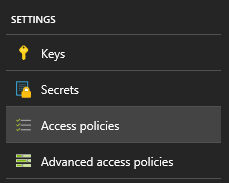
Over here you have the option to add a new principal by searching for the application just created.
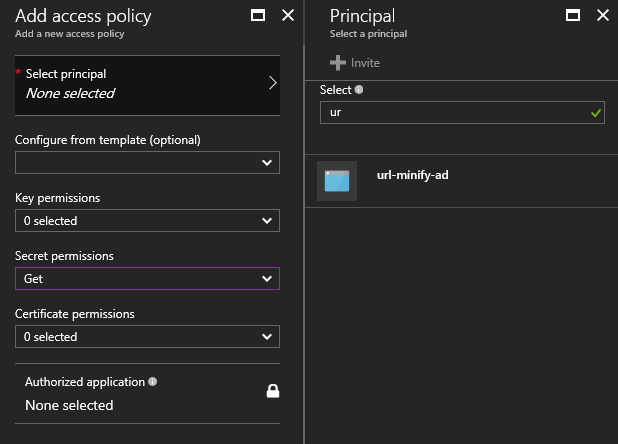
Make sure you limit the permission set you give this application. For now the application only needs to retrieve secrets from the Key Vault. Therefore, selecting the Get permission for Secrets is good enough.
Save the changes you made to the access policies and you are good to go!
The hardest part is over and we can start coding our Azure Function!
Creating the Azure Function
In an earlier post I already mentioned you can write your Azure Functions in the portal or an IDE like Visual Studio. Because Visual Studio offers the best developer experience I’ll be using this for all of my Azure Functions development.
I’ve tried to keep things as simple as possible, therefore not doing anything fancy in this sample. All this function does is retrieving the connection string from the Key Vault and returning it to the requesting user.
using System.Configuration;
using System.Net;
using System.Net.Http;
using Microsoft.Azure.KeyVault;
using Microsoft.Azure.WebJobs;
using Microsoft.Azure.WebJobs.Extensions.Http;
using Microsoft.Azure.WebJobs.Host;
using Microsoft.IdentityModel.Clients.ActiveDirectory;

namespace Minifier
{
    public static class Get
    {
        [FunctionName("Get")]
        public static HttpResponseMessage Run(
            [HttpTrigger(AuthorizationLevel.Anonymous, "get", Route = "{slug}")] HttpRequestMessage req, string slug, TraceWriter log)
        {
            // The Application Id of the Azure AD application
            var clientId = ConfigurationManager.AppSettings["ClientId"];
            // The Value of the Key you created in the Azure AD application
            var clientSecret = ConfigurationManager.AppSettings["ClientKey"];
            // The Secret Identifier of your secret value
            var connectionstringUrl = ConfigurationManager.AppSettings["ConnectionstringUrl"];
            // Creating the Key Vault client
            var keyVault = new KeyVaultClient(async (authority, resource, scope) =>
            {
                var authContext = new AuthenticationContext(authority);
                var credential = new ClientCredential(clientId, clientSecret);
                var token = await authContext.AcquireTokenAsync(resource, credential);
                return token.AccessToken;
            });
            // Retrieving the connection string from Key Vault
            var connectionstring = keyVault.GetSecretAsync(connectionstringUrl).Result.Value;
            return req.CreateResponse(HttpStatusCode.OK, "The connection string is: " + connectionstring);
        }
    }
}
This is all you have to do in your function. The most difficult part is creating the KeyVaultClient, but you can just copy-paste this piece of sample code to get it up and running!
Now you might think: “Hey, I see you are still retrieving data from the application settings, that’s not very safe, is it?”. Very observant indeed! However, there isn’t a very good way around this. You still need to identify yourself with the Azure Key Vault, therefore storing a secret somewhere. As I mentioned, the best thing is do add these settings somewhere in the delivery pipeline, this way as few people possible know the actual values. This is also one of the reasons why it is better to work with certificates. Certificates aren’t stored somewhere in plain text, but installed on a system. Because of this you can manage them a bit better, compared to secrets stored in a configuration file or portal.
Still, if someone managed to ‘steal’ your client secrets and identifiers, you will be able to make sure they can’t do anything with it. Remove (or restrict) the principal in your Key Vault and the application will be ‘crippled’ right away.
That’s all for working with the Azure Key Vault in combination with Azure Functions. It’s not very different (if at all) from a normal web application. Which makes it an even better solution to use for storing secrets in the cloud.
