Starting with Azure Functions
Lately, I’ve been busy learning more about creating serverless solutions. Because my main interest lies within the Microsoft Azure stack I surely had to check out the Azure Functions offering.
Azure Functions enable you to create a serverless solutions which are completely event-based. As it’s located within the Azure space, you can integrate easily with all of the other Azure services, like for example the service bus, Cosmos DB, storage, but also external services like SendGrid and GitHub!
All of these integrations are fine and all, but seeing Azure Functions perform in action is still easiest with regular HTTP triggers. You can just navigate with a browser (or Postman) to a URL and your function will be activated immediately. I guess most people will create these kind of functions in order to learn to work with them, at least that’s what I did.
Creating your Azure Functions App
In order to create Azure Functions, you first have to create a so called Function App in the Azure Portal. Creating such an app is quite easy, the only thing you have to think about is which type of Hosting Plan you want to use. At this time there are 2 options, the Consumption Plan or the App Service Plan.
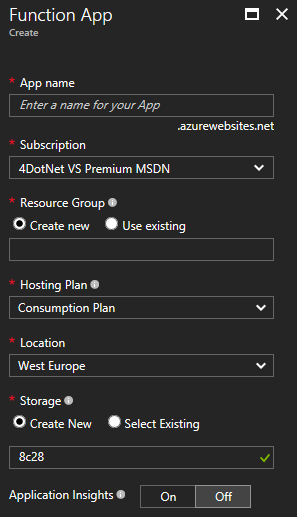
For your regular “Hello World”-function it doesn’t really matter, but there are a few important differences between the two.
If you want to experience the full power of a serverless compute solution, you want to use the Consumption plan. This plan creates instances to host your Azure Functions on-demand, depending on the number of incoming events. Even when there is a super-high load on your system, this plan scales automatically.
The other main advantage is, you will only pay for the functions if they actually do something.
As you might remember, these two advantages are, in my opinion, the main benefits for people to move to serverless offerings.
However, using the App Service plan also has some advantages. The main advantage will be to utilize the full power of your virtual machines and not having unexpected (high?) costs. With the App Service plan, your function apps run on the App Service virtual machines you might already have deployed on your subscription (Basic, Standard and Premium). This means you can share the same (underlying) virtual machines of your websites with your Azure Functions. Using this plan might save you some money in the end, because you are already paying for the (unused) compute which you are able to utilize now. Running these functions won’t cost anything extra, aside from the extra bandwidth of course.
Another advantage is your functions will be able to run continuously, or nearly continuously. The App Service plan is useful in scenario’s where you need a lot of long-running compute. Keep in mind you need to enable the Always On setting in your App Service if you want your functions to run continuously.
There are some other little differences between the two plans, but the mentioned differences are most important, to me at least.
Do remember to enable Application Insights for your Functions App. It’s already an awesome monitoring platform, but the integration with Azure Functions makes it even more amazing! I can’t think of a valid reason not to enable it, because it is also quite cheap.
After having completed the creation of your Functions App you are able to navigate to it in the portal. A Functions App acts much like a container for one or more Azure Functions. This way you are able to place multiple Azure Functions into a single Functions App. It might be useful for monitoring if you are placing functions for a single functional use-case into one Functions App.
You can of course put all of your functions inside one App. This doesn’t really matter at the moment. It’s a matter of taste.
Your first Azure Function
If you are just staring with Azure Functions and serverless computing I’d advise to check out the portal and create a new function from over there. Of course, it isn’t a recommended practice if you want to get serious about developing a serverless solution, but this way you are able to take baby steps into this technology space. A recommended practice would be using an ARM template or CLI script.
From inside the Function App you have the possibility to create new functions.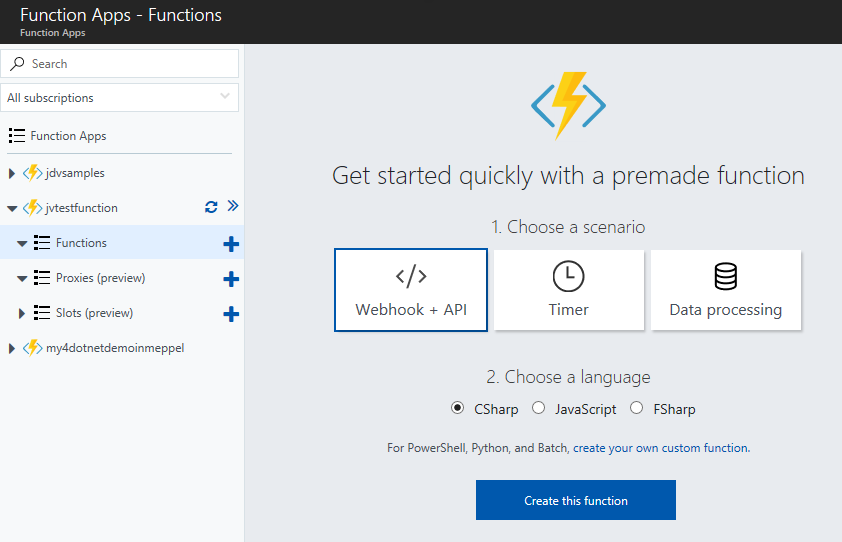
Currently, the primary languages of choice are C#, JavaScript and F#. This is just to get you started, because there are more languages supported already (node.js, python, PHP) and more are coming. There’s even an initiative to support R scripts in Azure Functions!
For now I’ll go with the C# function, because that’s my ’native’ programming language.
After this function is created you are presented with an in-browser code editor from which you can start coding and running your function.
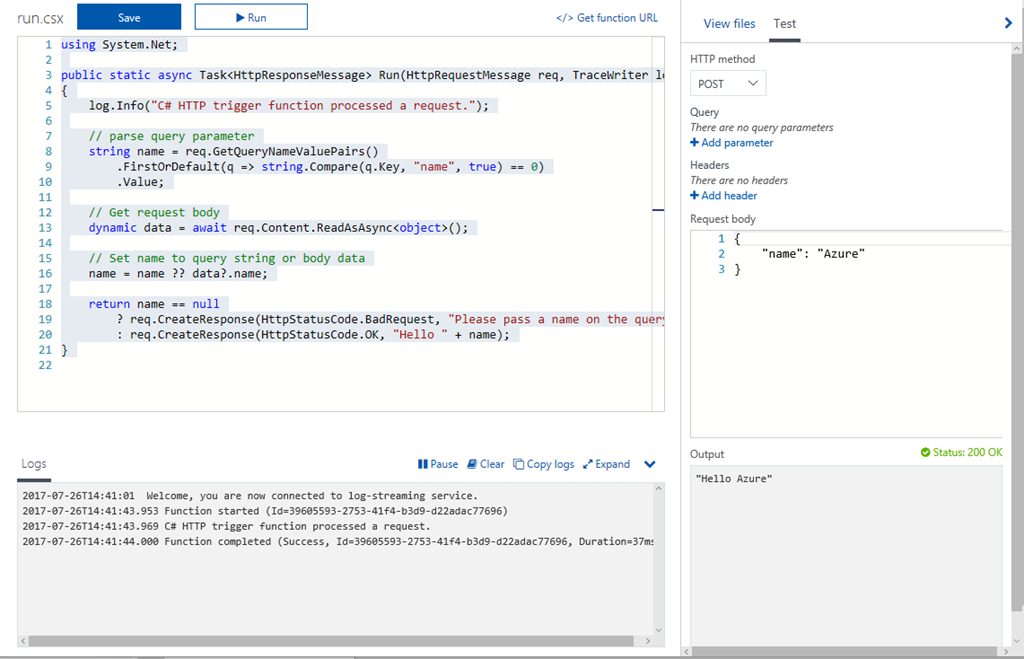
This function is placed in a file called run.csx. The csx extension belongs to C# scripts (check out scriptcs.net), much like ps1 belongs to PowerShell scripts.
It should now be clear this Azure Function is ‘just’ a script file with an entry point. This entry point is much like the Main-method in the Program.cs file of your console application.
Because we have created an HTTP hook/endpoint, you should return a valid HTTP response, like you can see in the script. If you want to test your function, the portal has you covered by pressing the Test button. Even though testing in the portal is cool, it’s even cooler to try it out in your browser. If everything is set up correctly you will be able to navigate to the URL [https://[yourFunctionApp].azurewebsites.net/api/HttpTriggerCSharp1?code=someCode] and receive the content, which should be _Please pass a name on the query string or in the request body_. You can extract the proper URL from the Get function URL link in the portal.
Management & settings
Azure Functions are really, really, really short-lived App Services. They are also deployed in the same Azure App Service ecosystem, therefore you can leverage the same management possibilities which are available to your regular App Services.
On the Platform features tab you are able to navigate to most useful management features of your Functions App.
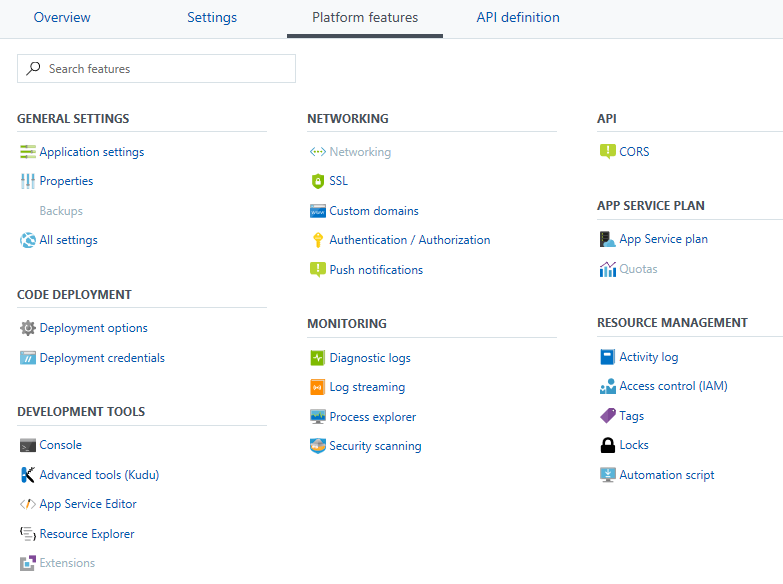
I really like this page, it’s much better and clearer compared to the configuration ‘blade’ of regular Azure services. Hopefully this design will be implemented with the other services also!`
Keep in mind to configure CORS properly if you want to use your HTTP function from within a javascript application!
All other features presented over here are also important of course. I especially like the direct link to the Kudu site, from which you can do even more management!
Another setting, which is in preview at the moment, is enabling deployment slots. Yes, deployment slots for your Azure Functions! This works exactly the same like you are used to with the regular App Services. I’ve configured one of my Function Apps to use the deployment slots. By enabling deployment slots you can now deploy the develop branch to a development slot and the master branch to the production slot of the Function App.
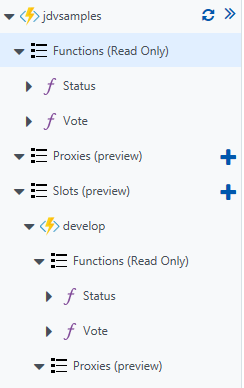
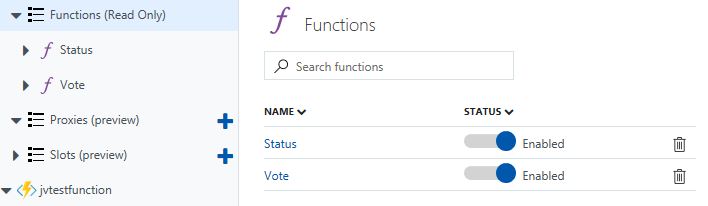
If for some reason you want to disable the usage of a specific function, just navigate to the Functions leaf in the treeview and you are able to disable (and re-enable) the different functions individually.
Creating real functions
Creating functions from within the Azure Portal isn’t a very good idea in real life. Especially since you don’t have any version control, quality gates, continuous integration & deployment in place. That’s why it’s a good idea not to use the browser as your primary coding environment. For a professional development experience you have multiple options at hand.
The easiest option is to use Visual Studio 2017. You need version 15.3 (or higher) of Visual Studio, which is still in preview at this moment. When you are done installing this version you should be able to install the Azure Functions Tools for Visual Studio 2017 from the Visual Studio Marketplace on your machine.
Doing so will enable you to choose a new project template called Azure Functions. You can add multiple Azure Functions to this project. Currently, there already is an extensive list of events available to which you can subscribe to. I’m sure the list will grow in the future, but for now it will suffice for a great deal of solutions.
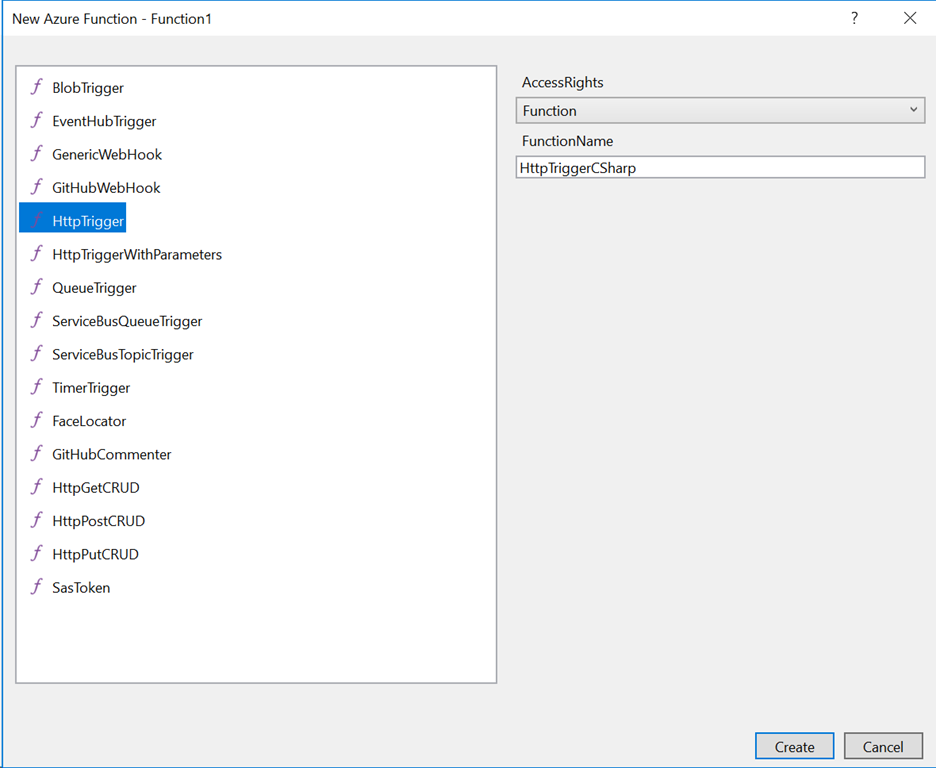
After having chosen the event of your choice you can change some settings, like Access Rights. If you want your HttpTrigger to be accessed by anonymous users from the web, you need to set it to Anonymous instead of Function. No worries if you forgot to do this, it’s something you can set from inside your code also.
When comparing the created functions (the one from the portal and from Visual Studio) you will notice a couple of differences.
namespace FunctionApp1
{
    public static class Function1
    {
        [FunctionName("HttpTriggerCSharp")]
        public static async Task<HttpResponseMessage> Run([HttpTrigger(AuthorizationLevel.Function, "get", "post", Route = null)]HttpRequestMessage req, TraceWriter log)
        {
            //do stuff
        }
    }
}
First of all, your function is now wrapped inside a namespace and a (static) class. This makes organizing and integrating the code with your current codebase much easier.
Another thing you might notices are the extra attributes added to the function.
The Run-method now has an attribute FunctionName, which will tell the Function App what the name of the function will be. Do note, having multiple functions with the same FunctionName will override the one getting deployed. The function.json file will create an entrypoint for the latest function it finds with a specific name.
Also, the first parameter, the HttpRequestMessage, now has an HttpTrigger-attribute stating how the function can/should be triggered. In this case the function can only be triggered by other functions with a HTTP GET or POST. Because of these attributes it is easier to change the behavior of the functions later on. You aren’t dependent on choices made in some wizard.
I already mentioned the function.json file briefly. This file is used to populate the Function App with your functions. If you’ve explored the portal a bit, you might have seen this file already after creating the initial function.
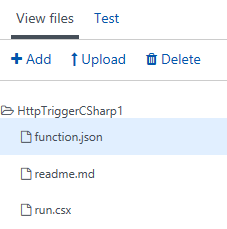
This file contains all configuration for the provided functions within the Function App. The function.json file from the first function script contains the following information.
{
  "disabled": false,
  "bindings": [
    {
      "authLevel": "function",
      "name": "req",
      "type": "httpTrigger",
      "direction": "in"
    },
    {
      "name": "$return",
      "type": "http",
      "direction": "out"
    }
  ]
}
Now compare it with the one, generated, by the function in Visual Studio.
{
  "bindings": [
    {
      "type": "httpTrigger",
      "methods": [
        "get",
        "post"
      ],
      "authLevel": "function",
      "direction": "in",
      "name": "req"
    },
    {
      "name": "$return",
      "type": "http",
      "direction": "out"
    }
  ],
  "disabled": false,
  "scriptFile": "..\\FunctionApp1.dll",
  "entryPoint": "FunctionApp1.Function1.Run"
}
As you can see, the file which is generated in Visual Studio contains information about the entry point for the function.
Note: You won’t see this file, it’s located in the assembly output folder after building the project.`
In the above example I’ve used Visual Studio to create functions. It is also possible to use any other IDE for this, only you have to take into consideration you’ll have to use the Azure Function CLI tooling in those environments.
Debugging
When using a proper IDE, like Visual Studio, you are used to debugging your software from within the IDE.
This isn’t any different with Azure Functions. When pressing the F5-button a command line application will start with your functions loaded inside.
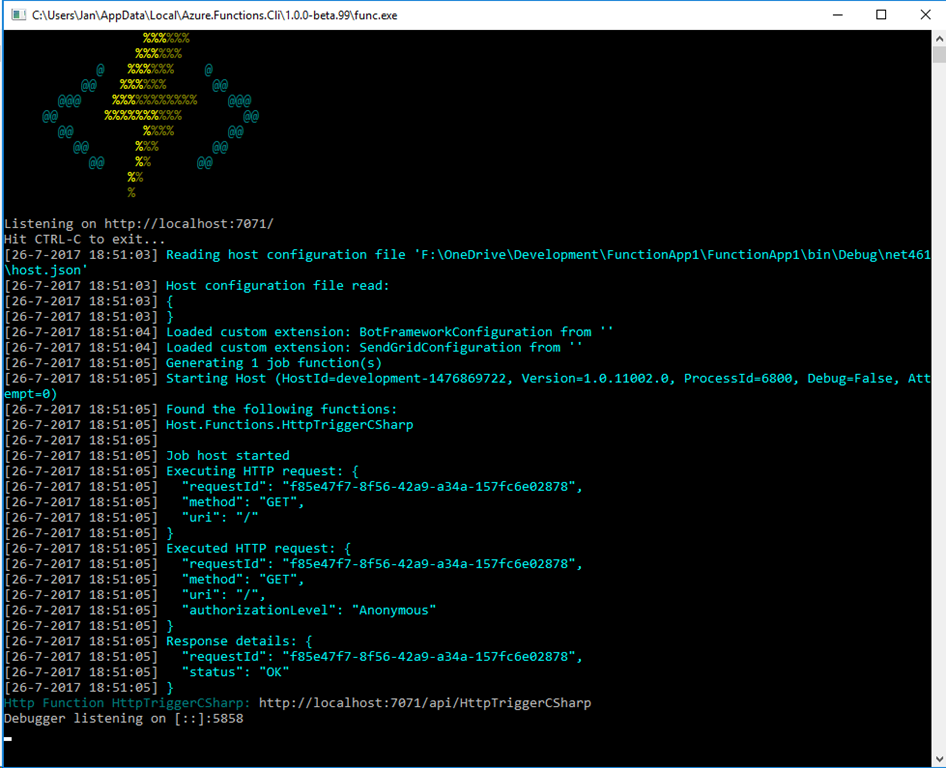
This application will start a small webserver which emulates the Function App. When working with HTTP triggers you can easily navigate to the provided endpoints. Of course, you can also work with any other event as long as you are able to trigger them.
At BUILD 2017 it was also announced you can do live-production-debugging of your Azure Functions from within Visual Studio. In other words: Connecting to the production environment and setting breakpoints in the code.
The crowd went wild, because this is quite cool. However, do you want to do this? It’s nice there is a possibility for you to leverage such a feature, but in most cases I would frown quite a bit if someone suggested doing this.
I do have to note live-debugging Azure Function production code isn’t as dangerous as a ’normal’ web application. Normally when you do this, the complete thread is paused and no one is able to continue on the site. This is one of many reasons why you never want to do this. With a serverless model this isn’t the case. Each function spins up a new instance/thread, so if you set a breakpoint in one of the instances, all other instances can still continue to work.
Still, take caution when considering to do this!
Deployment
We are all professional developers, so we also want to leverage the latest and greatest continuous integration & deployment tools. When working in the Microsoft & Azure stack it’s quite common to use either TFS or Azure Release Management for building your assemblies.
Because your Azure Functions project still produce an assembly, which should be deployed with along with your function.json file, it is also still possible to use the normal CI/CD solutions for your serverless solution.
If you don’t feel like setting up such a build environment you can still use a different continuous deployment feature which the App Services model brings to us.
On the Platform features tab click on the Deployment options setting.
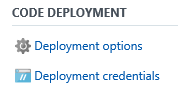
This will navigate you to the blade from where you can setup your continuous deployment.
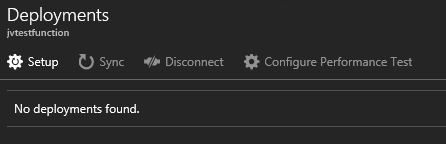
Using this feature you are able to deploy every commit of a specific branch to the specified application slot.
Setting up this feature is quite easy, if you are using a common version control system which is located in the cloud, like VSTS, GitHub, BitBucket or even DropBox and OneDrive.
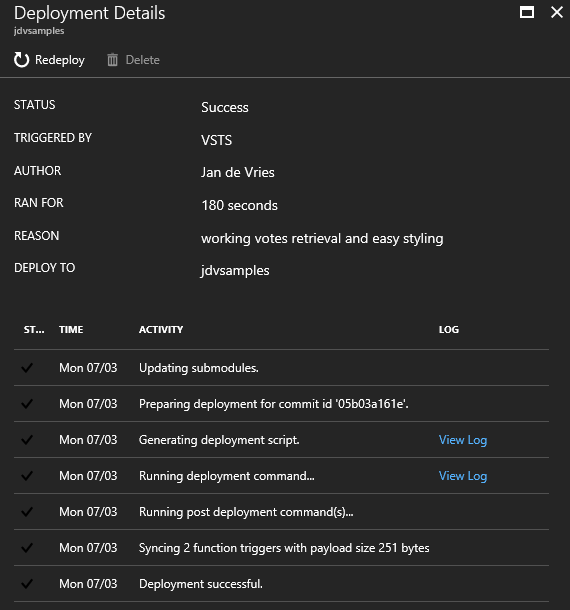
I’ve set up one of my applications with VSTS integration. Every time I push some changes to the master branch, the changes are being built and deployed to the specified slot.
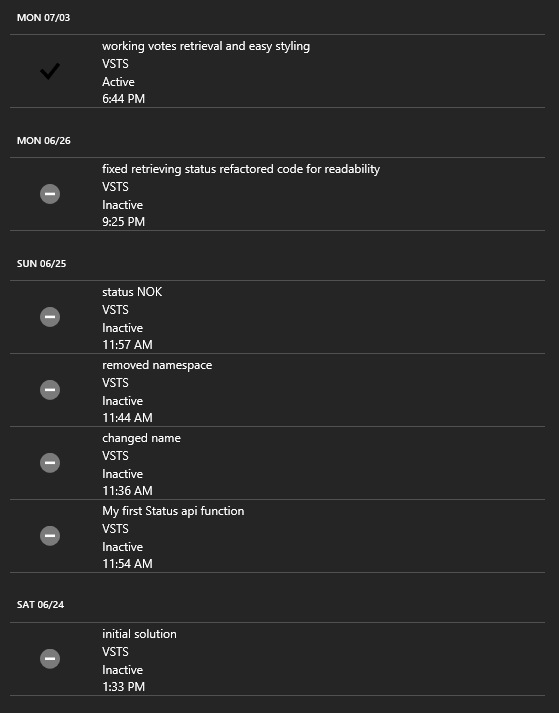
When clicking on a specific deployment, you can even see the details of this deployment and redeploy if needed.
All in all quite a cool feature if you want to use continuous deployment, but don’t want to set up TFS or Azure Release Management. The underlying technology still uses Azure Release Management, but you don’t have to worry about it anymore.
If you are thinking of using Azure Functions in your professional environment I highly recommend using a proper CI/CD tool! The continuous deployment option is quite alright (and better as publishing your app from within Visual Studio), but one of the major downsides is you can’t ‘promote’ a build to a different slot.
You can only push changes to a branch and those will get built. This isn’t something you want in your company, but that’s a completely different blog post and unrelated to serverless or Azure Functions.
Hope this helps you out a bit starting with Azure Functions.