There are a ton of useful Azure resources, and one that I don’t read or hear a lot about is Azure Traffic Manager.
According to the docs:
Azure Traffic Manager is a DNS-based traffic load balancer. This service allows you to distribute traffic to your public facing applications across the global Azure regions. Traffic Manager also provides your public endpoints with high availability and quick responsiveness.
Meaning it’s a very good service to make sure the requests to your backend are routed to the backend that’s able to respond the fastest. I’m using this service for two of my side-projects, the URL-minifier service, and the Guid service. The services are deployed to the United States, Europe and Australia, making sure just about everyone will have a similar experience in terms of speed.
An added benefit is you get high availability too, because if one region is down, requests will be routed to another region.
It’s also very cheap to use, about $0,50 per billion requests per month.
When combined with Cloudflare as a CDN and frontline DNS, it’s costing me just about nothing to use.
The setup
You can add the Azure Traffic Manager via the Azure Portal and add Endpoints to the resource. There are different type of endpoints you can use.
Read more →If you’ve read my previous post on how to create a Power Query custom connector with authentication, you might be wondering if the same can be achieved by using your own identity instead of a service principal being used.
The answer is: YES!
There are a couple of resources that I found helpful, but didn’t provide me with a complete answer, but did help me get to a solution. These are the ones I used as a reference:
Set up the authentication
In the previous post, the Anonymous authentication was used.
If you want to use your own account, and use Microsoft Entra ID, this should be changed to OAuth making the block look like this.
MyConnector = [
    TestConnection = (dataSourcePath) => {"MyConnector.Contents"},
    Authentication = [
        // Anonymous = [], // Can be used when a Service Principal is used to authorize against the API
        OAuth = [
            StartLogin = StartLogin,
            FinishLogin = FinishLogin,
            Refresh = Refresh
        ]
    ]
];
The StartLogin, FinishLogin and Refresh are being invoked by the runtime and you need to define your own implementation on what needs to happen over there.
Read more →For a while we have been creating Power BI reports retrieving data from our API. This works quite nice, but our API has OAuth2 authentication & authorization in place. So far, we added a manually created access token to the data source and updated it on a regular basis. While this works, it’s not a very solid approach.
I figured we can (and should) do better so decided to investigate a bit on the topic. I quickly stumbled on creating your very own Power Query custom connectors that support having authentication on the connector, or use the OAuth2 endpoints by invoking the Web.Contents method.
Get started
To get started, there is an article on MS Learn called Using the Power Query SDK and Create your first connector: Hello World. These are great starting points in my opinion. Just to see how stuff works and create an initial project.
The major takeaways from this article are:
- Use VS Code
- Use the Power Query SDK
- Create a new project by using the Power Query SDK
There is another thing you need to know, which I learned the hard way.
You are required to use the Set credentials option for a connector. Even if you set Authentication to Anonymous, credentials are required.
Read more →A request came by me to:
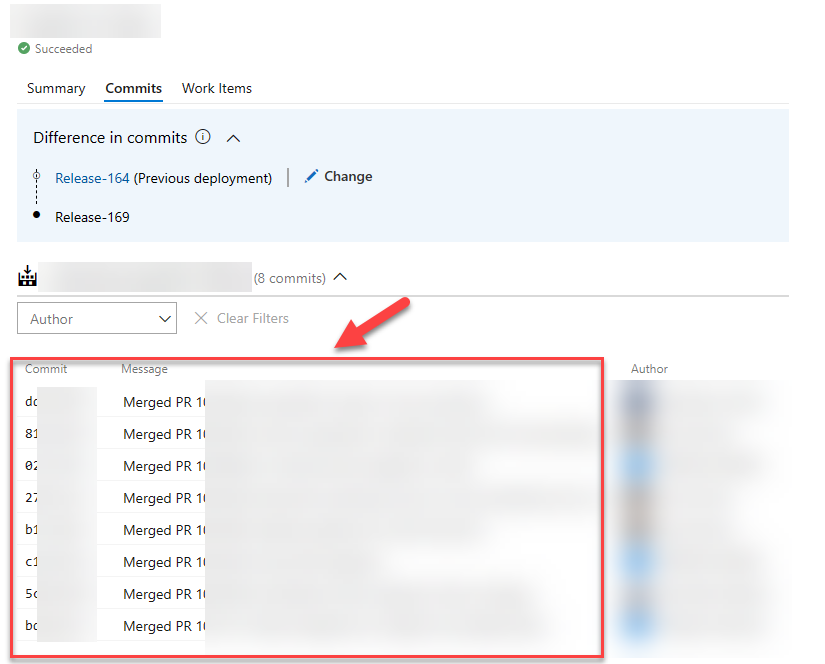
Get all the commits associated to a specific release, based on the previous succesful release.
The fun thing is, we’re using Azure DevOps.
Easy right?
Well, that’s what I thought, because this information is readily available in the web interface of Azure DevOps.
As the saying goes:
We do things not because it is easy, but because we thought it would be easy!
This phrase applies to the above request.
When starting out, I figured there must be some environment variable, or endpoint I can invoke to get these details. On the command-line, this is pretty git log command. Turns out, there isn’t. I did ask on Stack Overflow, but it appears the only way to get this data is to invoke several Azure DevOps REST API endpoints.
Not a big problem, but surely more work as expected.
Because of my earlier investigations on integrating with Azure DevOps, I was aware of the REST API service & documentation that is provided on the topic.
The initial implementation
With the documentation available I kind of knew the /_apis/release/releases would be my starting point.
From with the response of this endpoint you should be able to identify the current, and previous releases. In my case, I want to get the previous succesful release that had a specific stage in a succesful state. Quite possible with the response that you get.
Now that you know the previous release identifier, the changes endpoint can be invoked, taking the release id of the current and previous run.
Read more →Have you ever been on a project where an API returns a response that you can’t, or don’t want to, handle in your own application? Or a customer asks to generate a different response?
Yeah, me neither…
If you ever come across a project, where they want you to return a response like this:
HTTP/1.1 200 OK
Connection: Keep-Alive
Transfer-Encoding: chunked
Content-Type: application/json
Date: Wed, 10 Jan 2024 20:59:21 GMT

{
    "error": 404,
    "status": "NotFound",
    "description": "Could not find the object"
}
This post is for you!
Azure API Management (APIM)
Azure API Management has a lot of features available, one of them is to rewrite requests AND responses. This feature is especially useful if you have to integrate with a third party using a strange type of requests or responses, or when you’re building a platform used by thousands of customers and a couple of them can’t integrate proper with it.
While APIM has a dozen of more cool features, I won’t go into those in this post.
At this moment I’m working on a platform solution and we try to adhere to the most appropriate HTTP response codes for each situation. There are a lot of them!
Most customers will be able to handle the common status codes, like 200, 400 and 500. However, we use many more. While designing our API we adhere to the Microsoft Azure REST API guidelines, which I think is quite a good document to start with when creating APIs.
Read more →For those of you who are reading my posts from time to time, you probably know one of my side projects is a URL minifier solution. It’s one of those services which I’ve created to learn about specific Azure services. I’m still making improvements to it and sometimes adding new features to it altogether.
With the focus on AI and large language models in just about everything nowadays, it is time for me to add it to the URL minifier too.
The feature
In essence, a URL minifier only has one job. That is to take a slug and redirect the user to the full URL which belongs to it. Simple enough.
What I like to see in this service, is a summarization feature.
This way, as a user, I don’t need to read the full site but a summary might suffice. This is also a nice ‘Hello World’-implementation to get started in the Open AI and large language models ecosystem.
What to use?
To get started you need a service that offers a large language model, like the public one offered by Open AI which you might know from ChatGPT.
There’s also the Azure Open AI service, which offers pretty much the same capabilities. Or at least that is my understanding, and I’m only starting so might be wrong on that statement. I’m using this one because it’s the service which I’ll be using during my daily work too.
Read more →For those of you who are following me on Twitter, you might have seen my Philips Hue bridge was acting up in the past couple of months. Major bandwith usage, automations not being triggered at the appropriate times, and even the internet connectivity wasn’t working anymore. The bridge is also about 14 years old, so it might have been its time to shut down.
A relative cheap solution would be to buy a new Philips Hue bridge and set that up. However, lots of my friends are very fond of Home Assistant to automate everything, including their Hue lights. Because everyone is so positive about it, I thought I’d look into it too.
From what I understand, Home Assistant is a platform with a nice frontend application which enables user to add devices to it, so they can be used to automate stuff. For example: when turning on an Xbox, also turn on the lights in the game room.
I’m not sure how many devices are supported, but it looks like hundreds (or thousands) can be integrated. At least most of the popular devices are supported for automation.
In the IoT world there are two major communication protocols, Zigbee & Z-Wave. For a consumer, like me, they’re pretty much the same. The protocols differ on a technical level, of course. For Home Assistant to talk to my Hue lights and accessiories it needs some kind bridge to make sure the machine where Home Assistant is running on can communicate with the Zigbee hardware. For this, I’ve bought the Zigbee 3.0 USB Dongle Plus.
Read more →Most people who are professionally working with any of the cloud providers use some kind of infrastructure-as-code solution.
For Microsoft Azure, I’m mostly working with ARM- or Bicep templates to describe the resources necessary. While I’ve written ARM templates for years now, I’m enjoying creating Bicep templates a bit more due to the tooling it offers.
There is at least one downside to using these solutions, and that’s the fact most operations are happening on the Azure control plane. Often times this is good enough, as you only need to deploy some resources, specify some values to the resources, and be done with it. However, there are cases where you also need to invoke some actions which require the creation of data, identities, or trigger some kind of endpoint.
To facilitate this need, there’s a special kind of resource in Azure called deploymentScripts.
What are deploymentScripts?
As it’s mentioned in the docs, these scripts can be used to perform lots of custom actions, like:
- Add users to a directory.
- Perform data plane operations, for example, copy blobs or seed database.
- Look up and validate a license key.
- Create a self-signed certificate.
- Create an object in Azure AD.
- Look up IP Address blocks from custom system.
The benefits of deployment script:
Read more →
For a project I’m working on we have a massive ARM template and I had to add some stuff, deployment scripts, to it. While I still have enough love for ARM templates to work with it, creating & deploying big deployment scripts with isn’t a great experience.
However, with Bicep I can create (and debug) the script in a proper PowerShell file and load it in the Bicep template using the loadTextContent function. After compiling (az bicep build) the template it will output a nice ARM template for me with the PowerShell file contents inside.
The downside?
Now I’m stuck with 2 ARM templates, and while manual merges are possible I think we all know that’s not something to strive for. What do you do when there’s something on your local machine which needs automation? Right! Reach out to PowerShell to do the automation for you.
Because ARM Templates are JSON (sort of) we can use the built-in functions ConvertFrom-Json and ConvertTo-Json to read & write documents, so that’s what I did.
There’s also this great module called Join-Object by iRon7 which is able to:
Combines two object lists based on a related property between them.
This module has several join options, like InnerJoin, OuterJoin, Merge, and many more. So that’s everything I need for what I want to accomplish, merging 2 ARM templates with eachother.
Read more →When you need to work with service principals in your Azure environment, you are probably creating them via some script using the az ad sp command.
This works quite well, but these are created with your account. The account you used to log in with the Azure CLI. The same goes when using PowerShell, it’s always running in the context you used to log in. Most of the time your personal or environment administrator account.
There are a several reasons why you probably don’t want or need, these privileges assigned to your account. But you probably still want to create new service principals & assign them roles to specific services or applications. This is where an ‘administrator’ (for lack of a better name) service principal might come in to help.
By having a service principal with enough permissions on a subscription, management group, or tenant, you can get rid of these permissions on your account.
First, you need to create the ‘administrator’ service principal. I’m using the built-in Owner role for this, but you would be wise to use a custom role with just enough permissions to create users/service principals.
$createdAdminServicePrincipal = az ad sp create-for-rbac --name $administratorServicePrincipalName --role Owner --scopes /subscriptions/$subscriptionId | ConvertFrom-Json
$createdAdminServicePrincipalAppId = $createdAdminServicePrincipal.appId
$createdAdminServicePrincipalPassword = $createdAdminServicePrincipal.password
The appId and password are used to log in later on.
Read more →