Developing a new Orchard content part and widget
Note:
Going through my blogpost draftfolder I noticed this post which I wrote about a year ago. Seeing a lot of time has gone into it I decided to post it anyway. It’s based on Orchard version 1.2, so things might have changed, but the basics are probably the same. Now for the real post.
I’ve got a new job where I was needed to create a new CMS website and add some client specific features on it. As Orchard is my preferred choice at the moment, it didn’t take me long to choose which CMS I was going to use.
To create some new, custom, features to the website I had to create new Modules and wanted to let them act as a Widget. A Widget in Orchard is much like a SharePoint webpart or an old-fashioned ASP.NET usercontrol.
Lucky for me the Orchard team has documented their work quite good, so I could use a lot of code from the ‘Writing a Content Part’ and ‘Writing a Widget’ tutorials.
One of the things I was asked to create is a widget which implements the SlideShowPro viewer. This widget is what I’ll use in this blogpost as an example.
First thing you need to do, if you want to create a Widget, is to create a new Content Part. A Content Part can be implemented as a new module in your Orchard website. You can use the code generation module for this, but if you prefer to do this manual, that’s also possible. If you choose to do this manually you need to create a lot of folders and files yourself as you need to start off with a new ASP.NET MVC 3 Web Application.

Easiest way to create a module is by starting up the orchard command prompt (hides in the bin directory of the Orchard project) and run the following command:
codegen module NewModule /IncludeInSolution:true
The parameter IncludeInSolution makes sure the new project is added to the Orchard solution, however, it doesn’t work on my machine, so I added it manually to the Modules folder in the solution.
Inside the newly added module you’ll see some files added by default. One of them is the Module.txt file. This file contains some information about the module, like the name, description and author. I first made a mistake by typing some of the properties in lowercase, this resulted in a non-deployable module. Of course, that could also be because of some non-functional code. My final Module text file looks like this:
Name: Vinit.SlideShowPro
AntiForgery: enabled
Author: Vinit
Website: https://vinit.nl
Version: 1.0
OrchardVersion: 1.0
Description: Adds a SlideShow Pro module to the site so slides can be shown.
Features:
    Vinit.SlideShowPro:
        Description: Adds a SlideShow Pro module to the site so slides can be shown.
		Category: Vinit
After setting this up I had to figure out what the model should look like. All content will get uploaded to the site, so I need to specify an URL. This will result in a rather simple and small model with only 1 property, but it’ll do the work.
Just add a new class in the Models folder with a proper name and specify the properties you need. If you read the tutorial about writing a content part already, you know you need to add some stuff in the model.
For each model you want to use you need to have a class which inherits from the ContentPart<T> class and one which inherits from the ContentPartRecord class. The class which inherits from the ContentPartRecord is somewhat a representation of the table where the information will get stored, sort of a model. The class which inherits the ContentPart<T> class will be used in the views and throughout the code, something like a viewmodel.
My model class resulted in looking like this:
public class SlideShowProRecord : ContentPartRecord
{
	public virtual string SlideShowUrl { get; set; }
}
public class SlideShowProPart : ContentPart<slideshowprorecord>
{
	public string SlideUrl
	{
		get { return Record.SlideShowUrl; }

		set { Record.SlideShowUrl = value; }

	}

}
As you can see I’ll only store 1 string, SlideShowUrl, in the database. This property will have to correspond to the column in the database. In the SlideShowProPart class I’ve defined the SlideUrl to be Requiredso I know it will be available when requested. The SlideUrl retrieves and sets the property of the record which we have specified in the <T>.
Now we need to add some stuff which makes Orchard use our code and modify the database. First off, a Migration.cs file. You can do this by adding it via de Orchard prompt by typing:
codegen datamigration NewModule
Or you can just add a new class and call it Migration. I prefer this as you don’t need the extra context switch and it’s faster.
The Migration class makes sure the Orchard database is updated after an install or update of a new module. In here you can specify what needs to be created, altered or deleted. First off we need to tell Orchard it has to create a new table with a column named SlideShowUrl and tell it we can attach the content part to any content type.
This is the necessary code for those steps:
public int Create()
{
	SchemaBuilder.CreateTable("SlideShowProRecord", table => table
																.ContentPartRecord()
																.Column("SlideShowUrl", DbType.String));
	ContentDefinitionManager.AlterPartDefinition(typeof(SlideShowProPart).Name, cfg => cfg.Attachable());
	return 1;
}
As you can see, an int value needs to be returned. This return value acts as a ‘version’ of your module. If you add a new method which returns a higher number, Orchard will automatically see there’s an update for the module and tell the administrator in the dashboard. Once the module is updated, it stores the new ‘version’ number and knows the module is up-to-date. Can’t really tell if this is a best-practice, but hey, it works!
After having created the Migration class we also need to add a Handler to the project. The handler handles events of the content part or is able to manipulate the data model, before rendering the content part. Just as the example in the Orchard tutorial, I don’t need advanced stuff happening here, so I didn’t change the code here.
public SlideShowProHandler(IRepository<slideshowprorecord> repository)
{
    Filters.Add(StorageFilter.For(repository));
}
Next up are the views of the content part. Specifying the views is done in something called a Driver. In this driver you can specify which view will be shown for display, edit, summary, etc. All very nice, once you know how this works.
A fairly default implementation is this one:
public class Drivers : ContentPartDriver<slideshowpropart>
{
    protected override DriverResult Display(SlideShowProPart part, string displayType, dynamic shapeHelper)
    {
        return ContentShape("Parts_SlideShowPro", () => shapeHelper.Parts_SlideShowPro(SlideUrl: part.SlideUrl));
    }
    //GET
    protected override DriverResult Editor(SlideShowProPart part, dynamic shapeHelper)
    {
        return ContentShape("Parts_SlideShowPro_Edit",
                            () =>
                            shapeHelper.EditorTemplate(TemplateName: "Parts/SlideShowPro",
                                                        Model: part,
                                                        Prefix: Prefix));
    }
    //POST
    protected override DriverResult Editor(SlideShowProPart part, Orchard.ContentManagement.IUpdateModel updater, dynamic shapeHelper)
    {
        updater.TryUpdateModel(part, Prefix, null, null);
        return Editor(part, shapeHelper);
    }
}
The Display and Editor methods are overridden with some new functionality. The shapeHelper parameter is a dynamic type, which means you don’t get IntelliSense from it. I don’t know how the properties are defined on the project, but they work. Maybe I’ll check it out when I’ve got some extra spare time (read: never!).
In here you define where the views are located of the content part, “Parts/SlideShowPro” and which model will be used.
Fixing the views is rather easy, just add a new view with the name SlideShowPro.cshtml in Views/Parts and in Views/EditorTemplates/Parts and you are done. If you’ve created a MVC site already, you are probably familiar on how to create the views. The Orchard tutorial has a nice example and this is a small snippet of my EditorPart:
@model Vinit.SlideShowPro.Models.SlideShowProPart
<fieldset>
    <legend>SlideShowPro Fields</legend>
    <div class="editor-field">
        @Html.TextBoxFor(model => model.SlideUrl)
        @*Html.ValidationMessageFor(model => model.SlideUrl)*@
    </div>
</fieldset>
And the DisplayPart:
@if ( Model.SlideUrl != null && !string.IsNullOrWhiteSpace(Model.SlideUrl) && Model.SlideUrl.Length > 3) {
<script type="text/javascript" src="@String.Format("{0}js/slideshowpro.js", Model.SlideUrl)"></script>
<div id="slideshow"></div>
The last step for successfully creating a content part is adding the placement.info file at the root of the project. This file contains some information on where to locate the views in a larger view.
<Placement>
    <Place Parts_SlideShowPro="Content:2"/>
    <Place Parts_SlideShowPro_Edit="Content:7"/>
</Placement>
The above example specifies I want the views in the Content block at the 10th position, or in the editor modus at the 7th position.
Now, build, deploy, activate and check out of the content part is working.
Once you’ve enabled the new module, you can add the content part to a random content type to check if everything is working.
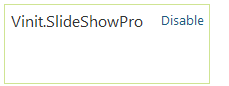
Navigate to the Content Types list and edit one of them, maybe Page.
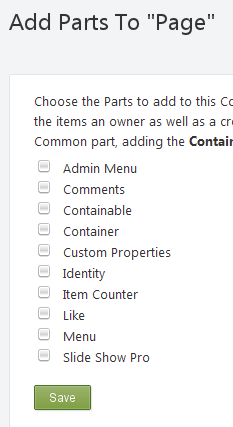
Check the Slide Show Pro box in the list and click Save.
When creating a new page you should see a new block on the screen, the same block as you have specified in the editor view of your module. When viewing the new page you should see the display view on the page.
So far for the hard part. Once you’ve got a working content part, creating a Widget from this is a piece of cake.
Just add the following code to the Migration class, deploy and you’re happy to go.
public int UpdateFrom1()
{
	// Create a new widget content type with our map
	ContentDefinitionManager.AlterTypeDefinition("SlideShowProWidget", cfg => cfg
		.WithPart("SlideShowProPart")
		.WithPart("WidgetPart")
		.WithPart("CommonPart")
		.WithSetting("Stereotype", "Widget"));
	return 2;
}
In this piece of code you tell Orchard you want to create a SlideShowProWidget which consists of the SlideShowProPart, WidgetPart and CommonPart.
Deploy and update the module! If everything is installed correct you should also see a notification in the Dashboard.
After that you can add the widget to a content block:
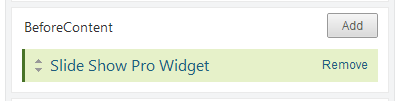
So far for my small tutorial on how to add a new widget to Orchard. Lucky for me most of the stuff was already explained in the Orchard tutorials. I added some comments here which I had to find out myself or didn’t quite get from the original.
And as always, it’s always good to try things by yourself. That way you’ll get more experience on the matter.