Custom deployment steps for an Azure App Service
I’ve just started setting up some continuous deployment for my personal websites. All of the sites are hosted within Azure App Services and the sources are located on either GitHub or BitBucket. By having the source code located on a public accessible repository (be it private or public), it’s rather easy to connect Azure to these locations.
On my day-job I come across a lot of web- and desktop applications which also need continuous integration and deployment steps in order for them to go live. For some of these projects I’ve used Octopus Deploy and currently looking towards Azure Release Management. These are all great systems, but they offer quite a lot of overhead for my personal sites. Currently my, most important, personal sites are so called static websites using MiniBlog (this site) and Hugo (for keto.jan-v.nl). Some of the other websites I have aren’t set up with a continuous deployment path yet.
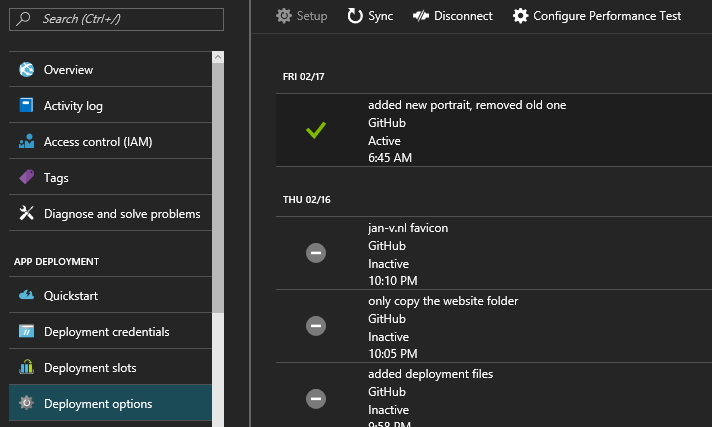
I don’t really want to set up an Octopus Deploy server or a path in Azure Release Management for these two sites. Lucky for me, the Azure team has come up with some great addition in order to provide some custom deployment steps of your Azure App Service. In order to set this up, you need to enable the automatic deployments via the Deployment Options blade in the Azure portal.
Normally, when you have set up your site to be deployed every time some change occurs in a specific branch of your repository the Azure App Service deployment system tries to build your site and place the output to the wwwroot folder on the file system. Because I don’t need any msbuild steps whatsoever, I need to override this step and create my own, custom, deployment step.
Setting up such a thing is quite easy, you just have to create a [.deployment](https://github.com/projectkudu/kudu/wiki/Customizing-deployments) file in the root of your repository and specify the build/deployment script which should be executed. This functionality is provided by Kudu, which Azure uses in order to deploy Git repositories to the Azure App Service.
You can specify a custom script in this deployment file, this can either be a ’normal’ command script (cmd or bat) or a PowerShell script. I have chosen for PowerShell as it offers me a bit more flexibility compared to a normal command script.
The contents of the deployment file aren’t very exciting. For my scenario it looks like the following:
[config]
command = powershell -NoProfile -NoLogo -ExecutionPolicy Unrestricted -Command "& "$pwd\deploy.ps1" 2>&1 | echo"
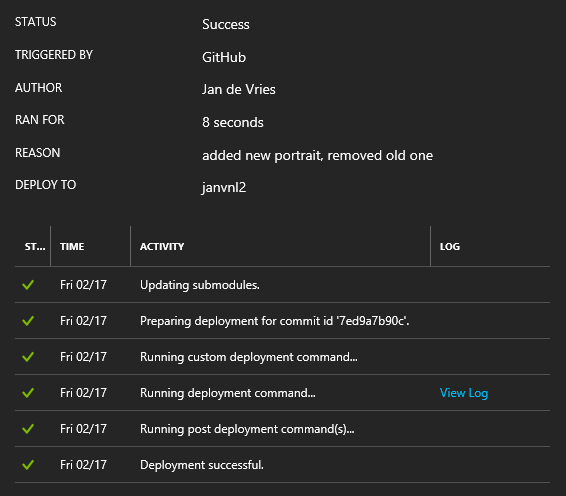
This will activate the custom deployment step within the Azure App Service as you can see in the following picture (Running custom deployment command).
The contents of my PowerShell script, deploy.ps1, aren’t very exciting either. The MiniBlog project is just a normal ASP.NET Website, so I just have to copy the contents from the repository folder to the folder of the website.
robocopy "$Env:DEPLOYMENT_SOURCE\Website" "$Env:DEPLOYMENT_TARGET" /E
You can do some more advanced stuff in your deployment script. For my Hugo website I had to tell the Hugo assembly to build my website. So the contents of this deploy.ps1 script are similar to this.
# 1. Variable substitutions
if ($env:HTTP_HOST -ne "") {
    echo "doing substitutions on $Env:DEPLOYMENT_SOURCE\config.toml"
    gc "$Env:DEPLOYMENT_SOURCE\config.toml" | %{ $_ -replace '%%HTTP_HOST%%', $env:WEBSITE_HOSTNAME } | out-file -encoding ascii "$Env:DEPLOYMENT_SOURCE\config.new.toml"
    mv "$Env:DEPLOYMENT_SOURCE\config.toml" "$Env:DEPLOYMENT_SOURCE\config.old.toml"
    mv "$Env:DEPLOYMENT_SOURCE\config.new.toml" "$Env:DEPLOYMENT_SOURCE\config.toml"
    rm "$Env:DEPLOYMENT_SOURCE\config.old.toml"
} else {
    echo "not doing any substitutions"
}

# 2. Hugo in temporary path
& "$Env:DEPLOYMENT_SOURCE/bin/hugo.exe" -s "$Env:DEPLOYMENT_SOURCE/" -d "$Env:DEPLOYMENT_TARGET/public" --log -v
# 3. Move the web.config to the root
mv "$Env:DEPLOYMENT_SOURCE/web.config" "$Env:DEPLOYMENT_TARGET/public/web.config"
Still not very exciting of course, but it shows a little what can be achieved. I’m not aware of any limitations for these deployment scripts, so anything can be placed inside it. If you need to do something with specific assemblys, like the hugo.exe, you will need to put them in your repository, or some other location which can be accessed by the script.
You can also view the output of your script in the Azure Portal. All data which is outputted by the script (Write-Host, echo, etc.) is shown in this Activity Log.
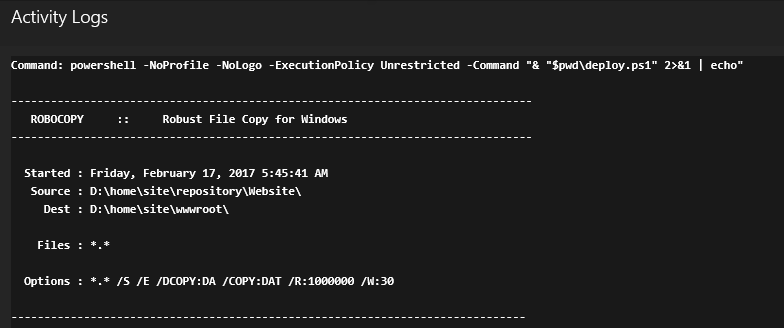
Useful when debugging your script.
If you have any secrets in your web application/site (like connection strings, private keys, passwords, etc.), it might be a good idea to use this custom deployment step to substitute the committed values to the actual values. If these values are stored in the Azure Key Vault, you can just access the key vault and make sure the correct values are placed within your application before it’s deployed.
Using these deployment scripts can help you out when you have some simple scenarios. If your system is a bit more complex or are working in a professional environment, I’d advise to check out one of the more sophisticated deployment systems, like Octopus Deploy or Azure Release Management. These systems offer a quite a bit more options out of the box and it’s easier to manage the steps, security and insights of a deployment.
Next I’ll try to update an Umbraco site of mine to make use of this continuous deployment scenario. This should be rather easy also as it only needs to call msbuild, which is the default action the Azure App Service deployment option invokes.