Creating an Azure Virtual Network
Nowadays it’s possible to create virtual networks within your Azure subscription. This can be very useful for managing your Azure resources within a specific network or setting up a point-to-site or site-to-site connection to expand your current on-premise network.
To me creating a virtual network sounds like a great way to manage my virtual machines and services for development purposes which I’m running within Azure. It will also let me connect to them without exposing stuff to the public internet. I can imagine a virtual network can also be useful for adding multiple build agents, private nuget repositories, a source control server, domain controller, DNS, etc. By moving all of your machines to the cloud, the only thing you’ll need on-premise is a proper router for connecting to the cloud.
In order to create a new virtual network, you’ll have to navigate to the management portal. This feature is available within the classic and new portal. As I prefer the classic portal all screenshots in this post are from within this portal.
The management portal has a menu option called Networks from where you can manage your virtual networks. The image below shows a virtual network called janhome.

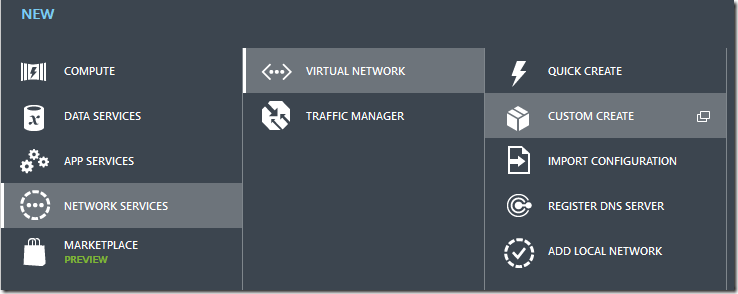
If you want to create a new virtual network by yourself, just select the option from the New menu.

The first thing you are asked to fill out is the name and location of the new virtual network. For the sake of this post I’ll add a second network called jan_home.

Normally you’ll choose a datacenter location nearby, for me this is West Europe.
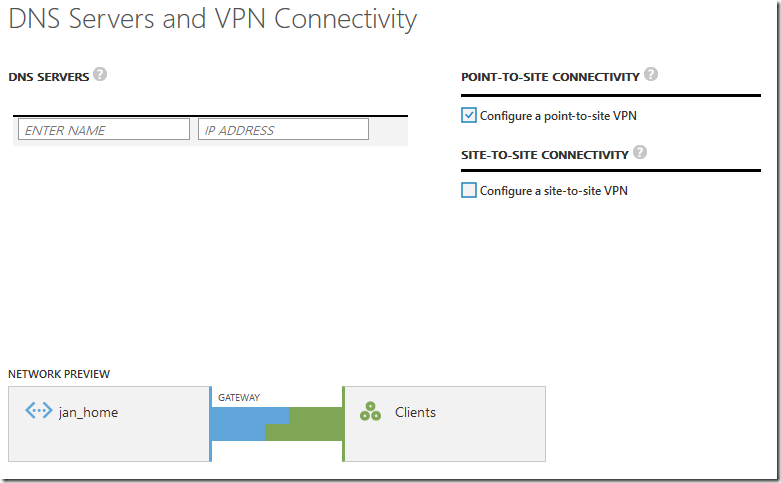
The second step will give you an opportunity to specify a DNS server and the type of VPN you might want to use for this virtual network.

I don’t have any DNS servers set up at the moment, so this will stay empty.
As I want to use this network to connect to my Azure machines via VPN, the option Configure a point-to-site VPN option has to be checked. If all company servers are migrated to the cloud, the point-to-site option is also a great solution for remote workers. With this point-to-site option they’ll be able to securely connect with the company network from everywhere.
If you want your on-premise network (site) to connect to the machines within the virtual network (site), you’ll have to check the site-to-site VPN option. This will make your current network somewhat of a hybrid-network, both in the cloud and on-premise. To me, this looks like the preferred way of working with a virtual network. It gives you both the benefits of having local servers and the scalability + services of the Azure cloud. For a site-to-site VPN connection you do need a compatible internet router in order to set up the secure connection. I’d like to use this option, but the router of my internet provider isn’t ready to set up a VPN.
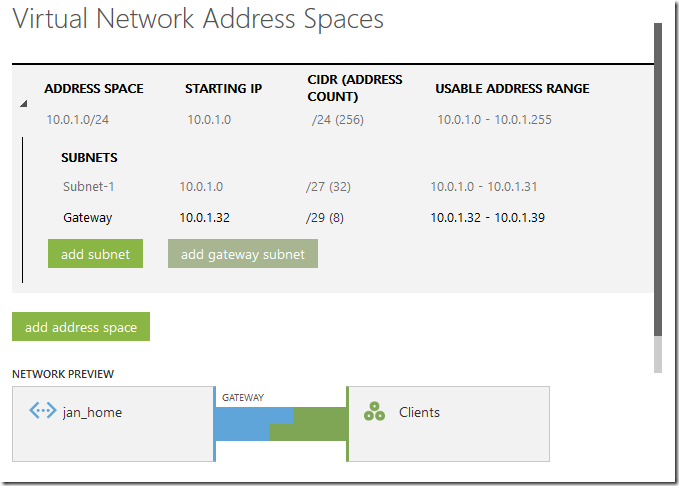
The next step in the wizard gives you an option to create extra subnets if you want/need them. I’m not an IT Pro guy, so I don’t see any reason to add extra complexity to my simple network, but I’m sure others will disagree on this matter.
The last step gives you an option to add the gateway subnet.

For my simple network I haven’t changed the default options, but you can if you want to.
Creating this virtual network will take some time.
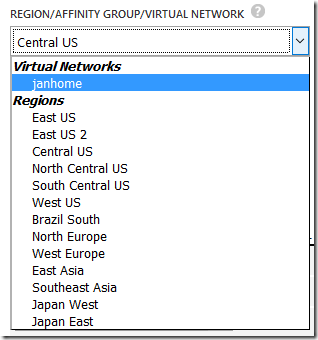
Once the virtual network is created you can start adding virtual machines to it. The region dropdown is extended with the created virtual network(s).

A virtual network works much like the (deprecated) affinity groups. It will make sure all your machines are deployed within 1 datacenter to maintain the least possible latency between the machines.
Next post will be about setting up a VPN to this Azure virtual network from my development machine, in order to manage all my development virtual machines in Azure.
