Creating a deployment workflow with Octopus Deploy
The latest project I was working on didn’t have a continuous integration and continuous deployment environment set up yet. Creating a continuous integration environment was rather easy as we were already using Teamcity and adding a couple of builds isn’t much of a problem. The next logical step would be to start setting up continuous deployment.
I started out by scripting a lot of PowerShell to manage our Azure environment like creating all SQL servers, databases, service busses, cloud services, etc. All of this worked quite well, but managing these scripts was quite cumbersome.
A colleague of mine told me about Octopus Deploy. They had started using this deployment automation system on their project and it sounded like the exact same thing I was doing, just a lot easier!
Setting up the main server and it’s agents (tentacles) was quite easy and doesn’t need much explanation. The pricing of the software isn’t bad either. You can start using it for free and when you need to use more as 10 tentacles or 5 projects, you’ll start paying $700 for the professional license. Spending $700 is still a lot cheaper as paying the hourly rate of a PowerShell professional to create the same functionality.
One of the first things you want to do when starting out with Octopus Deploy is creating your own deployment workflow. Even though this is possible it’s better to navigate around a bit and think about how you want to deploy your software.
The basis of any deployment is having a deployment environment. So, the first thing you need to do is create these environments, like Dev, Test, Acc, Prod and assign a tentacle to each of these.
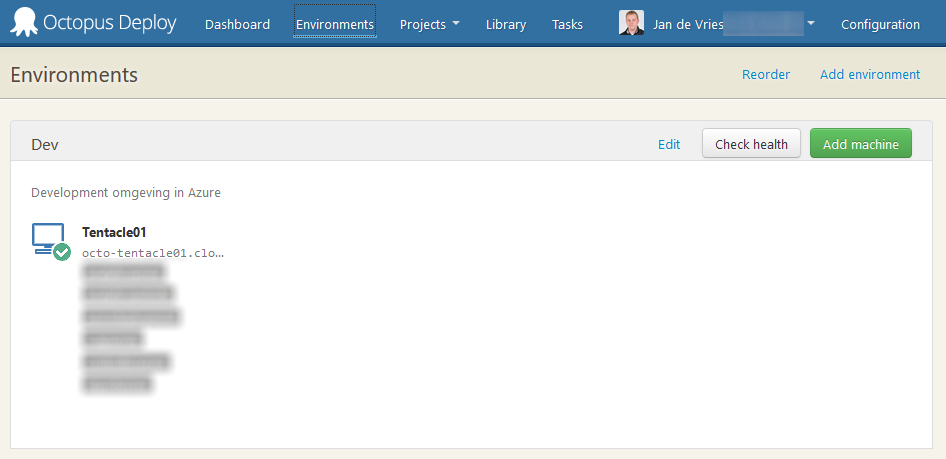
Adding a tentacle to an environment can be done by pressing the Add machine button.
After having created these environments, you can start creating your deployment workflow. The default Octopus experience already provides the most basic steps you might want to use, like running a PowerShell script or deploy a NuGet package somewhere.
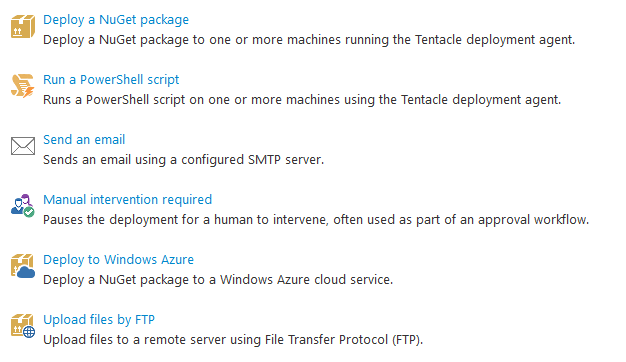
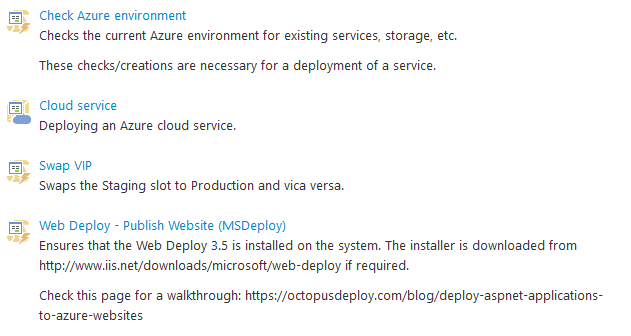
To make my life easier while deploying to Azure, I’ve created some steps of my own for deploying a Cloud Service, Swapping VIP, checking my current Azure environment and deploying a website using MSDeploy.
Creating your own build steps is fairly easy. When creating a new build step you have to override one of the existing steps. For my own Cloud service build step I’ve used the default _Deploy to Windows Azure _step and made sure I didn’t had to copy paste the generic fields all the time.
The deployment of a website project was a bit harder compared to deploying a Cloud service. I had already discovered this when deploying the complete environment with just PowerShell, so this wasn’t new for me. The linked article on this (above) describes in-depth on which steps you have to undertake to get this working. For reference I’ll share the script I’ve used in this build step.
[System.Reflection.Assembly]::LoadWithPartialName("Microsoft.Web.Deployment")
# A collection of functions that can be used by script steps to determine where packages installed
# by previous steps are located on the filesystem.
function Find-InstallLocations {
    $result = @()
    $OctopusParameters.Keys | foreach {
        if ($_.EndsWith('].Output.Package.InstallationDirectoryPath')) {
            $result += $OctopusParameters[$_]
        }
    }
    return $result
}
function Find-InstallLocation($stepName) {
    $result = $OctopusParameters.Keys | where {
        $_.Equals("Octopus.Action[$stepName].Output.Package.InstallationDirectoryPath",  [System.StringComparison]::OrdinalIgnoreCase)
    } | select -first 1
    if ($result) {
        return $OctopusParameters[$result]
    }
    throw "No install location found for step: $stepName"
}
function Find-SingleInstallLocation {
    $all = @(Find-InstallLocations)
    if ($all.Length -eq 1) {
        return $all[0]
    }
    if ($all.Length -eq 0) {
        throw "No package steps found"
    }
    throw "Multiple package steps have run; please specify a single step"
}
function Test-LastExit($cmd) {
    if ($LastExitCode -ne 0) {
        Write-Host "##octopus[stderr-error]"
        write-error "$cmd failed with exit code: $LastExitCode"
    }
}
$stepName = $OctopusParameters['WebDeployPackageStepName']
$stepPath = ""
if (-not [string]::IsNullOrEmpty($stepName)) {
    Write-Host "Finding path to package step: $stepName"
    $stepPath = Find-InstallLocation $stepName
} else {
    $stepPath = Find-SingleInstallLocation
}
Write-Host "Package was installed to: $stepPath"
Write-Host "##octopus[stderr-progress]"
Write-Host "Publishing Website"
$websiteName = $OctopusParameters['WebsiteName']
$publishUrl = $OctopusParameters['PublishUrl']
$destBaseOptions = new-object Microsoft.Web.Deployment.DeploymentBaseOptions
$destBaseOptions.UserName = $OctopusParameters['Username']
$destBaseOptions.Password = $OctopusParameters['Password']
$destBaseOptions.ComputerName = "https://$publishUrl/msdeploy.axd?site=$websiteName"
$destBaseOptions.AuthenticationType = "Basic"
$syncOptions = new-object Microsoft.Web.Deployment.DeploymentSyncOptions
$syncOptions.WhatIf = $false
$syncOptions.UseChecksum = $true
$enableAppOfflineRule = $OctopusParameters['EnableAppOfflineRule']
if($enableAppOfflineRule -eq $true)
{
    $appOfflineRule = $null
    $availableRules = [Microsoft.Web.Deployment.DeploymentSyncOptions]::GetAvailableRules()
    if (!$availableRules.TryGetValue('AppOffline', [ref]$appOfflineRule))
    {
        throw "Failed to find AppOffline Rule"
    }
    else
    {
        $syncOptions.Rules.Add($appOfflineRule)
        Write-Host "Enabled AppOffline Rule"
    }
}
$deploymentObject = [Microsoft.Web.Deployment.DeploymentManager]::CreateObject("contentPath", $stepPath)
$deploymentObject.SyncTo("contentPath", $websiteName, $destBaseOptions, $syncOptions)
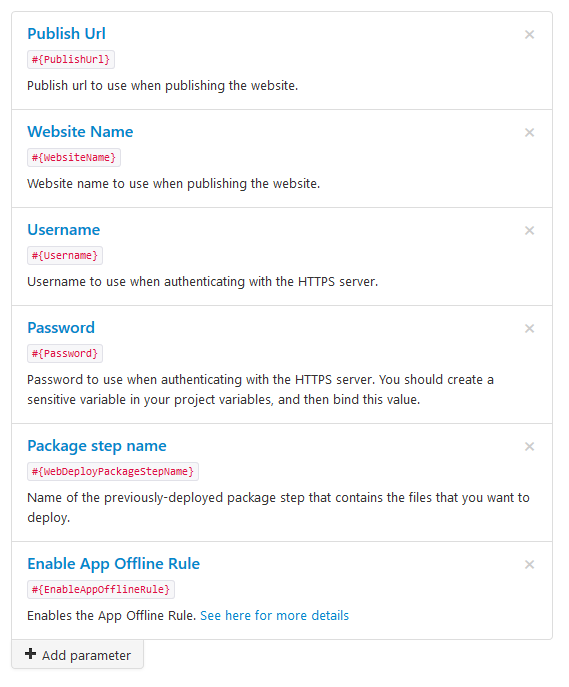
You can probably find it out yourself, but these are the parameters used in the script.
After having created your own custom steps it’s time to create a deployment workflow. Create a new Project in Octopus Deploy and head down to the Process tab. Over here you can add all necessary steps for your deployment which might look like this in the end.
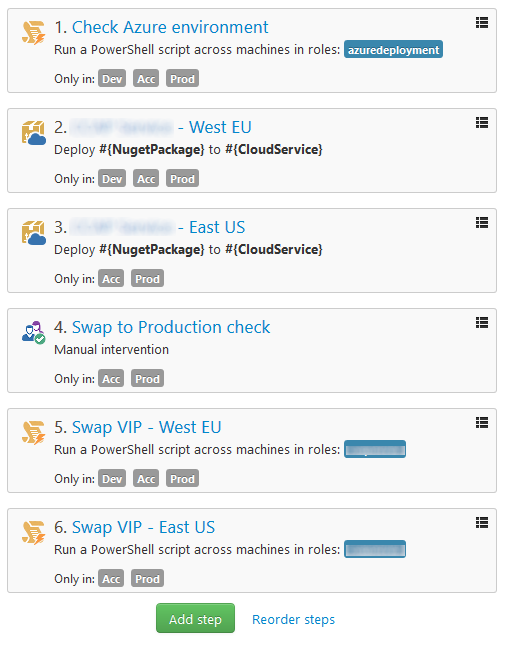
As you will probably notice, you can configure each step to be executed per environment. In this deployment workflow, we don’t want a manual intervention step before swapping the VIP. We also don’t want to distribute our software across the world, so the East US step is also turned off for development deployments.
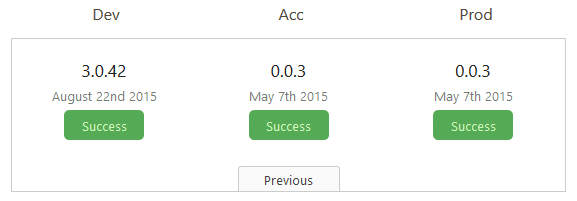
The deployment on the Dev environment has ran a couple of times and is up to date with the latest software version. When you are happy with the results, you can choose to upgrade it to a different environment. Depending on the Lifecycle you have configured you can upgrade the deployment to any environment or just to the next stage. We have configured the lifecycle so a package has to be installed on the Development first, then Acceptance and if that environment is proven to be good enough, it will be pushed towards Production. The current status of my testing project looks like this:
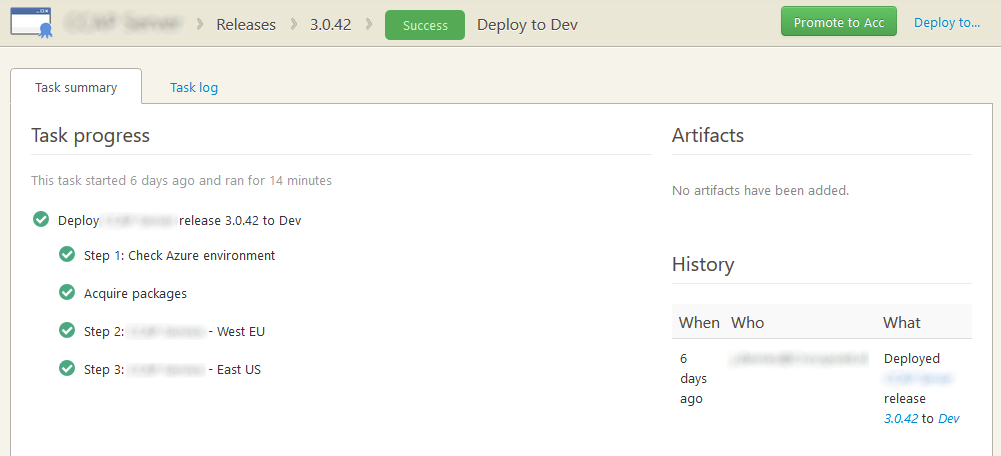
Zooming in on a specific release, you can see a button to promote the package to the next environment.
I hope this helps a bit to see what’s possible with Octopus Deploy. Personally I think it’s a very nice system which really helps gaining insights on your software deployments and works a lot better as scripting your own PowerShell deployments from scratch.
If there’s still something which needs a bit more in-depth explanation or detail, let me know so I can add it in an upcoming post. Keep in mind, I’ve only used Octopus Deploy in an Azure environment, but I’m sure an on-premise installation will work about the same.
