Automate deploying Azure Functions with VSTS
In the past couple of years the software industry has come a long way in professionalizing the development environment. One of the things which has improved significantly is automating the builds and being able to continuously deploy software.
Having a continuous integration and -deployment environment is the norm nowadays, which means I (and probably you as a reader also) want to have this when creating Azure Functions also!
There are dozens of build servers and deployment tools available, but because Azure Functions are highly likely being deployed in Microsoft Azure, it makes sense to use Visual Studio Team Services with Release Management. I’m not saying you can’t pull this off with any of the other deployment environment, but for me it doesn’t make sense because I already have a VSTS environment and this integrates quite well.
In order for you to deploy your Function App, the first thing you have to make sure is to have an environment (resource group) in your Azure subscription to deploy to. It is advised to use ARM templates for this. There is one big problem with ARM templates though, I genuinely dislike ARM templates. It’s something about the JSON, the long list of variables and ‘magic’ values you have to write down all over the place.
For this reason I first started checking out how to deploy Azure Functions using PowerShell scripts. In the past (3 to 4 years ago) I used a lot of PowerShell scripts to automatically set up and deploy my Azure environments. It is easy to debug, understand and extend. A quick search on the internet showed me the ’new’ cmdlets you have to use nowadays to spin up a nice resource group and app service. Even though this looked like a very promising deployment strategy, it did feel a bit dirty and hacky.
In the end I have decided to use ARM templates. Just because I dislike ARM templates doesn’t mean they are a bad thing per se. Also, I noticed these templates have become first-class citizens if you want to deploy software into Azure.
Creating your ARM template
If you are some kind of Azure wizard, you can probably create the templates by yourself. Most of us probably don’t have that level of expertise, so there’s an easier way to get you started.
What I do is head down to the portal, create a resource group and everything which is necessary, like the Function App and extract the ARM template afterwards. Downloading the ARM template is somewhat hidden in the portal, but lucky for us, someone has already asked on Stack Overflow where to find this feature. Once you know where this functionality resides, it makes a bit more sense on why the portal team has decided put it over there.
First of all, you have to navigate to the resource group for which you want to extract an ARM template.

On this overview page you’ll see a link beneath the headline Deployments. Click on it and you’ll be navigated to a page where all the deployments are listed which have occurred on your resource group.
Just pick the one you are interested in. In our case it’s the deployment which has created and populated our Function App.
On the detail page of this deployment you’ll see some information which you have specified yourself while creating the Function App. There’s also the option to view the template which Azure has used to create your Function App.
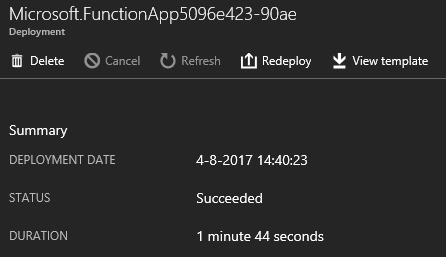
Just click on this link and you will be able to see the complete template, along with the parameters used and most important, there’s the option to download the template!
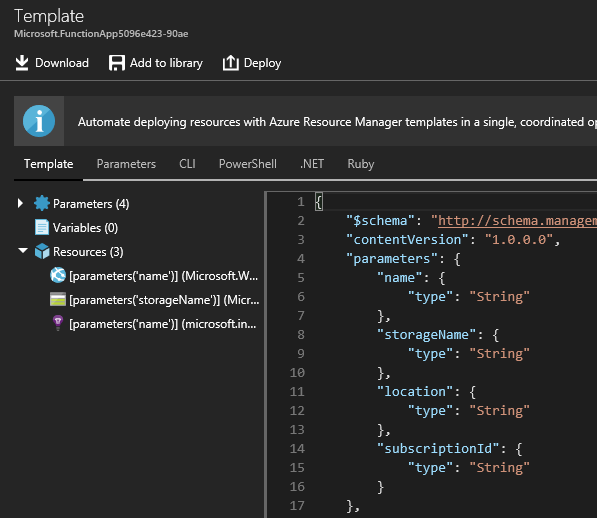
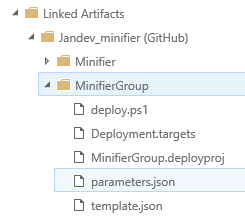
After downloading the template you’ll see a lot of files in the zip-file. You won’t be needing most of them as they are helper files to deploy the template to Azure. Because we will be using VSTS, we only need the parameters.json and template.json files.
The template.json file contains all the information which is necessary for, in our case, the Function App. Below is the one used for my deployment.
{
    "$schema": "https://schema.management.azure.com/schemas/2014-04-01-preview/deploymentTemplate.json#",
    "contentVersion": "1.0.0.0",
    "parameters": {
        "name": {
            "type": "String"
        },
        "storageName": {
            "type": "String"
        },
        "location": {
            "type": "String"
        },
        "subscriptionId": {
            "type": "String"
        }
    },
    "resources": [
        {
            "type": "Microsoft.Web/sites",
            "kind": "functionapp",
            "name": "[parameters('name')]",
            "apiVersion": "2016-03-01",
            "location": "[parameters('location')]",
            "properties": {
                "name": "[parameters('name')]",
                "siteConfig": {
                    "appSettings": [
                        {
                            "name": "AzureWebJobsDashboard",
                            "value": "[concat('DefaultEndpointsProtocol=https;AccountName=',parameters('storageName'),';AccountKey=',listKeys(resourceId('Microsoft.Storage/storageAccounts', parameters('storageName')), '2015-05-01-preview').key1)]"
                        },
                        {
                            "name": "AzureWebJobsStorage",
                            "value": "[concat('DefaultEndpointsProtocol=https;AccountName=',parameters('storageName'),';AccountKey=',listKeys(resourceId('Microsoft.Storage/storageAccounts', parameters('storageName')), '2015-05-01-preview').key1)]"
                        },
                        {
                            "name": "FUNCTIONS_EXTENSION_VERSION",
                            "value": "~1"
                        },
                        {
                            "name": "WEBSITE_CONTENTAZUREFILECONNECTIONSTRING",
                            "value": "[concat('DefaultEndpointsProtocol=https;AccountName=',parameters('storageName'),';AccountKey=',listKeys(resourceId('Microsoft.Storage/storageAccounts', parameters('storageName')), '2015-05-01-preview').key1)]"
                        },
                        {
                            "name": "WEBSITE_CONTENTSHARE",
                            "value": "[concat(toLower(parameters('name')), 'b342')]"
                        },
                        {
                            "name": "WEBSITE_NODE_DEFAULT_VERSION",
                            "value": "6.5.0"
                        }
                    ]
                },
                "clientAffinityEnabled": false
            },
            "dependsOn": [
                "[resourceId('Microsoft.Storage/storageAccounts', parameters('storageName'))]"
            ]
        },
        {
            "type": "Microsoft.Storage/storageAccounts",
            "name": "[parameters('storageName')]",
            "apiVersion": "2015-05-01-preview",
            "location": "[parameters('location')]",
            "properties": {
                "accountType": "Standard_LRS"
            }
        }
    ]
}
A fairly readable JSON file, aside from all the magic api versions, types, etc.
The contents of the parameters.json file are a bit more understandable. It contains the key-value pairs which are being referenced in the template file.
{
    "$schema": "https://schema.management.azure.com/schemas/2015-01-01/deploymentParameters.json#",
    "contentVersion": "1.0.0.0",
    "parameters": {
        "name": {},
        "storageName": {},
        "location": {},
        "subscriptionId": {}
    }
}
The template file uses the format parameters('name') to reference a parameter from the parameters.json file.
These files are important, so you want to add somewhere next to or inside your solution where your functions also reside. Be sure to add them to source control because you’ll need these files in VSTS later on.
For now the above template file is fine, but it’s more awesome to add something to it for a personal touch. I’ve done this by adding a new appSetting in the file.
"appSettings": [
    // other entries
    {
        "name": "MyValue",
        "value": "[parameters('myValue')]"
    }
Also, don’t forget to add myValue to the parameters file and in the header of the template file, otherwise you won’t be able to use it.
In short, if you want to use continuous deployment for your solution, use ARM templates and get started by downloading them from the portal. Now let’s continue to the fun part!
Set up your continuous integration for the Functions!
Setting up the continuous integration of your software solution is actually the easy part! VSTS has matured quite a lot over time, so all we have to do is pick the right template, point it to the right sources and you are (almost) done.
Picking the correct template is the hardest part. You have to pick the ASP.NET Core (.NET Framework). If you choose a different template you will struggle setting it up, if you are unfamiliar with VSTS.
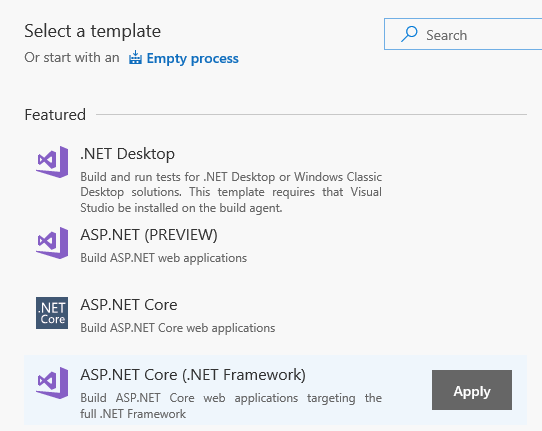
This template contains all the useful steps and settings you need to build and deploy your Azure Functions.
It should be quite easy to configure these steps. You can integrate VSTS with every popular source control provider. I’m using GitHub, so I’ve configured it so VSTS can connect to the repository.
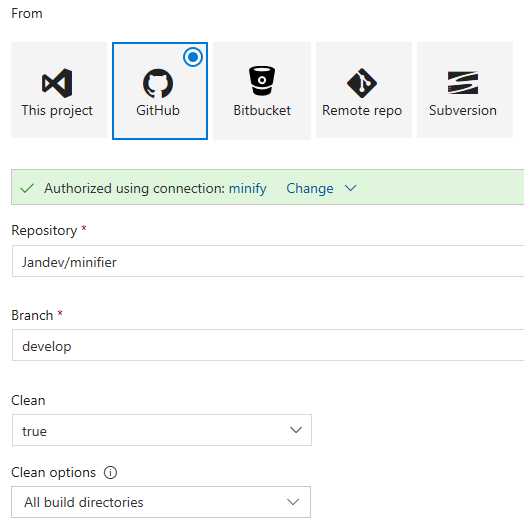
Note I’ve also selected the Clean options because I stumbled across some issues when deploying the sources. These errors were totally my fault, so you can just keep it turned off.
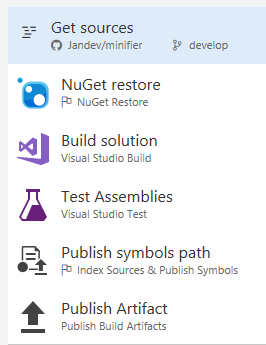
The NuGet restore step is pretty straightforward and you don’t have to change anything on it.
The next step, Build solution, is the most important one, because it will not only build your solution, but also create an artifact from it. The default setting is already set up properly, but for completeness I’ve added it below. This will tell MSBuild to create a package called WebApp.zip after building the solution.
/p:DeployOnBuild=true /p:WebPublishMethod=Package /p:PackageAsSingleFile=true /p:SkipInvalidConfigurations=true /p:DesktopBuildPackageLocation="$(build.artifactstagingdirectory)\WebApp.zip" /p:DeployIisAppPath="Default Web Site"
Next step which is important is Publish Artifact You don’t really have to change anything over here, but it’s good to know where your artifacts get published after the build.
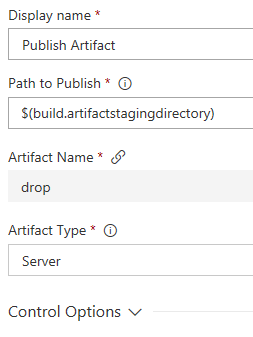
Of course, you can change stuff over here if you really want to.
One thing I neglected to mention is the build agent you want to use. The best agent to build your Azure Function on (at the moment) is the Hosted VS2017 agent.
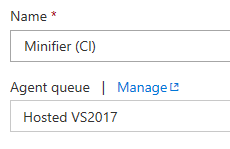
This agent is hosted by Microsoft, so you don’t have to configure anything for it which makes it very easy to use. Having this build agent hosted by Microsoft also means you don’t have any control over it, so if you want to build something on a .NET framework which isn’t supported (yet), you just have to set up your own build agent.
When you are finished setting up the build tasks be sure to add your repository trigger to the build.
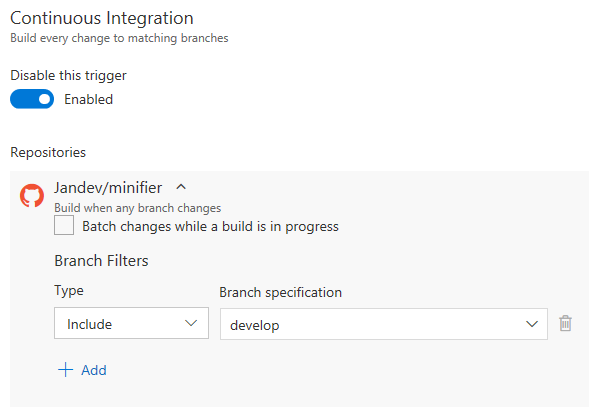
If you forget to do this the build will not be triggered automatically whenever someone pushes to the repository.
That’s all there is to it for setting up your continuous integration for Azure Functions. Everything works out of the box, if you select the correct template in the beginning.
Deploy your Azure Functions continuously!
Now that we have the continuous integration build in place we are ready to deploy the builds. If you are already familiar with Release Management it will be fairly easy to deploy your Azure Functions to Azure.
I had zero experience with Release Management so had to find it out the hard way!
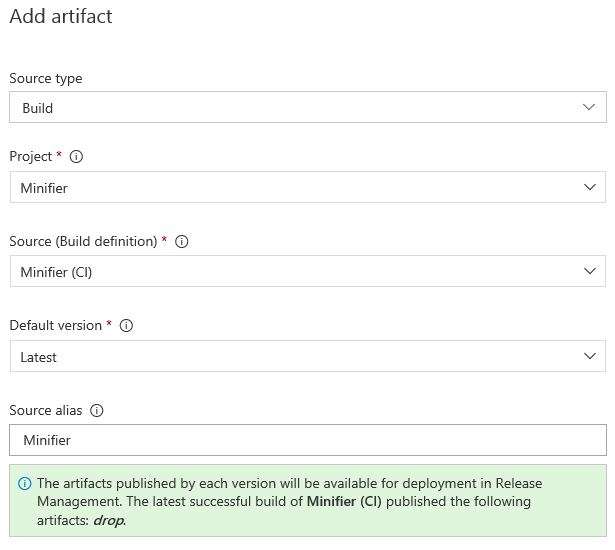
The first thing you want to do when creating a new release pipeline is adding the necessary artifacts. This means adding the artifacts from your CI build, where the source type will be Build and all other options will speak for themselves.
Next, not so obvious, artifact is adding the repository where your parameters.json and template.json files are located. These files aren’t stored in the artifact file from the build, so you have to retrieve them some other way.
Lucky for us we are using a GitHub repository and there’s a source type available called GitHub in Release Management. Therefore we can just add a new Source type and configure it to point to the GitHub location of choice.
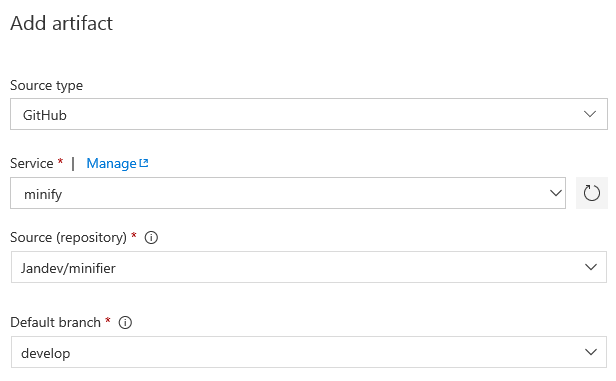
This will make sure the necessary template.json and parameters.json files are available when deploying the Azure Functions.
Next up is adding the environments to your pipeline. In my case I wanted to have a different environment for each slot (develop & production), but I can imagine this will differ per situation. Most of the customers I meet have several Azure subscriptions, each meant to facilitate the work for a specific state (Dev, Test, Acceptance, Production). This isn’t the case in my setup, everything is nice and cozy in a single subscription.
Adding an environment isn’t very hard, just add a new one and choose the Azure App Service Deployment template.
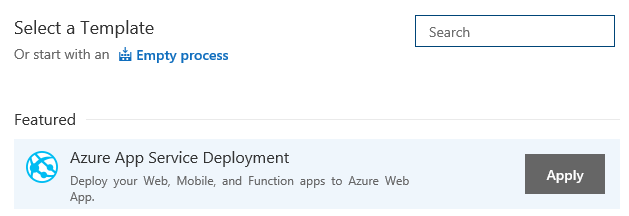
There are dozens of other templates which are all very useful, but not necessary for my little automated deployment pipeline.
Just fill out the details in the Deploy Azure App Service task and you are almost done.
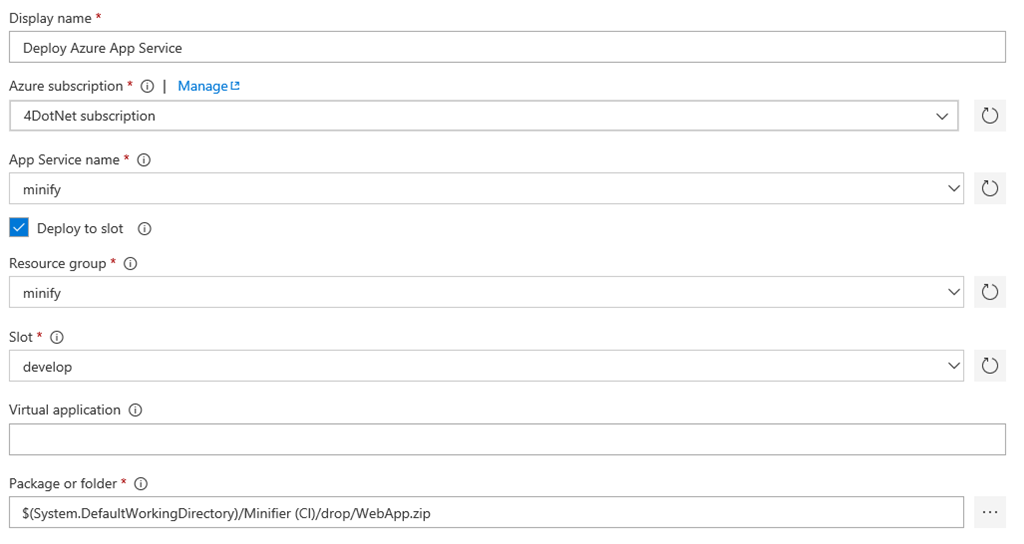
Main thing to remember is to select the zip-file which was created as an artifact from our CI build and to check the Deploy to slot option, as we want to deploy these Azure Functions to the develop slot.
If you are satisfied with this, good! But remember we still have the ARM template?
Yes, we want to make sure the Azure environment is up and running before we deploy our software. Because of this, you have to add 1 task to this phase which is called Azure Resource Group Deployment.
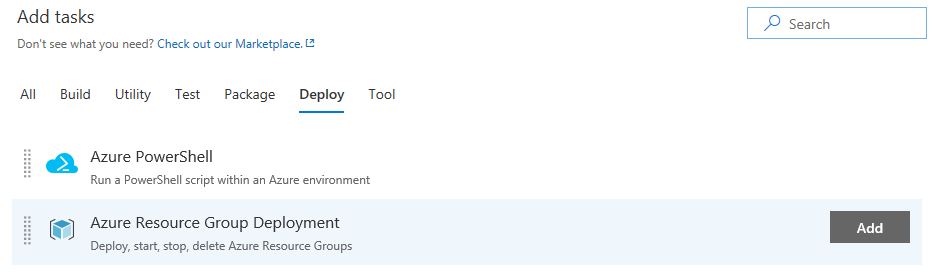
This is the task where we need our linked artifacts from the GitHub repository.
The path to the Template and Template parameters are the most important in this step as these will make sure your Azure environment (resource group) will be set up correctly.
Easiest way to get the correct path is to use the modal dialog which appears if you press the button behind the input box.
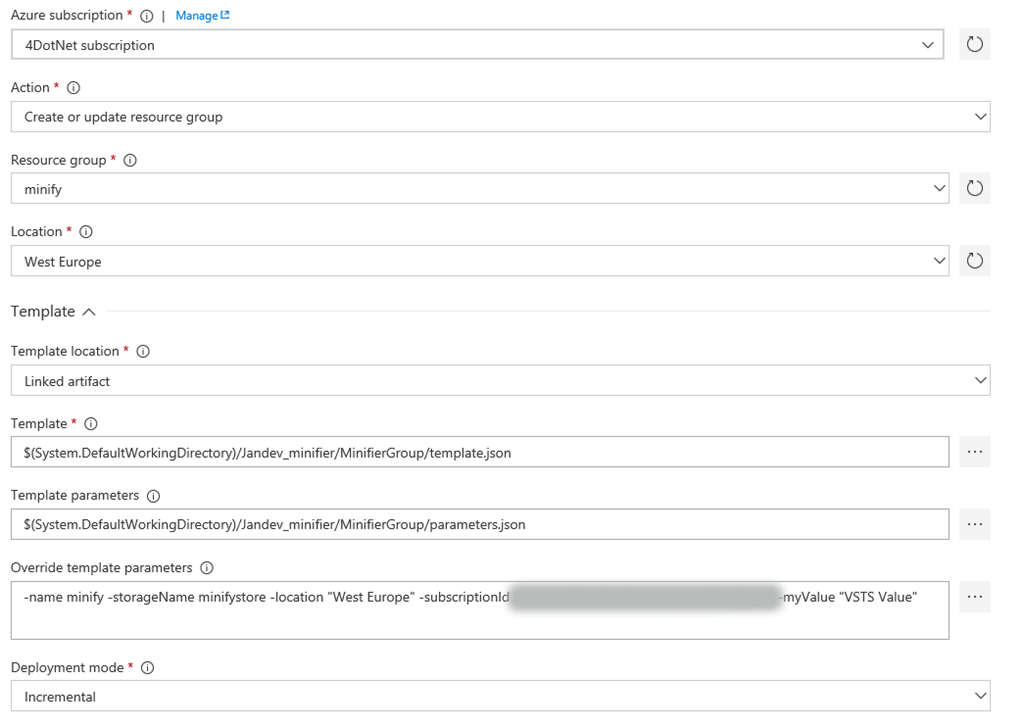
One thing you might notice over here is the option to Override template parameters. This is the main reason why you want to use VSTS Release Management (or any other deployment server). All this boilerplating is done so we can specify the parameters (secrets) for each environment, without having to store them in some kind of repository.
Just to test it I’ve overridden one of the parameters, myValue, with the text “VSTS Value” to make sure the updating actually happens.
Another thing to note is I’ve selected the Deployment mode to Incremental as I just want to update my deployments, not create a completely new Function App.
All of the other options don’t need much explanation at this time.
One thing I have failed to mention is adding the continuous deployment trigger to the pipeline. In your pipeline click on the Trigger-circle and Enable it, like you can see below.
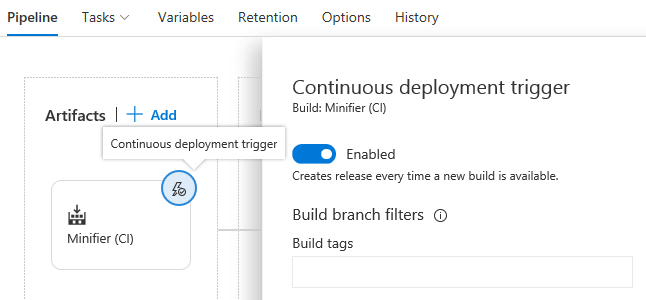
This will make sure each time a build has succeeded, a new deployment will occur to the Development slot (in my case).
This is all you need to know to deploy your Azure Functions (or any other Azure App Service for that matter). For the sake of completeness it would make sense to add another Environment in your pipeline, call it Production and make sure the same artifacts get deployed to the production slot. This Environment & Tasks will look very similar to the Develop environment, so I won’t repeat the steps over here. Just remember to choose the correct override parameters when deploying to the production slot. You don’t want to mess this up.
Now what?
The continuous integration & deployment steps are finished, so we can start deploying our software. If you already have some CI builds, you can create a new release in the releases tab.
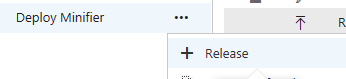
This will be a manual release, but you can also choose to push some changes to your repository and make everything automated.
I’ve done a couple releases to the develop environment already, which are al shown in the overview of the specific release.

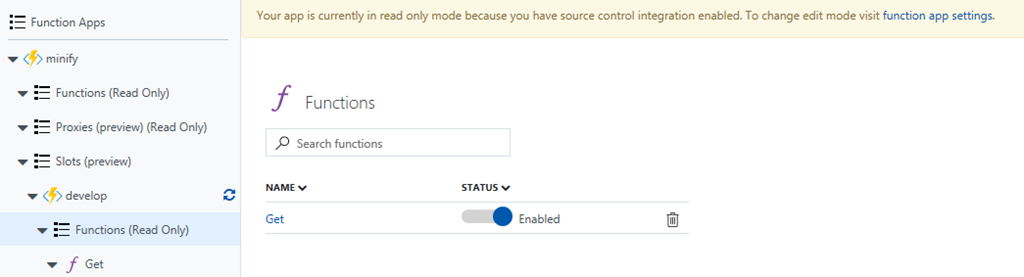
Over in the portal you will also notice your Azure Functions will be in read only mode, because continuous integration is turned on.
But, remember we added the the MyValue parameter to our ARM template? It is now also shown inside the Application settings of our Functions App!
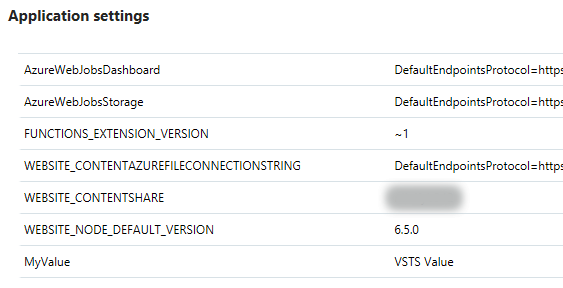
This is an awesome way of storing secrets inside your release pipeline! Or even better, store your secrets in Azure Key Vault and adding your Client Id and Client Secret to the Application Settings via the release pipeline, like I described in an earlier post.
I know I’ll keep using VSTS for my Azure Functions deployment from now on. It’s awesome and can only recommend you do it also!