Authentication of Microsoft Teams MessageCards actions in your API
Being able to create Message Cards or Actionable Messages in Microsoft Teams via a Logic App or an Azure Function is great. Especially if you can use this to invoke logic on your API and update the message in the Teams channel.
However, you don’t want everyone to invoke a management API endpoint you’ve exposed to ‘do stuff’ in your cloud environment. Normally, you’d want to authenticate if the user pressing the button (read: invoking the endpoint).
Lucky for us, this is very doable when invoking the endpoint via a Teams MessageCard/Actionable Message.
The token
Because Microsoft Teams is part of the Office 365 suite, you will be logged in as a user on the tenant. Therefore, the software has a user context and is able to pass this along to your API via a JWT Bearer token.
If you log in to the web client of Microsoft Teams (https://teams.microsoft.com) with your favorite browser you’ll be able to find the token which belongs to you.
In order to test this, I’ve created a new MessageCard in my Teams channel with 1 potentialAction which will invoke an Azure Function.
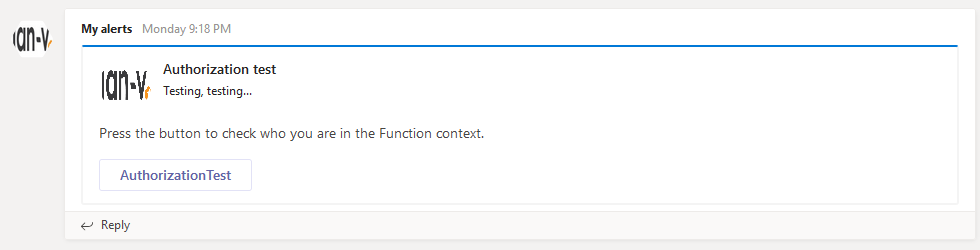
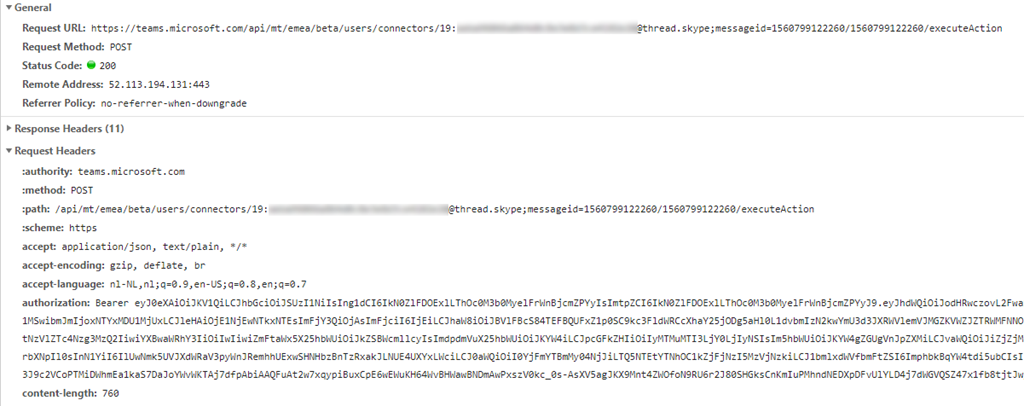
If you open up the network tab of your browser’s Developer Tools and press the AuthorizationTest button you’ll see the request is made to a Teams endpoint called executeAction with a bearer token in the Authorization header.
When decoding this token at https://jwt.io/ you’ll see a lot of details which match with your Office 365 user.
{
  "aud": "https://api.spaces.skype.com",
  "iss": "https://sts.windows.net/4b1fa0f3-862b-4951-a3a8-df1c72935c79/",
  "iat": 1560882424,
  "nbf": 1560882424,
  "exp": 1560886324,
  "acct": 0,
  "acr": "1",
  "aio": "AVQAq/8LBACA8+mMRGmy37A7sPouo42hawcsCtG7iqUz//lmEAUCmK67lc2GmhtZIA2LM+1nw18wtIeREMejFpXpmH7uUsKbZGQYV3vyRRmlH7guw3JTBuk=",
  "amr": [
    "pwd",
    "mfa"
  ],
  "appid": "5e3ce6f0-2b1f-4285-8a4b-75ec7a757346",
  "appidacr": "0",
  "family_name": "de Vries",
  "given_name": "Jan",
  "ipaddr": "211.107.84.235",
  "name": "Jan de Vries",
  "oid": "b26c3c10-5fad-4cd3-b54c-f9283922e7e2",
  "puid": "10037FFF9443BDEA",
  "scp": "user_impersonation",
  "sub": "U02i9QRWudZWzrZeQzhaPLpgsGo0go4qjBk5A8Qv1-g",
  "tid": "4c1fc0f3-8c2b-4c51-c3a8-df3c72936c79",
  "unique_name": "[email protected]",
  "upn": "[email protected]",
  "uti": "avUcwdSBc0SXZfbcANocAA",
  "ver": "1.0"
}
My original assumption was this would be the token which is also sent to your backend API. I was ready to use this information in order to authenticate & authorize if a user was allowed to access the specific endpoint.
This assumption, however, is incorrect!
The token you’ll receive in your API has the following content.
{
  "iat": 1560799130,
  "ver": "STI.ExternalAccessToken.V1",
  "appid": "48afc8dc-f6d2-4c5f-bca7-069acd9cc086",
  "sub": "bc6c3ca0-5acd-4cd4-b54c-f9c83925e7e3",
  "appidacr": "2",
  "acr": "0",
  "tid": "4b1fa0f3-862b-4951-a3a8-df1c72935c79",
  "oid": "b26c3c10-5fad-4cd3-b54c-f9283922e7e2",
  "iss": "https://substrate.office.com/sts/",
  "aud": "https://serverlessdevops.azurewebsites.net",
  "exp": 1560800030,
  "nbf": 1560799130
}
As you can see, the content is very different. This (much) smaller token is still useful as it has the tid specified, which is your tenant identifier and the oid, which is the object identifier of the user who pressed the button.
How to validate
On GitHub, you can find an (old) repository containing some sample code which you can use to validate the incoming bearer token from Teams. This repository can be found over here: https://github.com/OfficeDev/o365-actionable-messages-utilities-for-dotnet
The validation logic can be found in the ActionableMessageTokenValidator.
var o365OpenIdConfig = await _configurationManager.GetConfigurationAsync(new CancellationToken());
var result = new ActionableMessageTokenValidationResult();
var parameters = new TokenValidationParameters
{
  ValidateIssuer = true,
  ValidIssuers = new[] { O365OpenIdConfiguration.TokenIssuer },
  ValidateAudience = true,
  ValidAudiences = new[] { targetServiceBaseUrl },
  ValidateLifetime = true,
  ClockSkew = TimeSpan.FromMinutes(TokenTimeValidationClockSkewBufferInMinutes),
  RequireSignedTokens = true,
  IssuerSigningKeys = o365OpenIdConfig.SigningKeys
};

ClaimsPrincipal claimsPrincipal;
var tokenHandler = new JwtSecurityTokenHandler();

try
{
  // This will validate the token's lifetime and the following claims:
  //
  // iss
  // aud
  //
  SecurityToken validatedToken;
  claimsPrincipal = tokenHandler.ValidateToken(token, parameters, out validatedToken);
}
What we’re doing over here is creating the validation parameters and the actual validation. The O365OpenIdConfiguration contains some constants which are true for every MessageCard action.
If using an Azure Function for your API endpoint, your token validation code might look similar to the following piece of code.
[FunctionName("AuthorizationTest")]
public static async Task<IActionResult> Run(
	[HttpTrigger(AuthorizationLevel.Function, "post", Route = null)]
	HttpRequest request,
	ILogger log)
{
	log.LogInformation($"Excuting {nameof(AuthorizationTest)}.");

	var bearerToken = request.Headers["Authorization"].ToString();
	var baseUrl = $"{request.Scheme}{Uri.SchemeDelimiter}{request.Host.Value}";

	var validationResult = new ActionableMessageTokenValidationResult();
	try
	{
		var tokenValidator = new ActionableMessageTokenValidator();
		validationResult = await tokenValidator.ValidateTokenAsync(bearerToken.Replace("Bearer ", ""), baseUrl);
	}
	catch(Exception ex)
	{
		log.LogError(ex, "Validation failed");
	}
	// the rest of your logic...

}
After the bearer token has been validated you might want to add some additional logic to check if the request is made from a tenant you trust and/or if the user (Object Id) matches someone who is allowed to invoke the endpoint.
If you want to do this, you’ll have to create some authorization logic for this yourself.
The full code sample which I’ve used in my Azure Function can be found in my ServerlessDevOps GitHub repository.
It has taken us some time to figure all of this out, but it’s working like a charm now!