Setup macOS for a developer coming from Windows
I had the opportunity to get a new development machine and it had to be a laptop. I’ve used solely Windows machines in the past and was always annoyed to see my peers, using a Mac, have awesome battery life and could have their laptop on their lap or table without melting the surface and never have fans turning on when doing simple stuff.
That’s a couple of reasons I chose to get a Macbook Pro myself this time. Of course, having the laptop integrate with all my other Apple hardware at home is a nice perk too.
What did I get
At this moment, a Macbook Pro comes with an M4 chip.
Based on what I’m reading on the internet, you can’t go wrong with any of these chips. Be it the M4, M4 Pro or M4 Max. I did read the fan turns on from time to time with the M4 Max, but that kind of makes sense. The M4 Pro machine was within the budget I was looking for, so chose that one.
There isn’t much to choose from when you know the size, 14", and CPU you want. I went with the 48GB memory and 1TB of storage option and that’s the machine I’m typing this post on right now.
All in all, I think this is a fairly solid machine for the upcoming years to do .NET, Python, Azure and AI development with and it’s small enough to travel with.
Use a docking station
I’m not very fond of using laptop keyboard and monitors when I also have the possibility of using multiple big screens and my own keyboard, mouse, and other stuff on my desk.
I’ve got an old version of the Club 3D USB3.2 Gen1 Type A or C Dual Display 4K60Hz. This docking station is using DisplayLink technology to drive the multiple monitors and has enough USB-ports to connect all my hubs and hardware on. After plugging in all cables, I connected it to my Macbook Pro and everything started working. All except for my monitors.
It turns out, you need to download and install the DisplayLink Drivers and start the DisplayLink Manager app on you machine to use the monitors. Once you’ve done that, the monitors can be used immediatly.
The specsheet of the M4 Pro says you can drive up to 2 4K monitors, when the laptop screen is turned off. While this is true, this isn’t the case when using DisplayLink technology. With this dock, I can use both my 4K monitors AND my laptop monitor at the same time. There are some disadvantages of using DisplayLink tech, but I’m not running into those for my work machine.
How to start using a Macbook
As mentioned, I’ve been using Windows machines since Windows 3.11, so I’m not very knowledgeable on how to configure macOS for a developer. For Windows machines, I have scripts to do the installation & configuration of software. Setting up a new machine only takes a couple of (unattended) hours. For a Mac, I have to figure out all of this stuff.
I’ve used one of the many YouTube videos for my initial configuration.
The main thing explained in this video is:
- Update your system with the latest updates
- Change display settings to use the highest resolution
- Show the battery percentage in the menu bar
- Customize the dock a bit
- Use Stacks on the desktop
- Add more fingers for Touch ID
- Change Finder settings to be more clean
- Turn of syncing documents to iCloud as I’m using OneDrive for this
Because I’m living in the Microsoft ecosystem, I just had to install the M365 suite of software from the App Store.
For some reason Teams isn’t available in the App Store, so it has to be downloaded from the official Microsoft site.
And you have to configure OneDrive for all of your accounts.
Install .NET
The winget equivalent of macOS is brew. You need to install this first by running a one-liner in your terminal.
/bin/bash -c "$(curl -fsSL https://raw.githubusercontent.com/Homebrew/install/master/install.sh)"
It prompted me to run the following two lines also.
echo 'eval "$(/opt/homebrew/bin/brew shellenv)"' >> /Users/jandevries/.zprofile
eval "$(/opt/homebrew/bin/brew shellenv)"
Once Homebrew was installed, I was able to install the latest dotnet version.
brew install --cask dotnet-sdk
Oh My Zsh
I’m familiar with Oh My Posh, but we use Oh My Zsh in a Mac.
There’s a decent post by binbingoloo on Dev.to on how to configure this.
In my .zshrc file the following plugins are configured.
plugins=(
  git
  git-prompt
  zsh-autosuggestions
  zsh-syntax-highlighting
  you-should-use
  macos
  dotnet
  azure
)
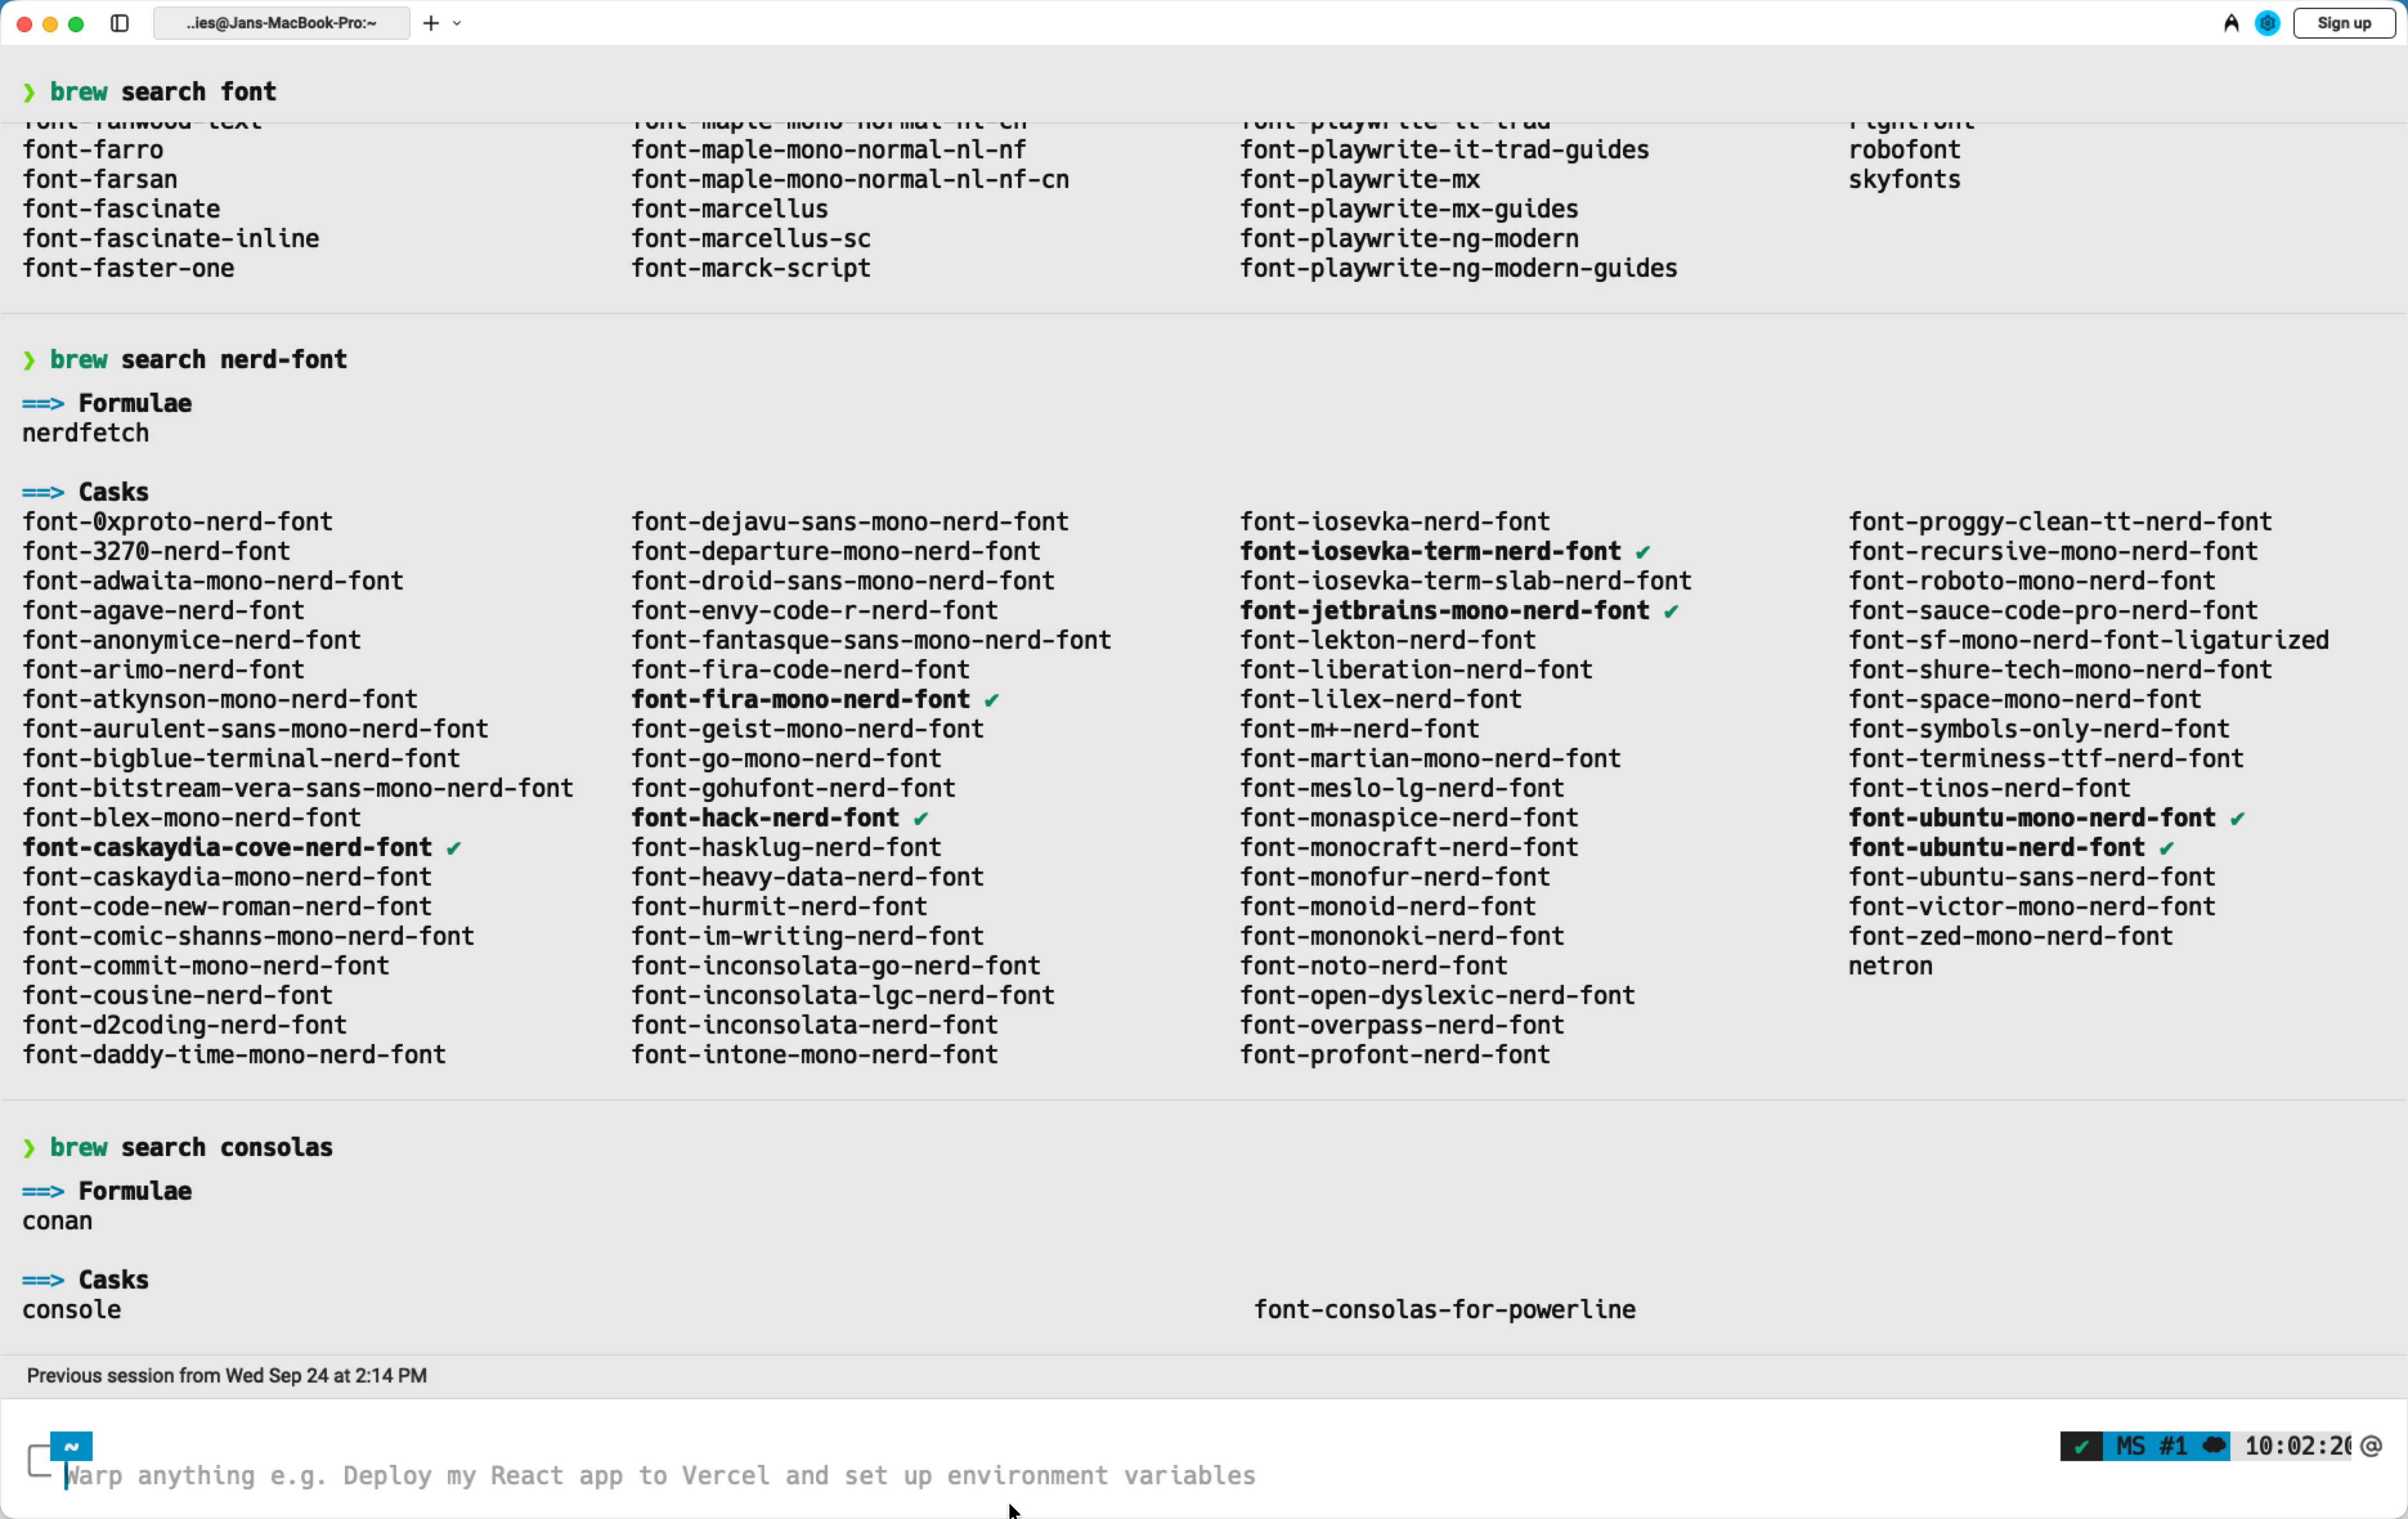
Install your Nerd Fonts
The post I linked earlier also shows how to install the Nerd Fonts you want.
brew install --cask font-hack-nerd-font
brew install --cask font-jetbrains-mono-nerd-font
In VS Code I now have the following fonts configured:
font-ubuntu-mono-nerd-font, UbuntuMono Nerd Font Mono, Consolas, 'Courier New', monospace
Install VS Code
VS Code will be quite useful for me, but it’s also not available in the App Store. Only available for download on the site.
After logging in all extensions are downloaded, so the environment feels quite familiar.
Get a better Terminal, use Warp
There are dozens of different terminals to use. At this time, I’ve chosen for Warp. It has some nice AI-features built in and I find it visually appearling too.
By default, it’s not using Oh My Zsh. To have the same experience as with your other terminals, you need to change some settings.
Fix your mouse, use Mac Mouse Fix
I’m using a vertical mouse, a left-handed Evoluent Vertical Mouse 4D to be precise. The drivers and software isn’t available for macOS and I would still like to use all/most of the buttons.
To get this working, I have installed & bought Mac Mouse Fix.
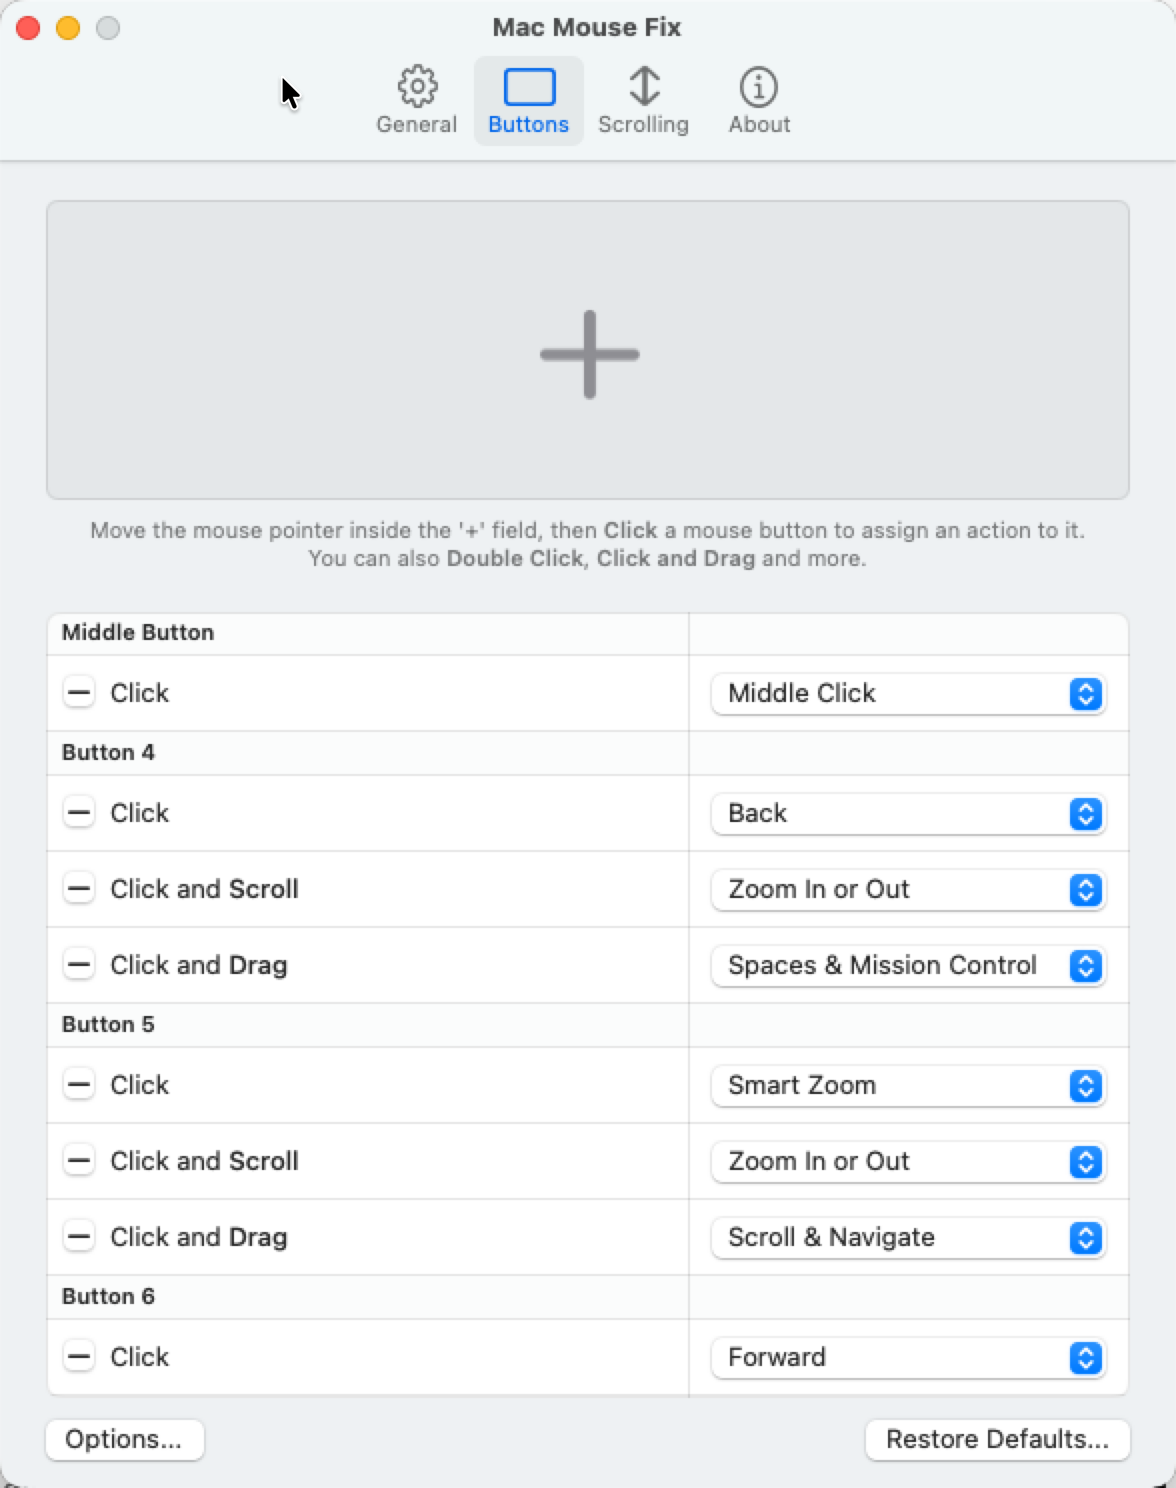
It costs $10, but at least I can continue using my mouse.
Enable clipboard history
In macOS Tahoe there’s a new feature called clipboard history. When turning it on you can use Spotlight to get stuff from the clipboard history and pasted it.
While this works, it’s pretty cumbersome as it involves multiple keyboard shortcuts.
We got a clipboard history feature in Windows a couple of years ago, which even synced across devices. This is an experience also offered by PastePal. It costs about 18 euros (or 15 dollars).
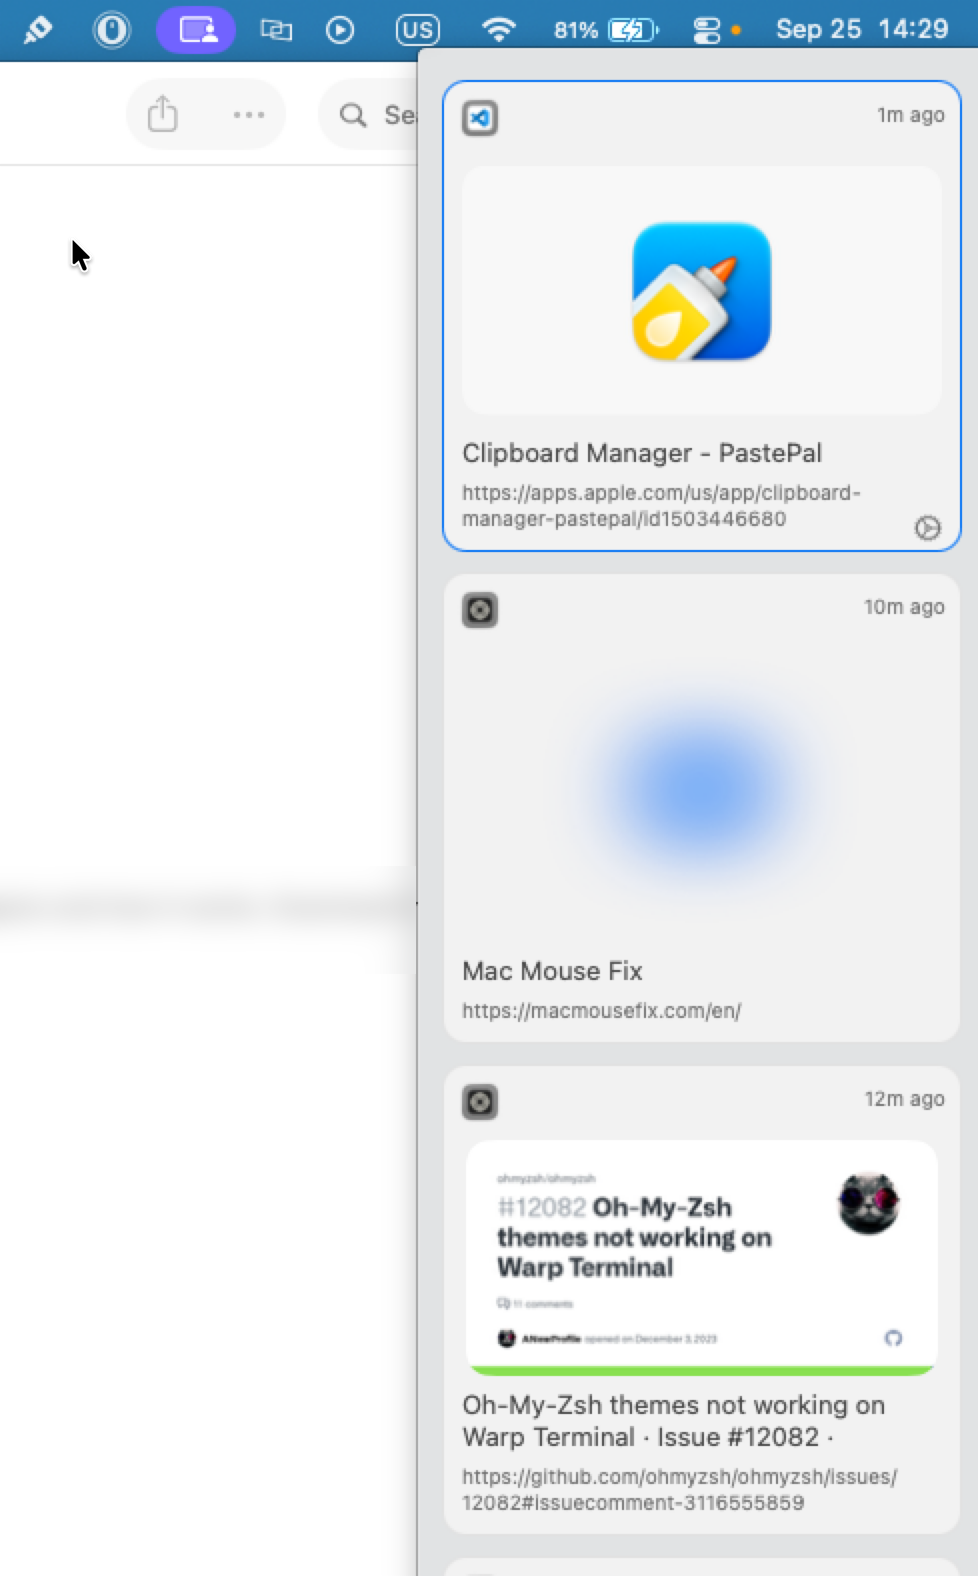
I’ve bound the side window to the [Shift]+[Command]+[v] shortcut, so it’s acting similar to the Windows experience.
See my hidden files
When setting up my system, I coulnd’t find any of the dot-files or other system folders. Turns out, you need to press the [Command] + [Shift] + . combo to see those files.
Or run defaults write com.apple.finder AppleShowAllFiles YES in your terminal so it’s turned on permanent.
Install some of my development software
On Windows, I’ve got quite a long script to install all my software.
For my Macbook I’ve ran through this list and checked how to install the software I wanted.
PowerShell
Obviously, I still want PowerShell on my system, this can be installed with Homebrew.
brew install --cask powershell
OrbStack
I will need to run containers. Some friends warned me about Docker Destop being resource hungry on Macs too. They refered me to OrbStack. From what I heard, this software only is using resources when it’s being used.
There are also some other nice features it offers. I haven’t really used it yet, so can’t comment if it’s any good or not.
brew install orbstack
The CLI tooling
The Azure Developer CLI and Azure CLI are quite useful, so those need to be installed. Both from their respective websites.
Foundry Local
There’s a new tool, Foundry Local, to run language models on your local machine.
I’m expecting it to be similar to Ollama.
Installing can be done via Homebrew again.
brew tap microsoft/foundrylocal && brew install foundrylocal
Testing the Hello World sample worked, so I’m looking forward using this more.
Other useful tooling
I’m a big fan of Git Fork and Beyond Compare. For both of them I don’t have a license to run on macOS, so will have to get them again.
No problem, as both pieces of software have been helping me for years, so well worth their money.
I have licenses for SnagIt 2019, 2020 and 2021. None of those support macOS. There are some alternatives, and even out of the box screenshot support, but I haven’t found any which holds up to the capabilities SnagIt has. It’s a yearly license of almost 40 euros, which is quite a lot. However, considering how much I use it in a daily basis it’s something I just have to accept.
A better Finder solution
I’m not very fond of using Finder.
When pressing [Enter] it doesn’t open files and navigation is mostly via a mouse.
On Windows I’ve used OneCommander, but that doesn’t work on macOS.
I’m not in the process of testing Marta and Commander One. Both appear to be good alternatives. At this moment, I’m liking Marta the most, but do miss the sidebar Finder has.
The Fn/Globe key on a regular keyboard
My daily driver at home is the CODE Keyboard. It’s awesome and has dipswitches to change from Windows to macOS configuration. There is only one problem with it, it doesn’t have the Fn/Globe key.
This is a mandatory key to snap windows to the side or corners using a keyboard. Snapping windows to halves of the screen or quarters, or even switching between monitors, is something I use a lot!
The feature of snapping windows in macOS isn’t as good compared to the Windows equivalent, but it’s decent and I can change my workflow a bit.
To bind the Fn/Globe-key to a different key you need to install Karabiner-Elements.
This software enables you to bind keys to other keys, like the [Caps Lock] to the [Fn/Globe] key, like I’ve done.
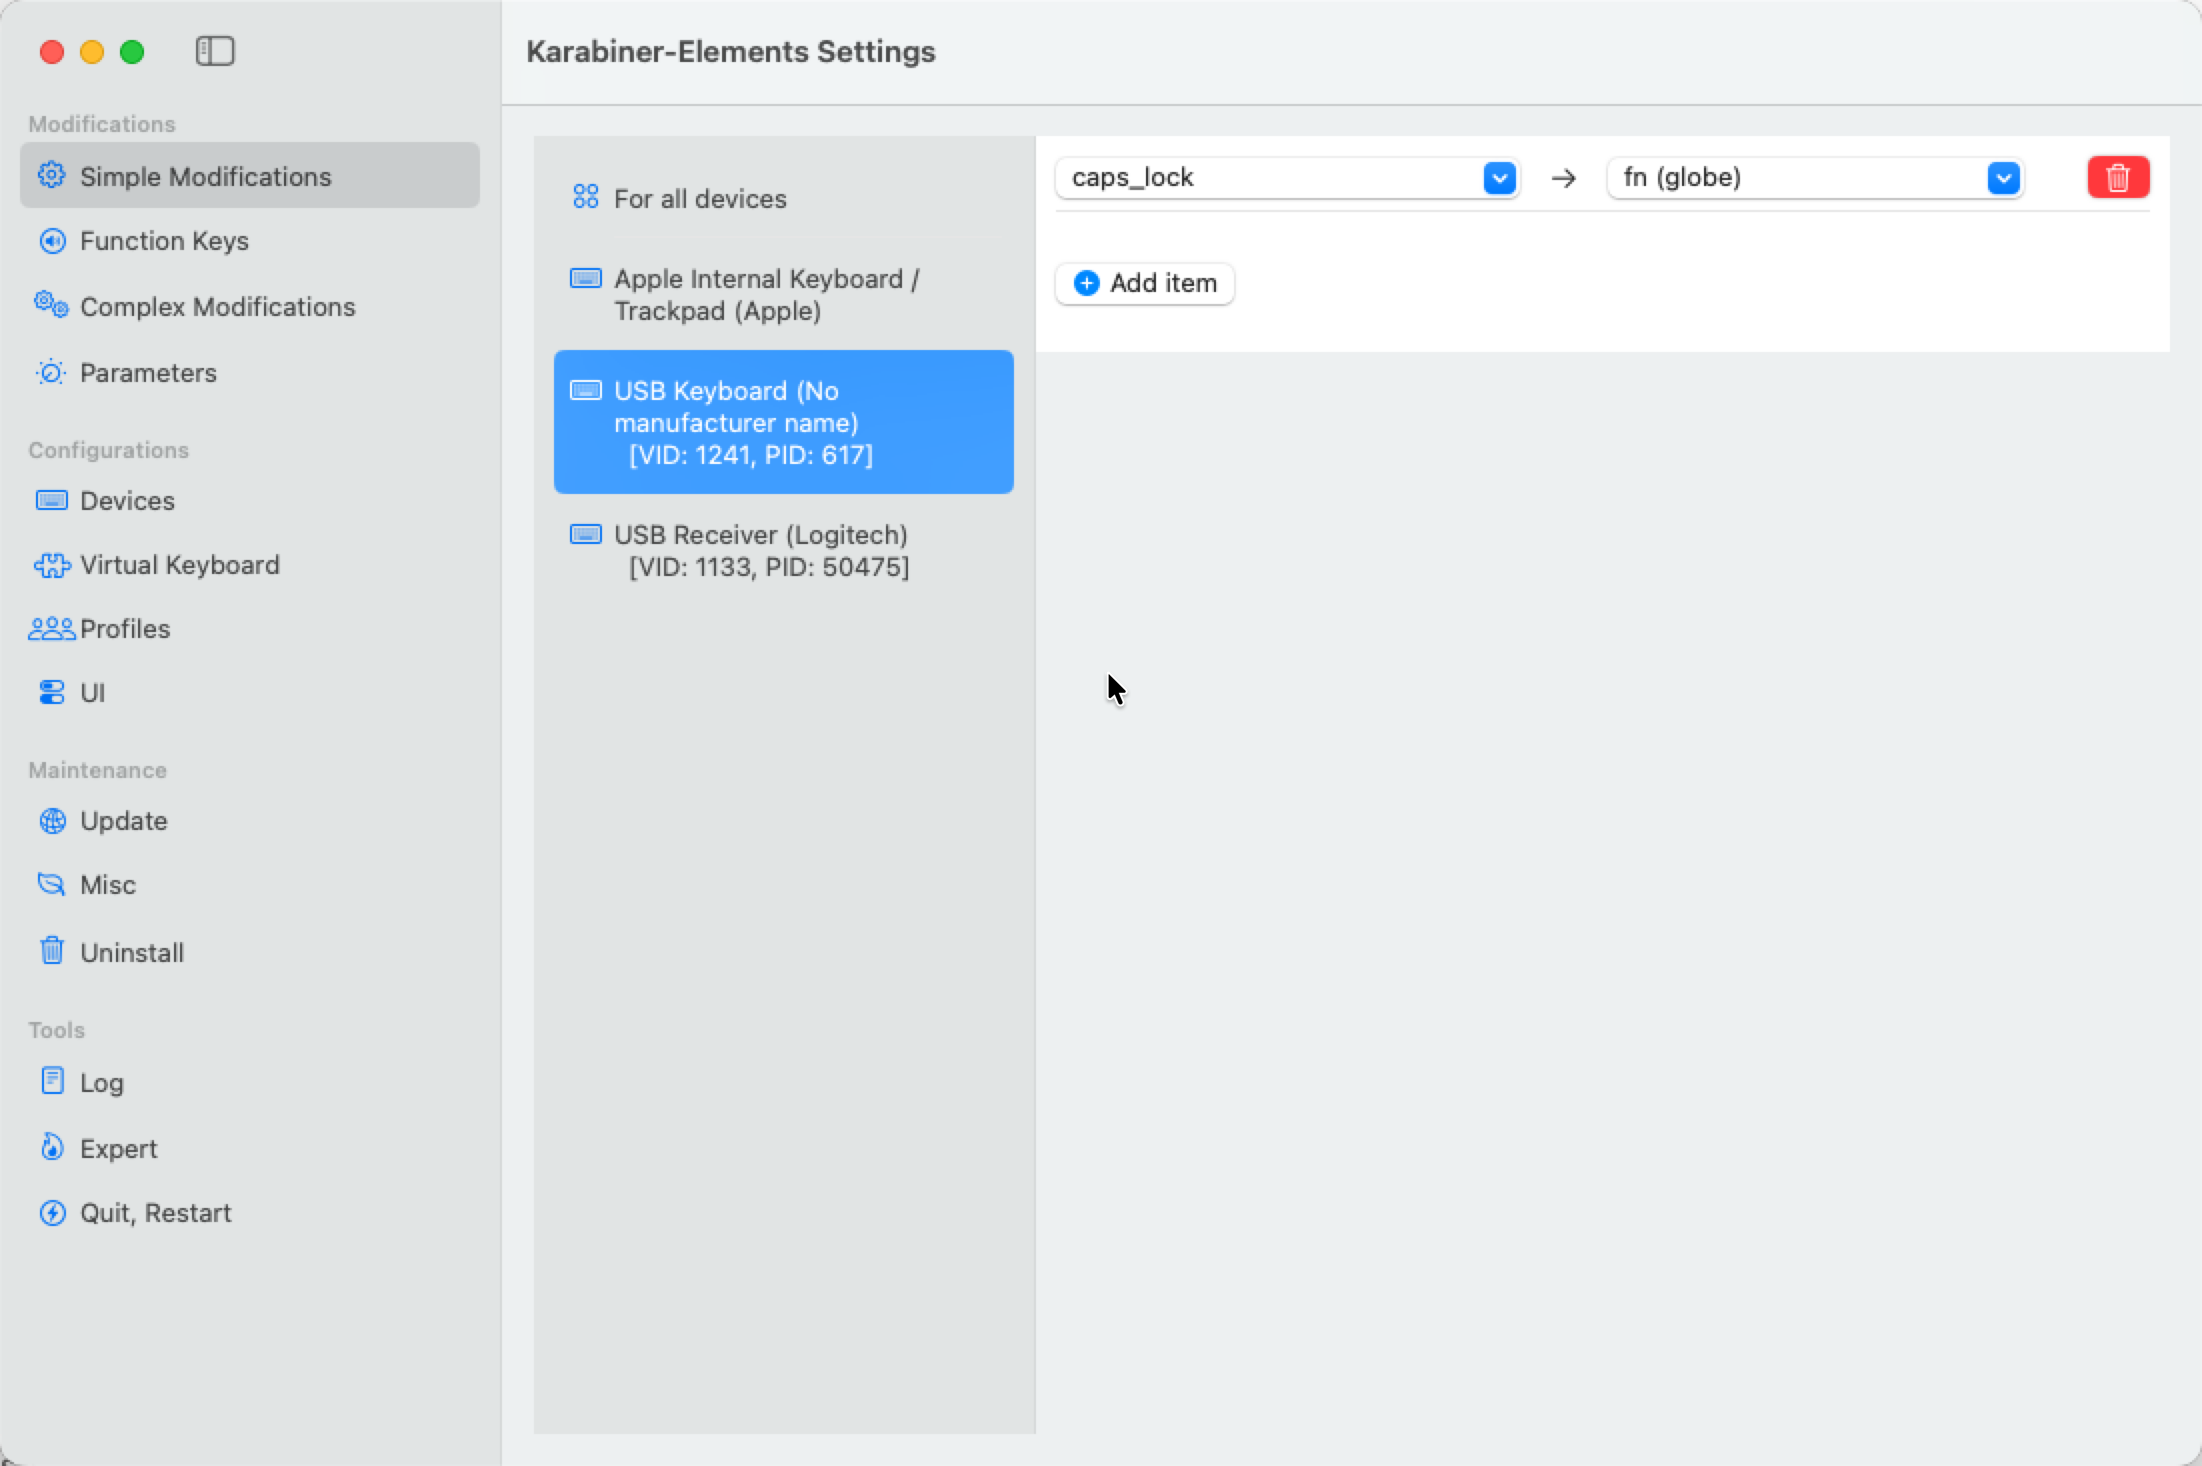
With this change, snapping windows to different corners of the monitor is now possible with external keyboards.
Any more things I should do
So far I’m quite happy with the changes I made and installed software. It’s too bad some features I relied on in Windows aren’t available on macOS, or comes with a price, but that’s what happens when changing operating systems. Each has its own appeal.
Are there some things I should consider installing or configuring?
As mentioned, I’m new to this ecosystem so still searching for good stuff to use and improve my developer workflow.